
T-Pro Web Recorder offers clinicians an easy way to start tasks via dictation. It is a pure recording tool, and provides an overview over the recorded tasks.
The tasks will be uploaded seamlessly to T-Pro's web application Dictate, where the documentation continues to be processed (e.g. transcribed, approved, stored).
Access the web recorder with this link: https://app.tpro.io
Login options
1 - Enter your T-Pro credentials and click on the Login button.
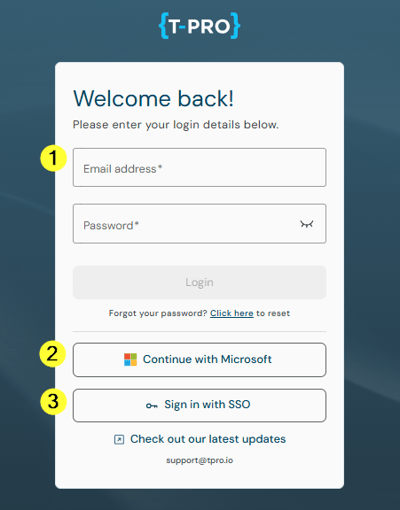
2 - If your organisation is applying a login process with Microsoft email accounts click this button.
3 - If your organisation is applying a single sign-on process click on Login with SSO.
=> Every user needs to accept the EULA.
-
If you have used T-Pro before, e.g. the web application Dictate you access the recorder straight away.
-
If you are new to T-Pro you need to go through the first-time login process to set up your account. This includes providing a contact mobile number and/or email address for additional security such as Multi Factor Authentication and notifications.
‼️View & download the FULL USER GUIDE here ➡️T-Pro Web Recorder 1.7 User Guide.
Recorder Screen
The recorder with its options on the left side of the screen.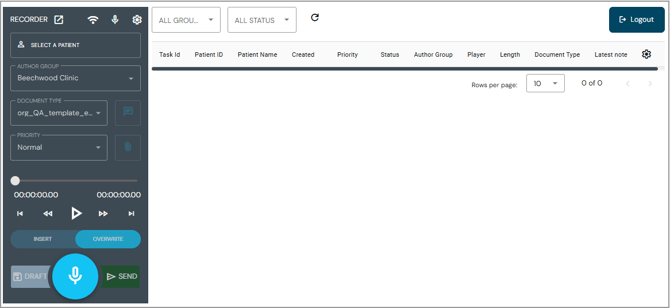
View for a new user without any tasks
In case you have been using the T-Pro Dictate app on your mobile phone before, the recorder will feel very familiar.
Tasks overview with filter functions and adjustable columns.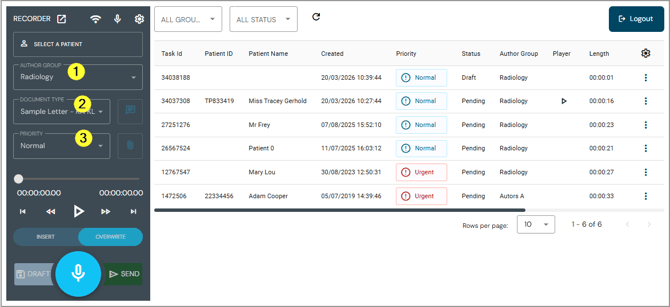
View for a user with tasks
In both cases your default settings should be displayed in the recorder fields:
1 - Author group
2 - Document type
3 - Priority of your tasks
The default settings can be changed any time. Click on the cog icon to bring up the Recorder Settings:
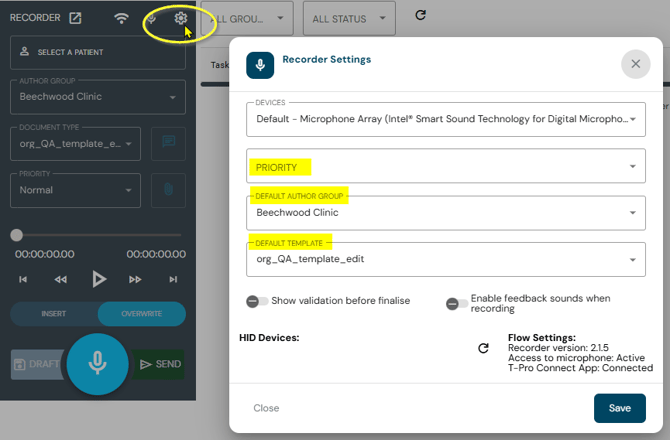
In this screen you can also view and change the default microphone selection.
-
You can enable a confirmation message before sending a task.
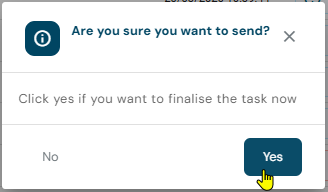
-
You can enable a feedback sound when you start and stop a recording.
At the top of the recorder you can detach it from the current window.
Click on the icon with the arrow: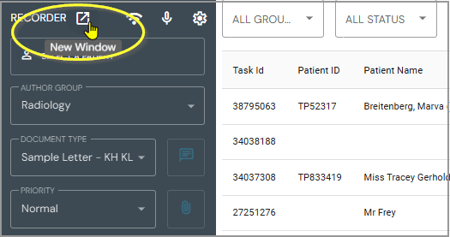
You can then move it around freely on your screen.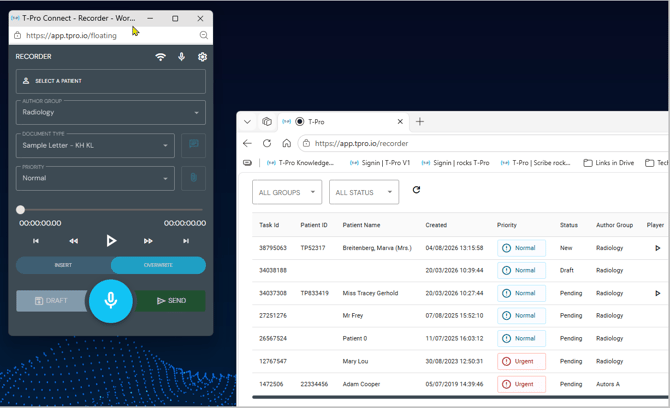
Floating recorder window
The task list appears in a separated window.
Click on the cog icon to adjust the columns you want to view: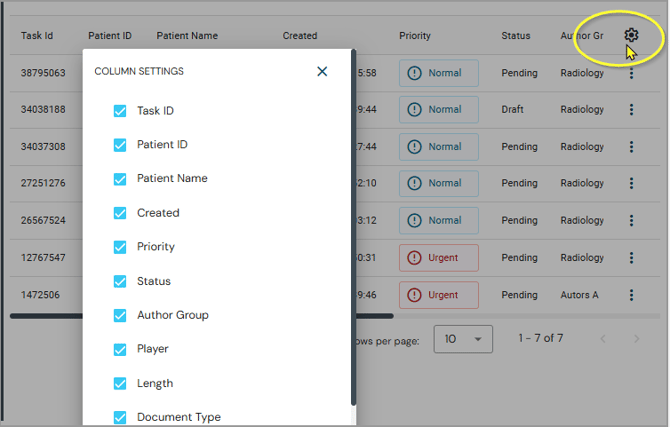
The Recording Process
You start with the selection of a patient.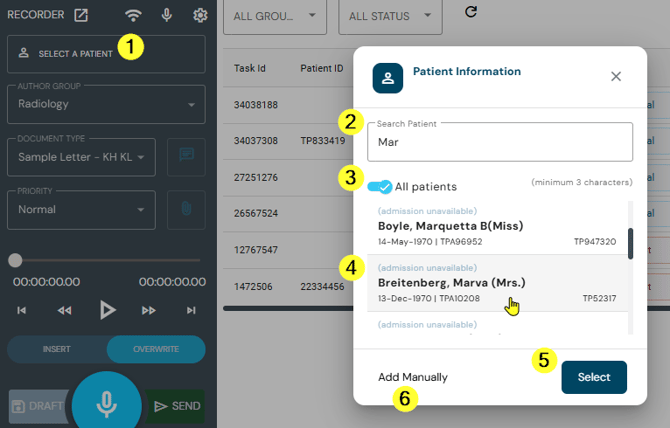
1 - Click into the field
2 - Enter the patient name into the search field or at least three characters
3 - With this enabled the search includes all your patient lists
4 - Select the relevant patient entry
5 - Click the button to Select
6 - Use this option to manually add patient data
Next, click on the microphone button to start your dictation. This will create a new task.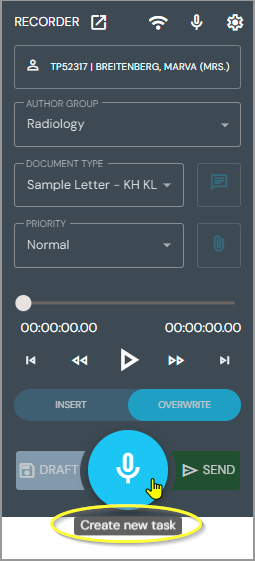
Pause and resume the dictation as you need.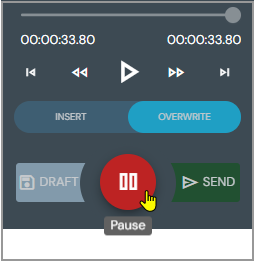
Move the slider to the far left to listen to your dictation from the start or set it to any time code to listen into a specific part.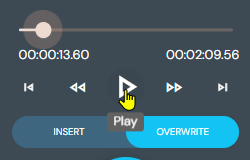
Click Play to replay your dictation.
Use the buttons to INSTERT new spoken content or OVERWRITE existing parts.
Notes & Attachments
You can add Notes and Attachments to your task: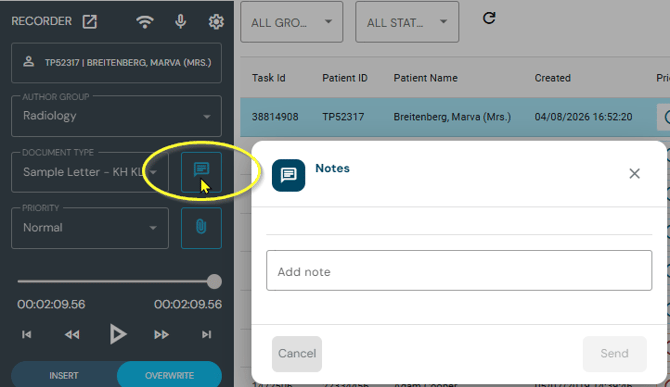
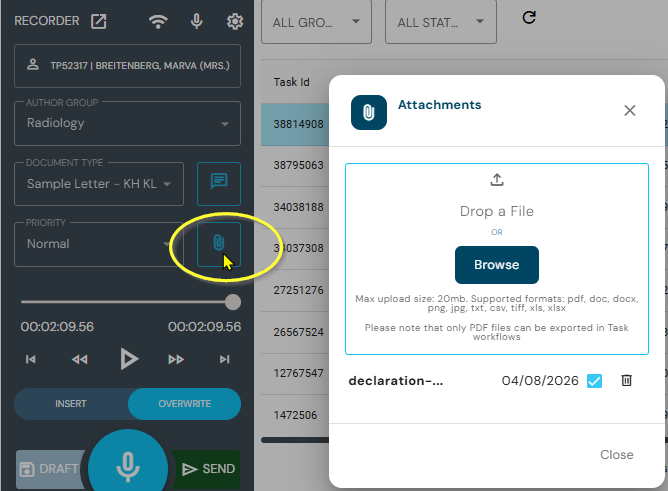
When everything is done and finalised, use the SEND button to upload your task.
=> The task will appear in the task overview with the status Pending.
* See below for more context.
If you want to save your dictation as a draft and return to it later, you can do so with the DRAFT button to the left of the microphone button.
=> The status in the task overview will be Draft; just click on it to continue.
There is a menu for tasks in the table, click on the three dots on the right: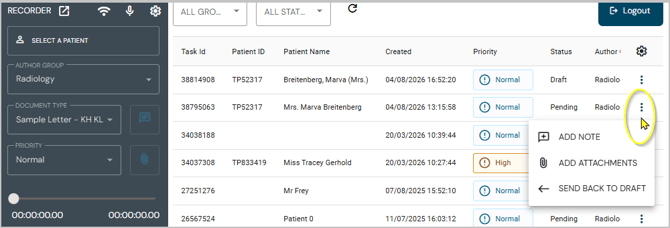
- With this you can add notes and attachments to pending tasks.
- You can also change the status back to DRAFT if you want to add to or change the dictation.
- Drafts can be deleted.
* Context to Dictate web app:
All tasks created in the Recorder - Draft and Pending - can also be viewed and worked on in Dictate.
Example:
A PENDING task created in the Recorder.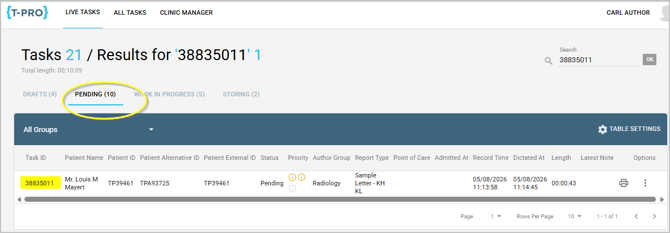
It then follows the transcription route to be further processed; below it has been picked up by a transcriber and moved to WIP.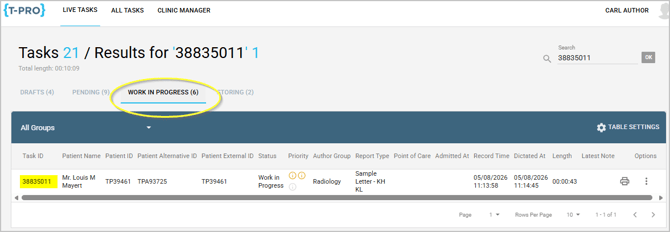
- You also approve your tasks in the Dictate application, not in the Recorder.
If you have any more queries, please do not hesitate to contact our Helpdesk or support@tpro.io.
© 2026