
Before you start
You need an author or transcriber account and access to the recordings on your computer or connected recorder.
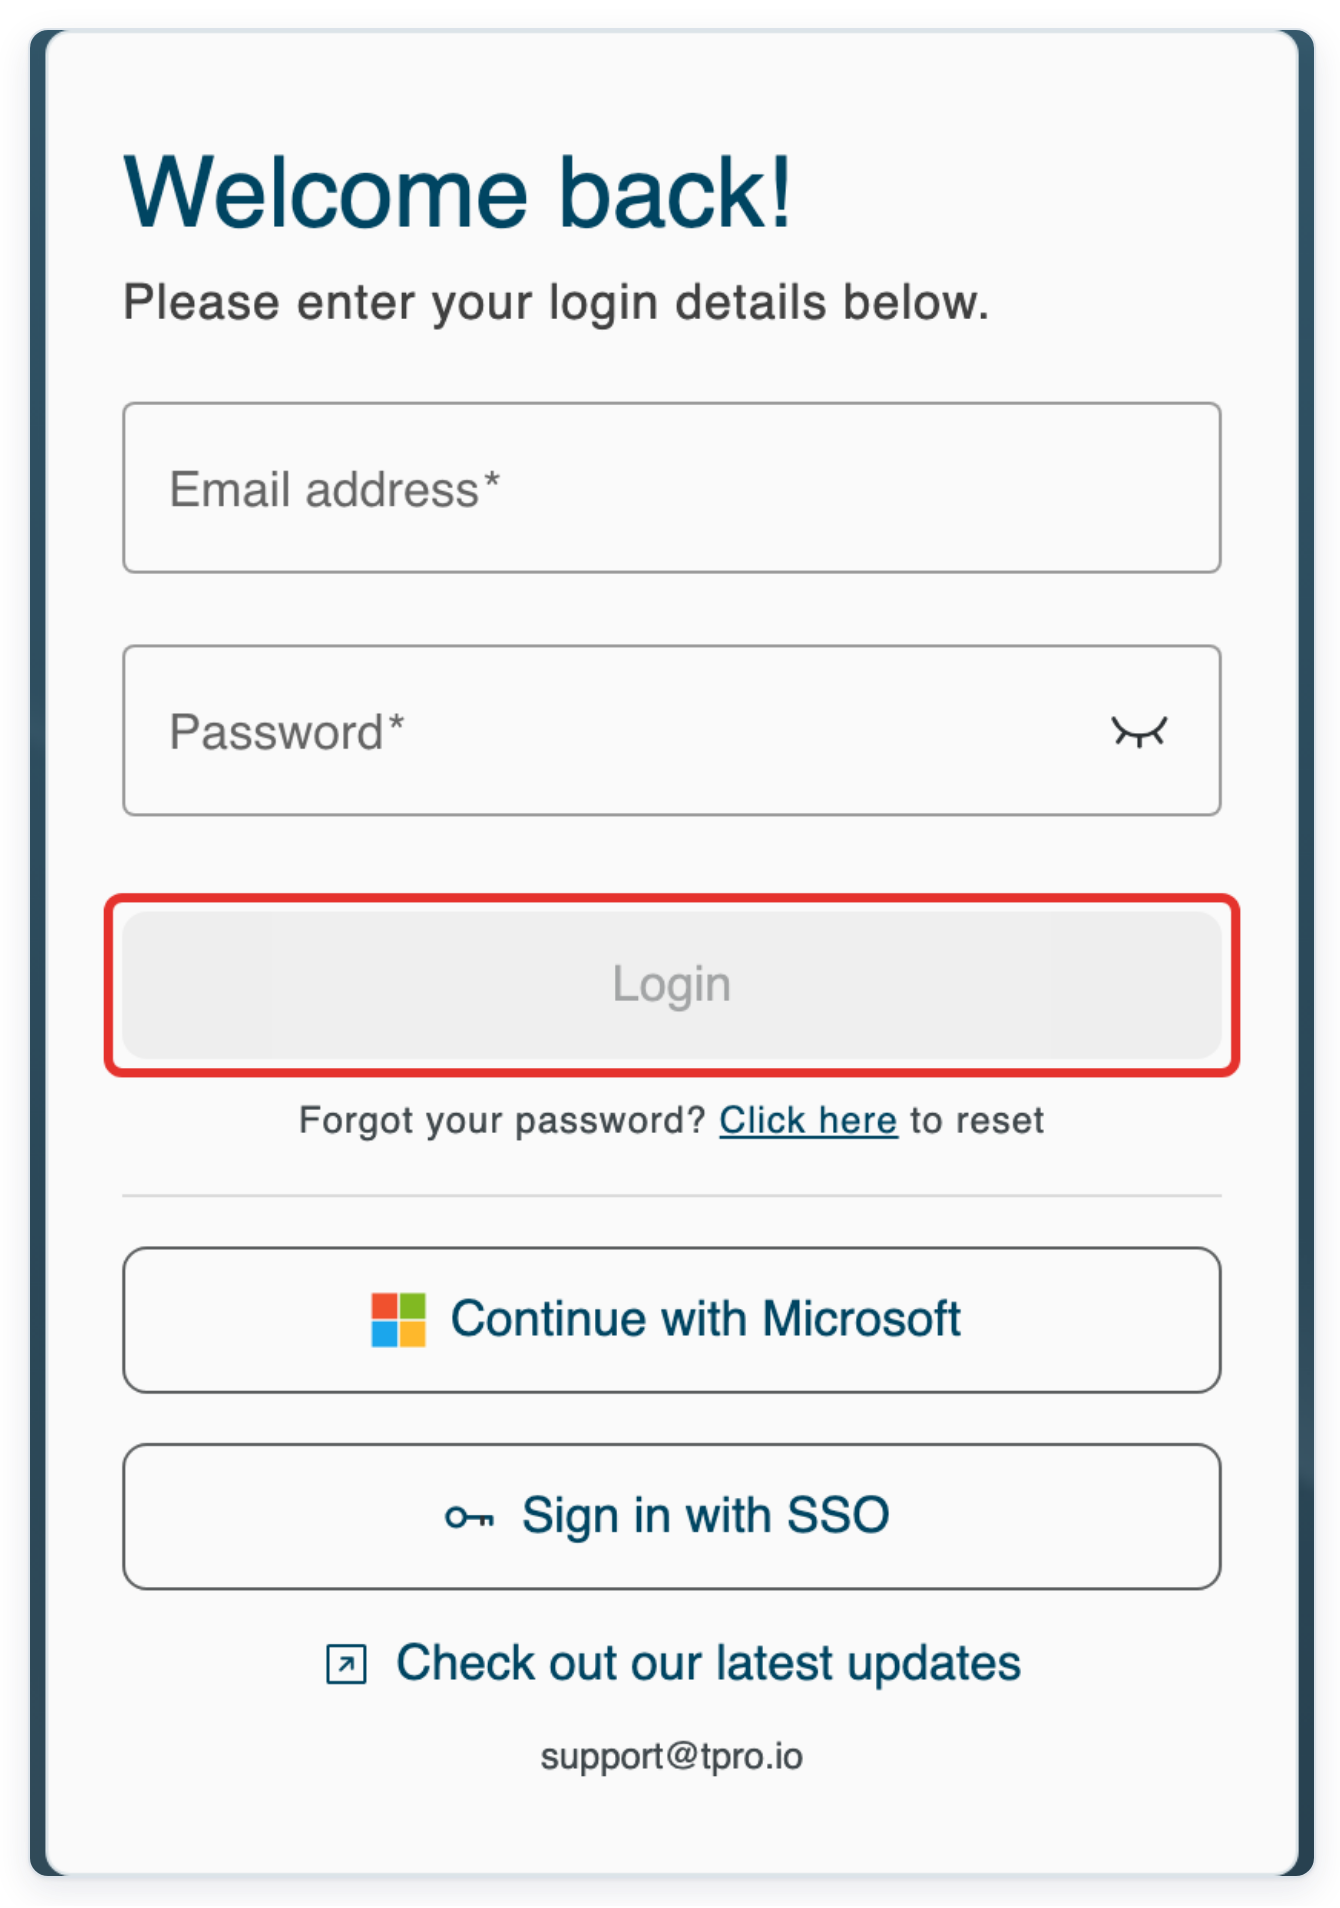
Log in to T-Pro with your author or transcriber credentials.
As an author
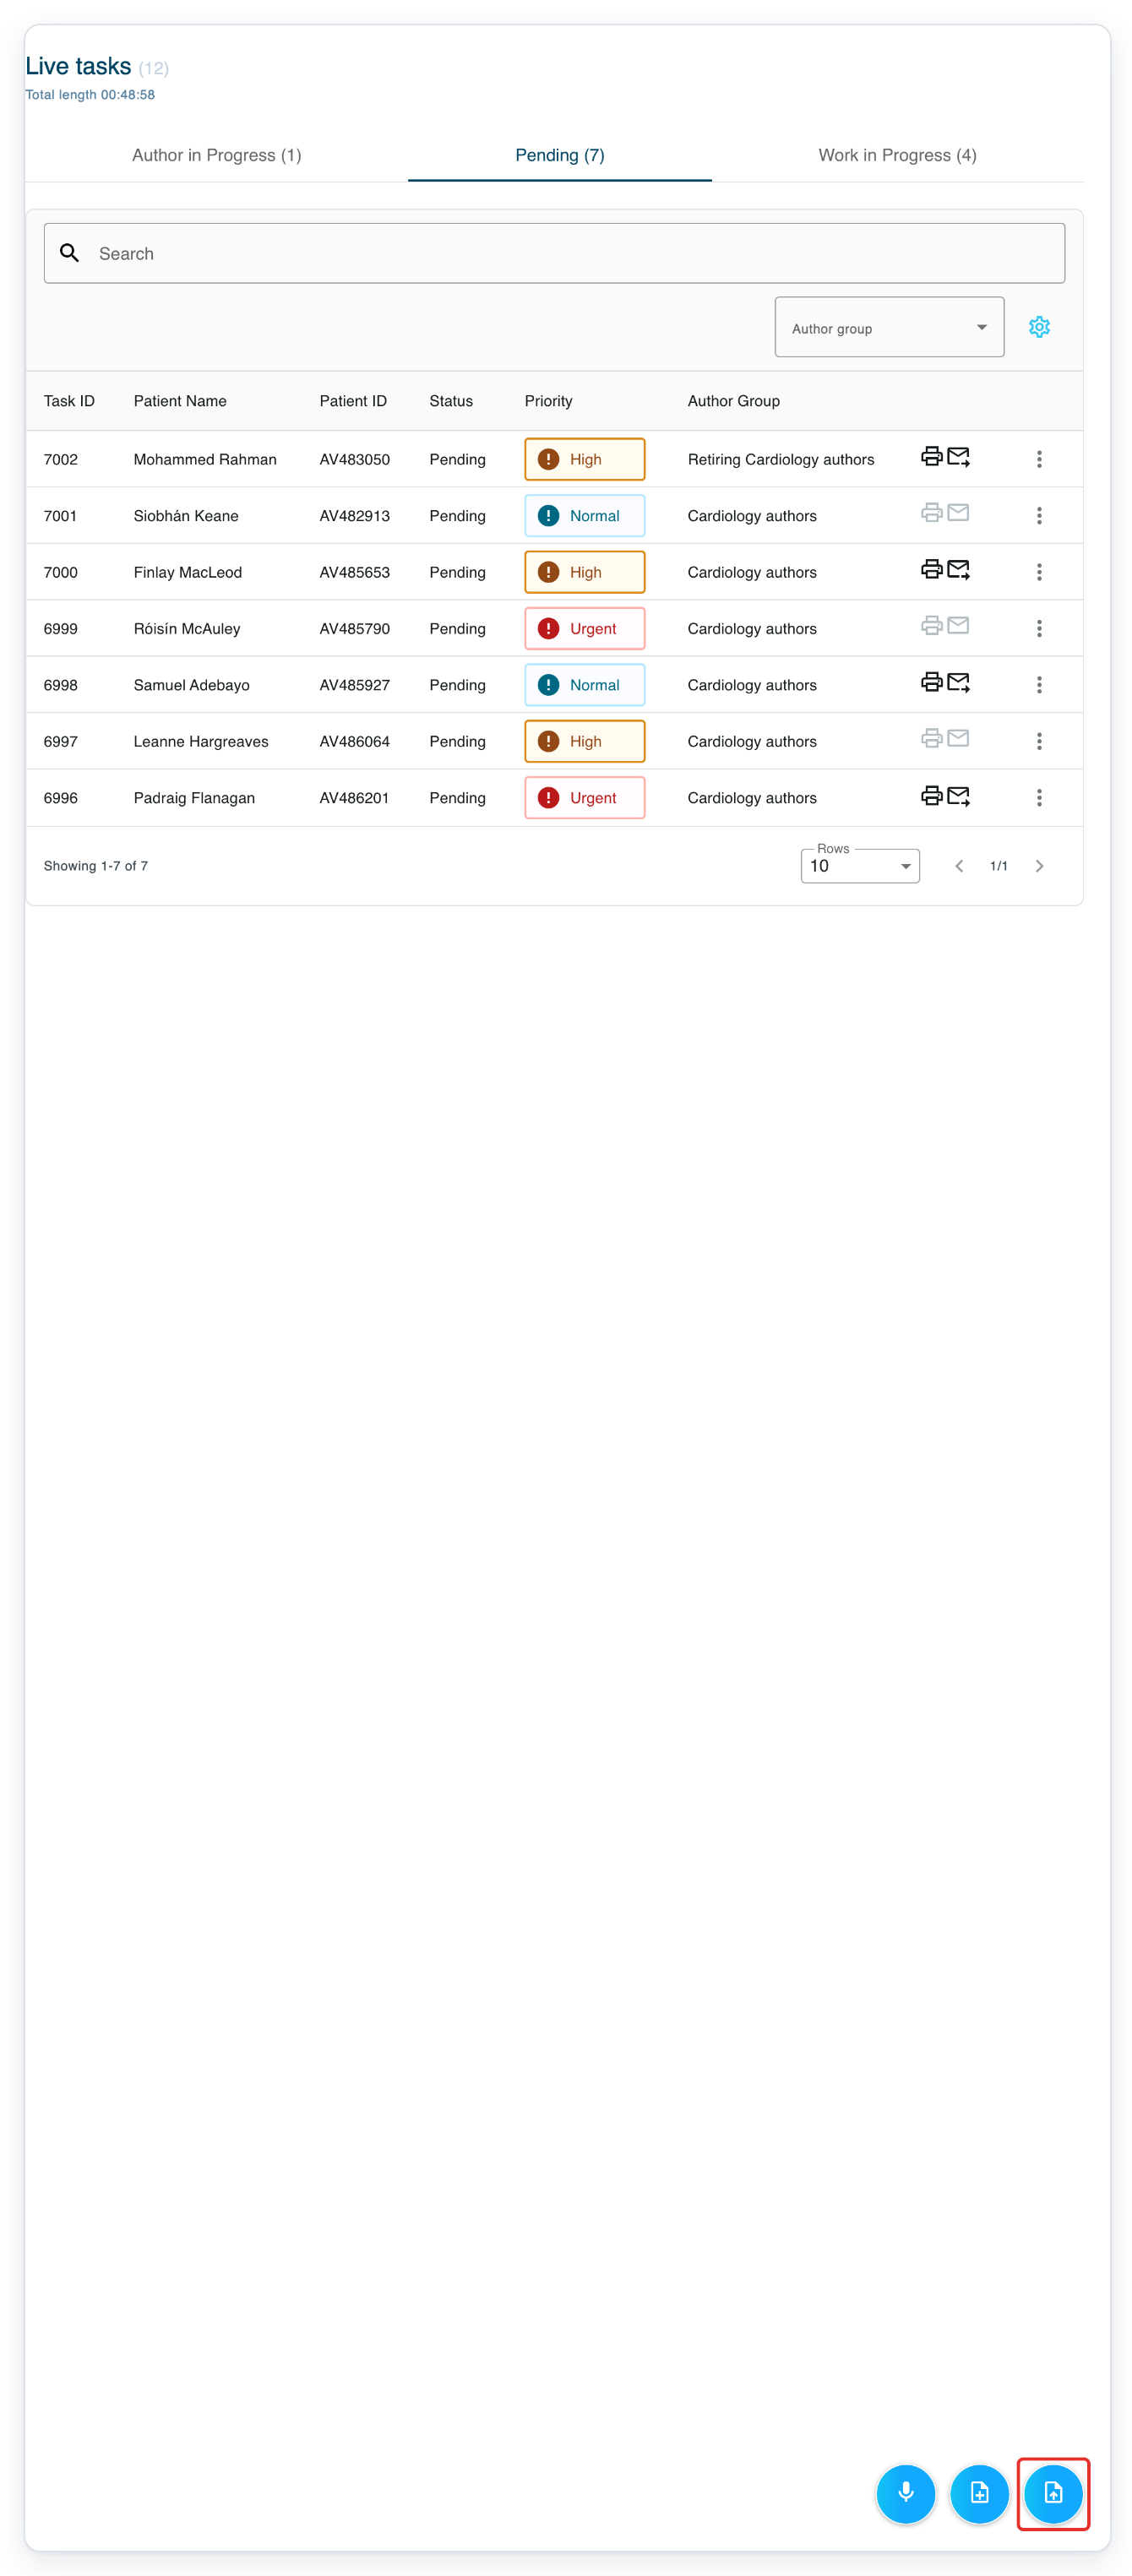
Go to Live Tasks. Click Upload task in the bottom right corner to open the upload page.
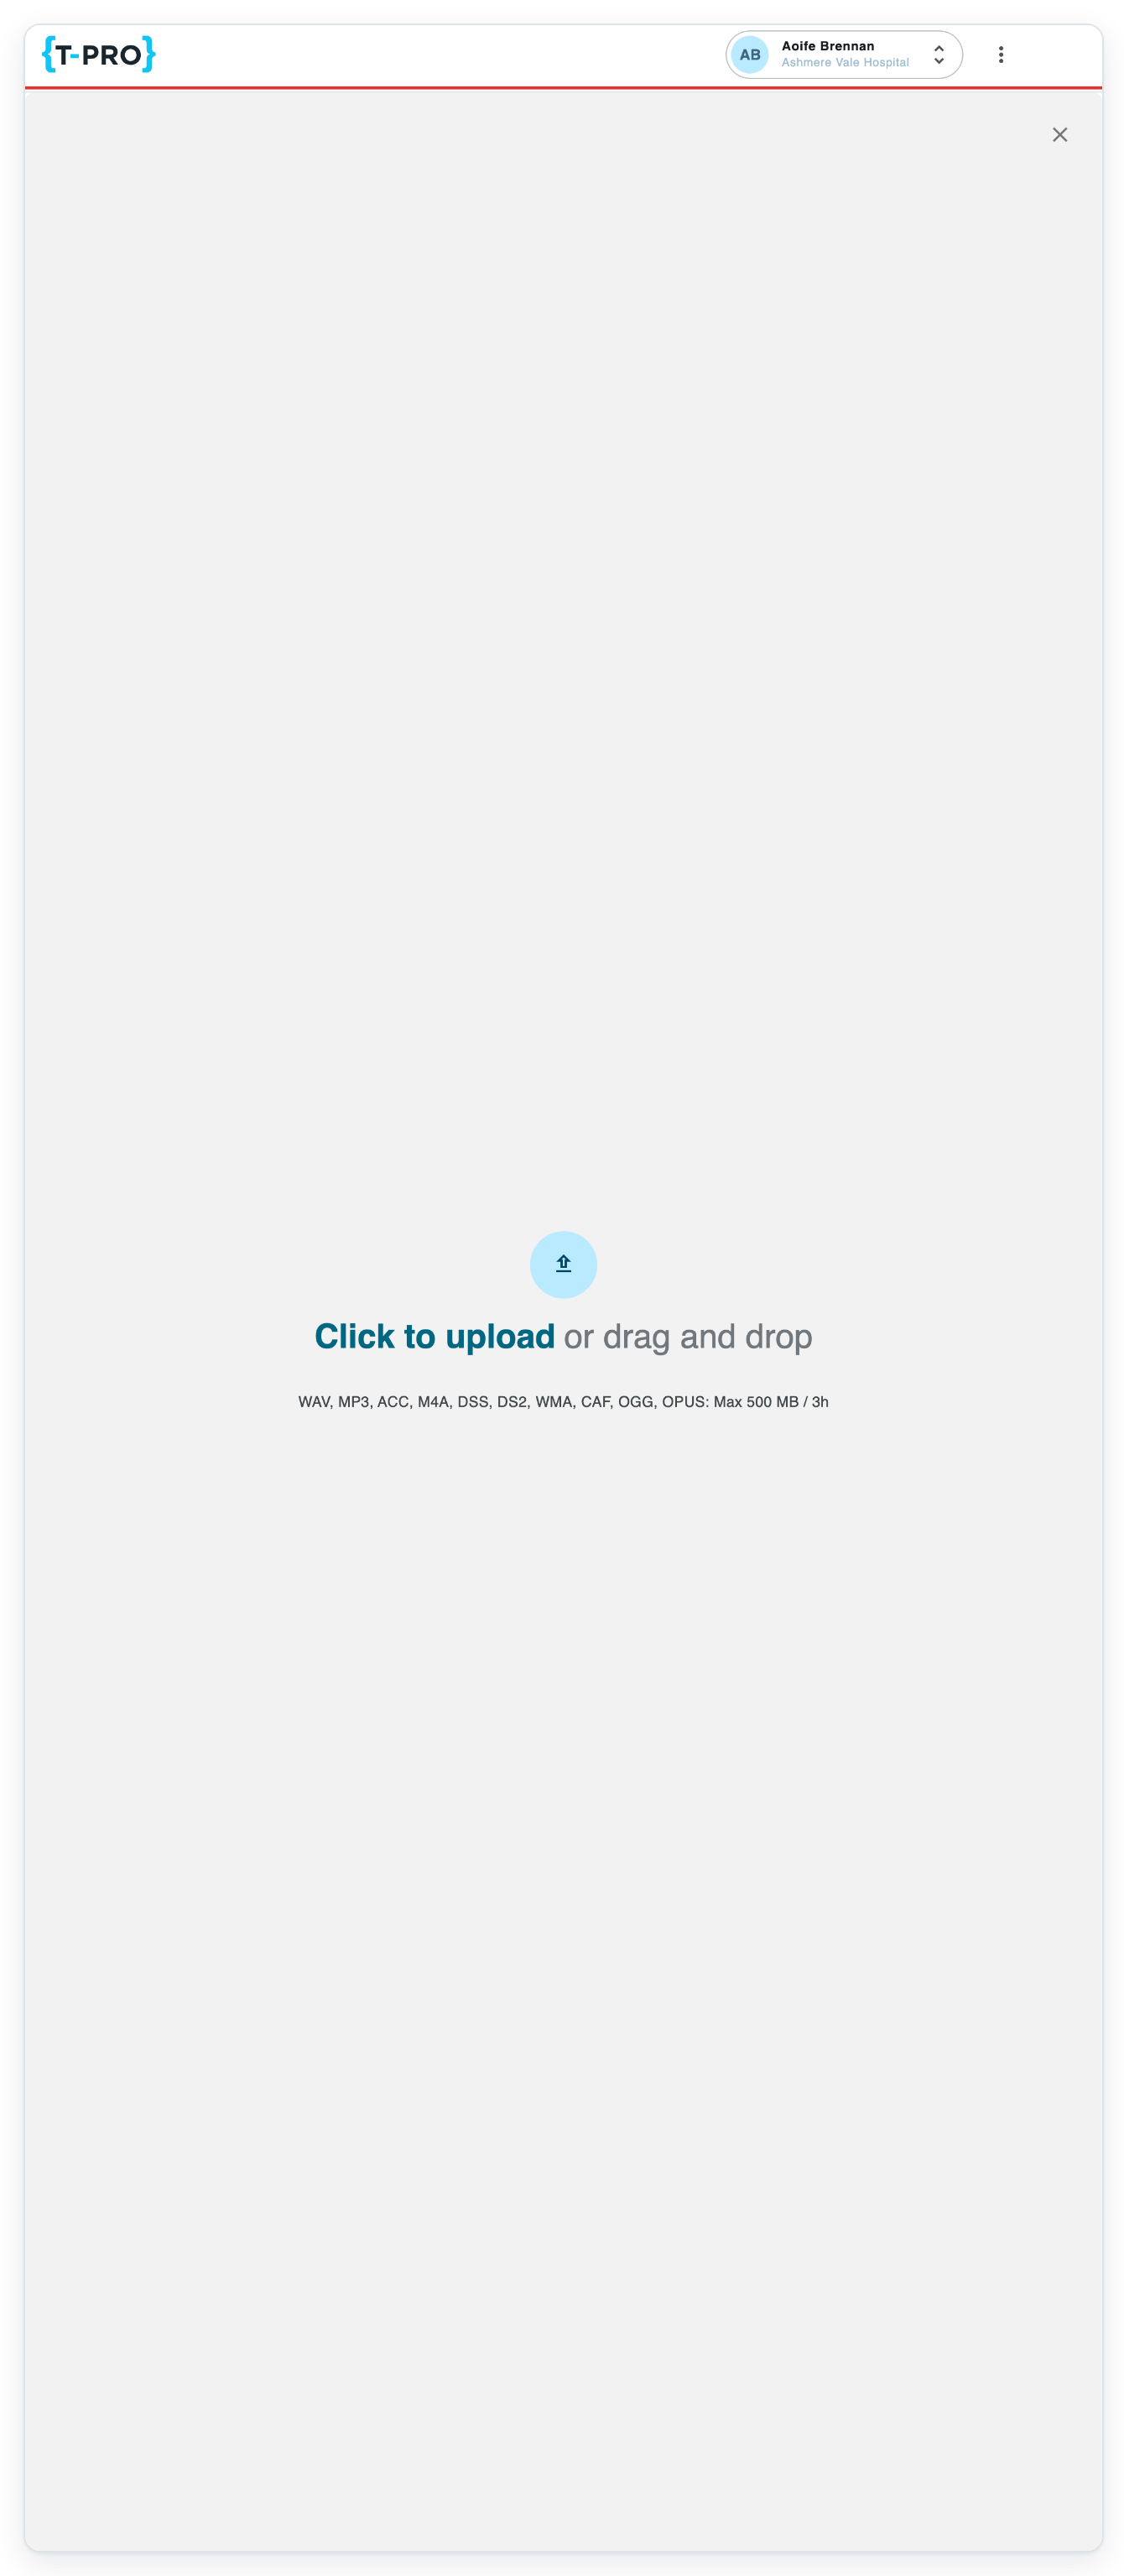
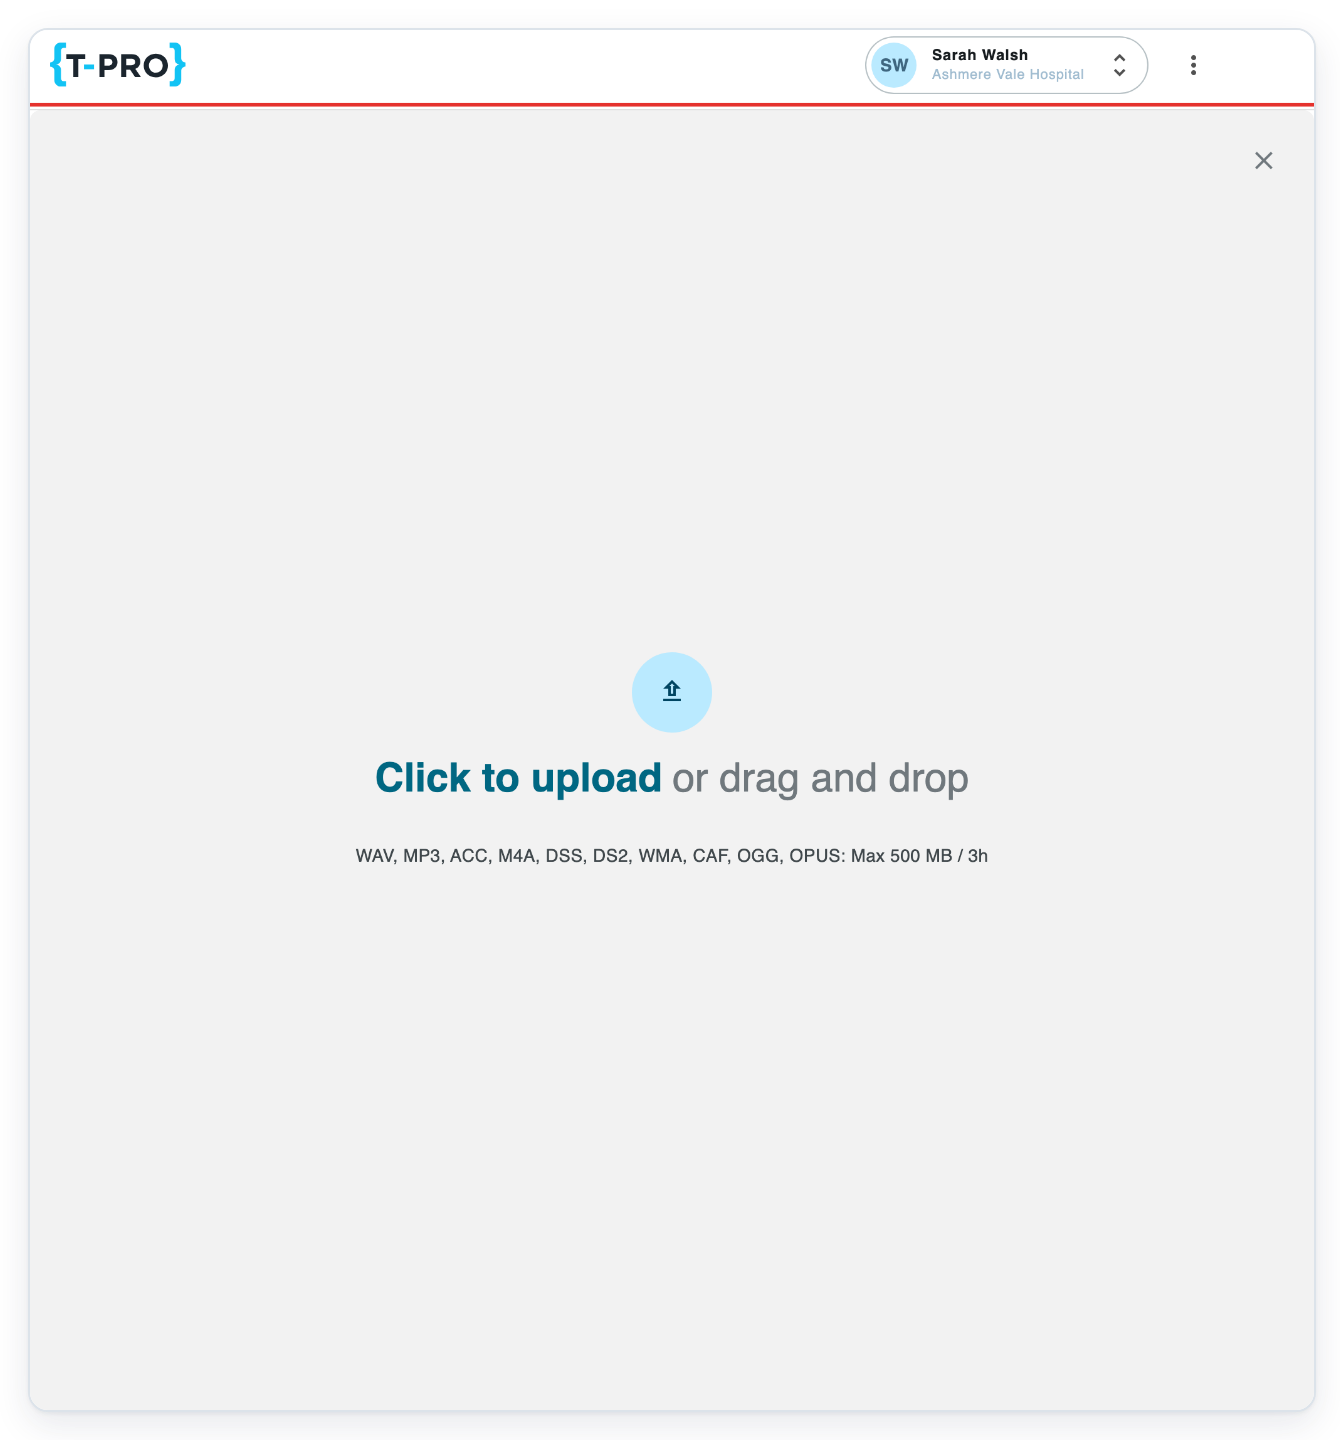
Click Click to upload, then choose the recordings you want to upload.
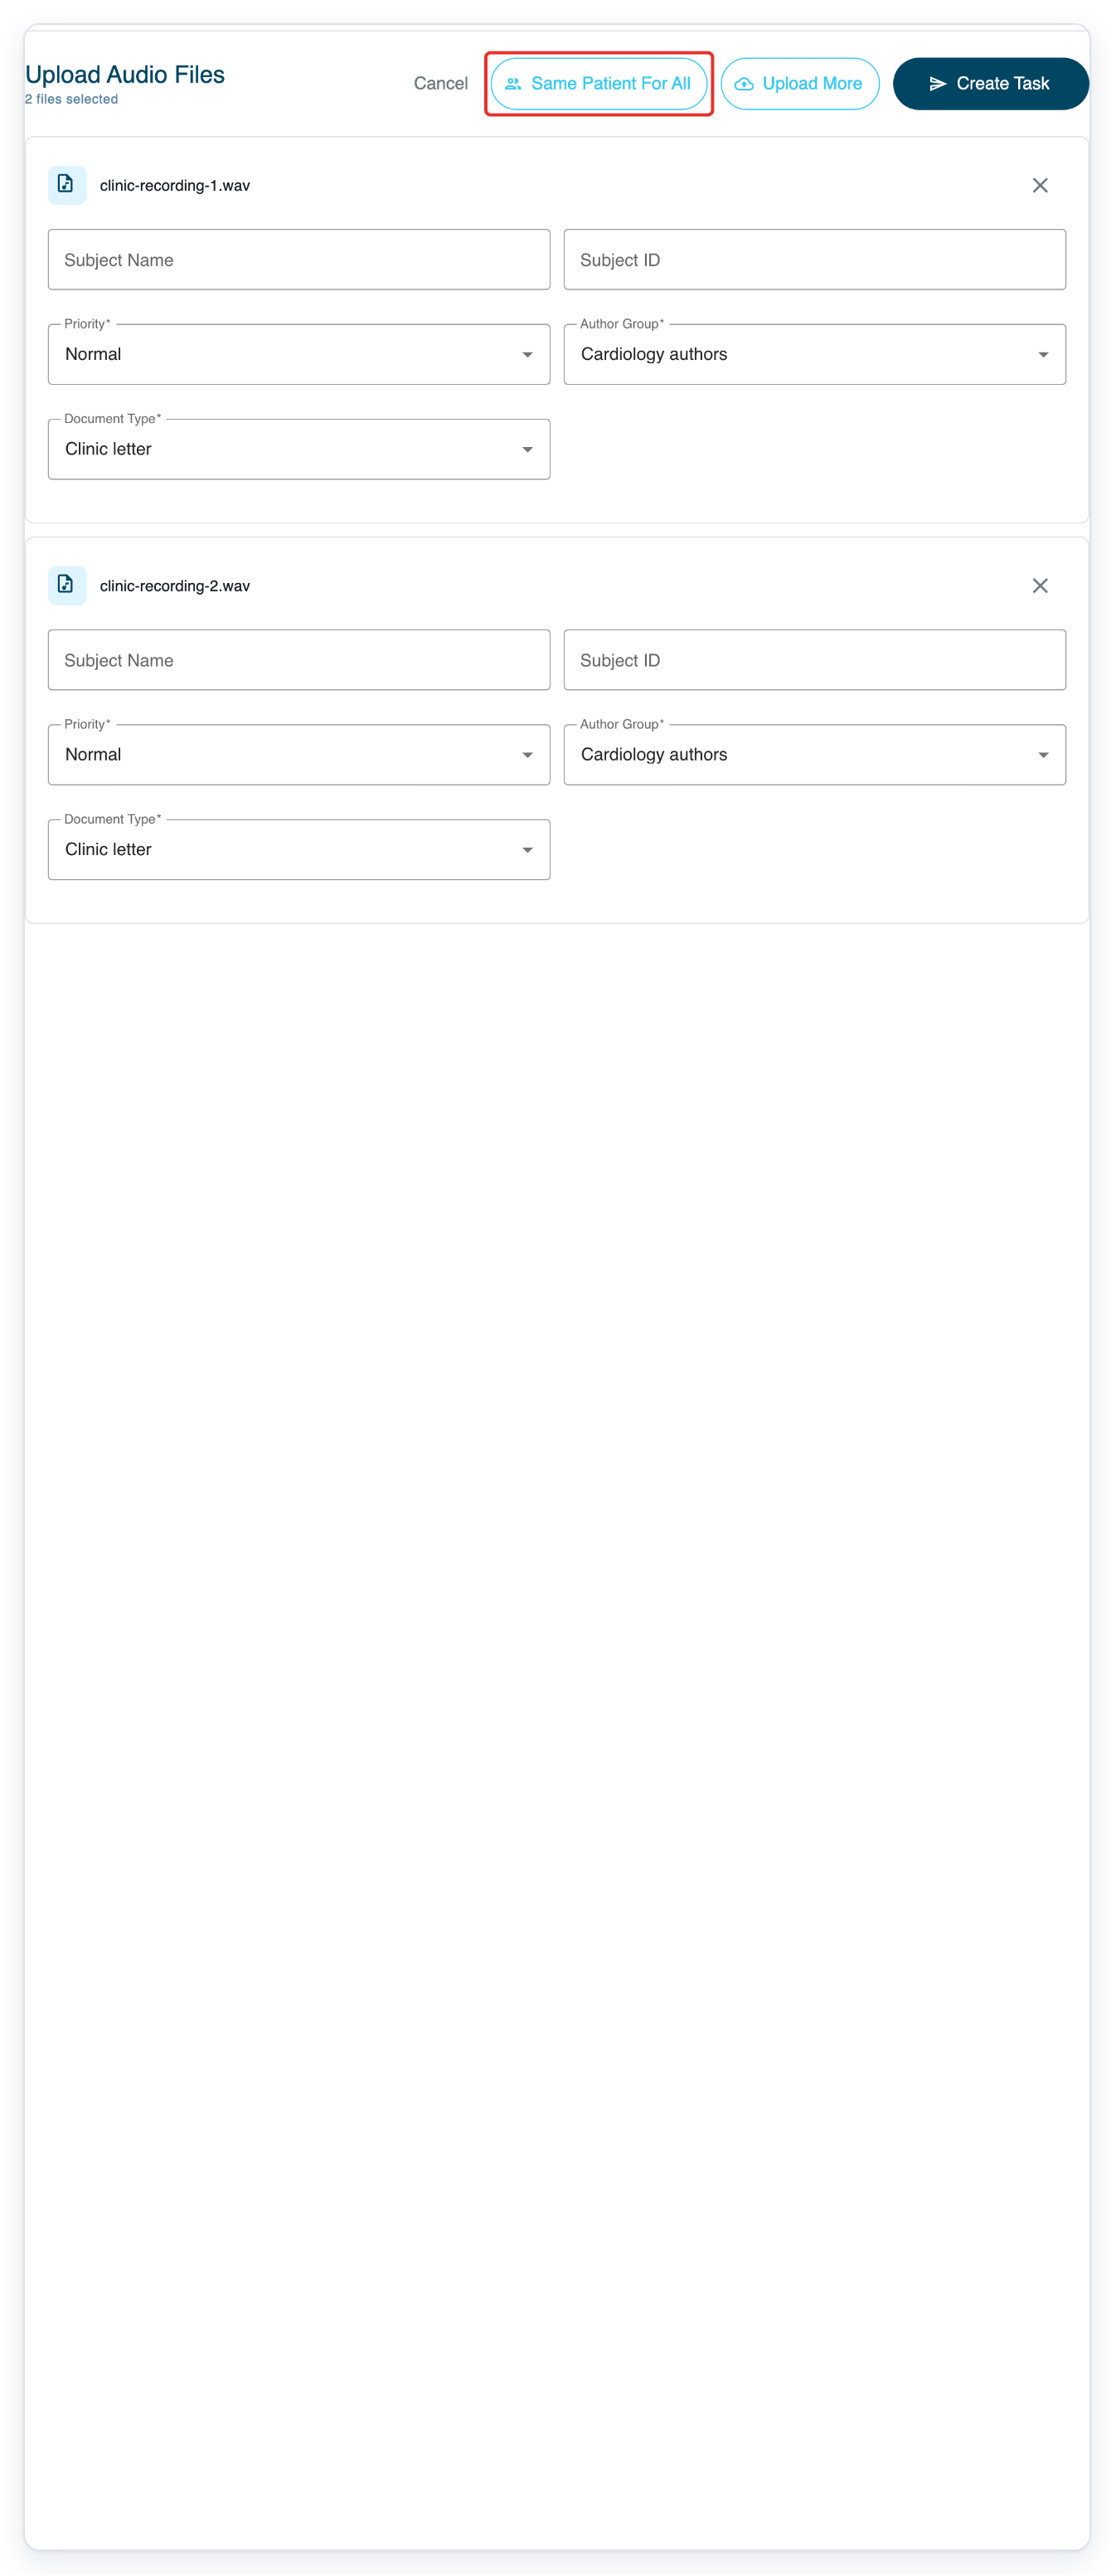
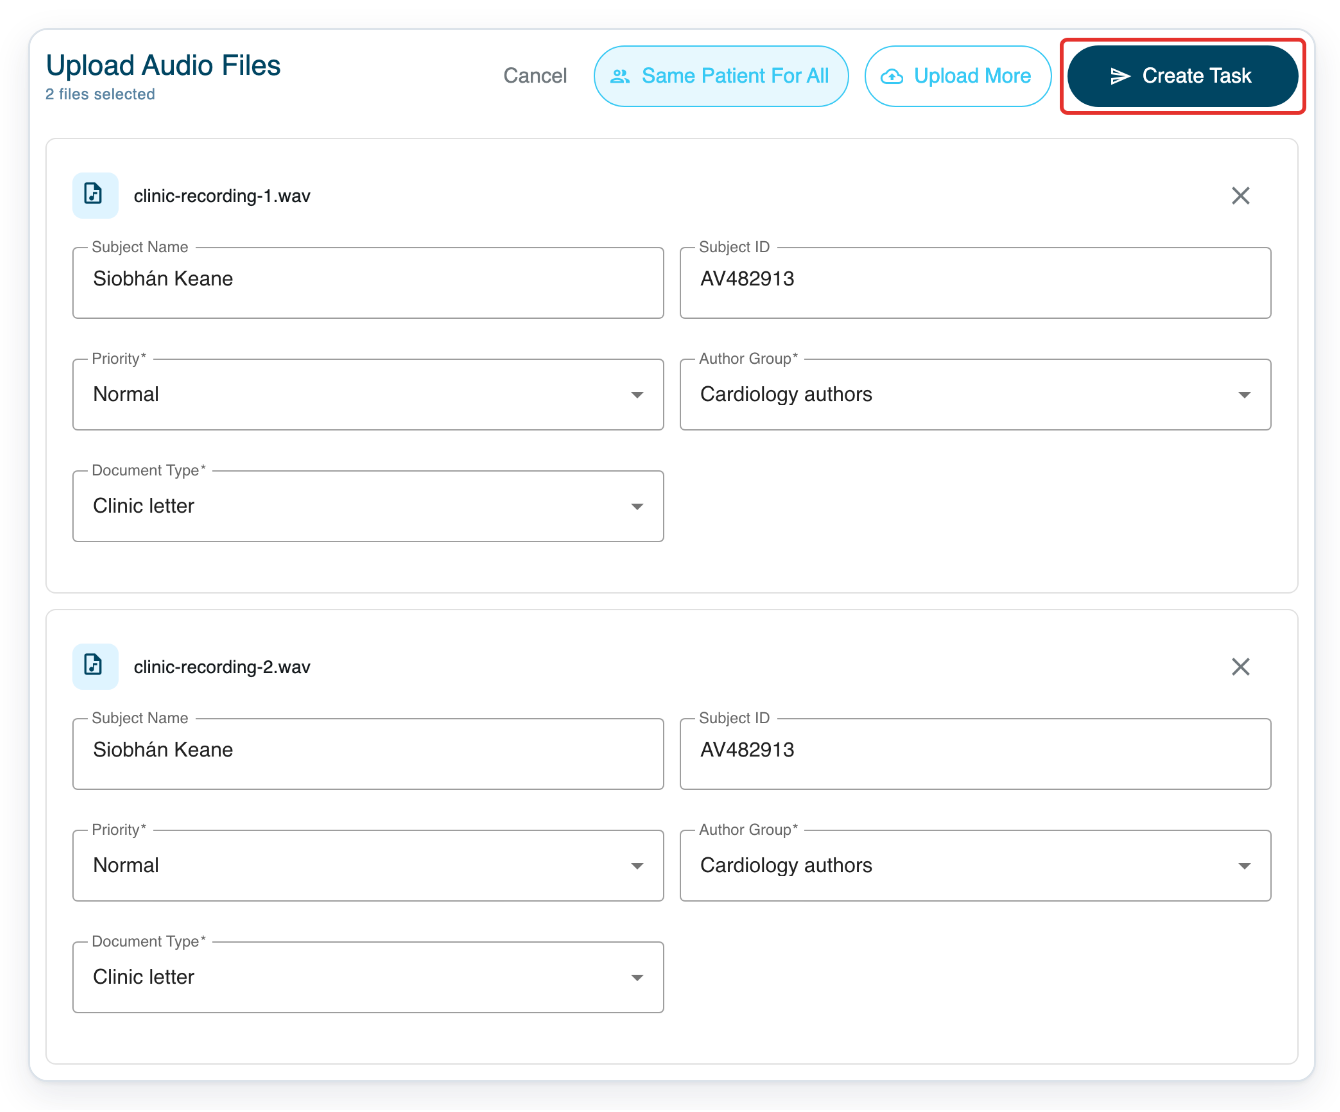
You can select one or more files, or drag and drop them onto this page. Each recording appears on its own card under Upload Audio Files. The example uses clinic-recording-1.wav.
The second recording is clinic-recording-2.wav.
For recordings about the same patient, click Same Patient For All to open Add Patient.
Click Subject Name in Add Patient and enter the patient's name.
The example uses Siobhán Keane. The patient's name and ID are optional. Add whichever details you have.
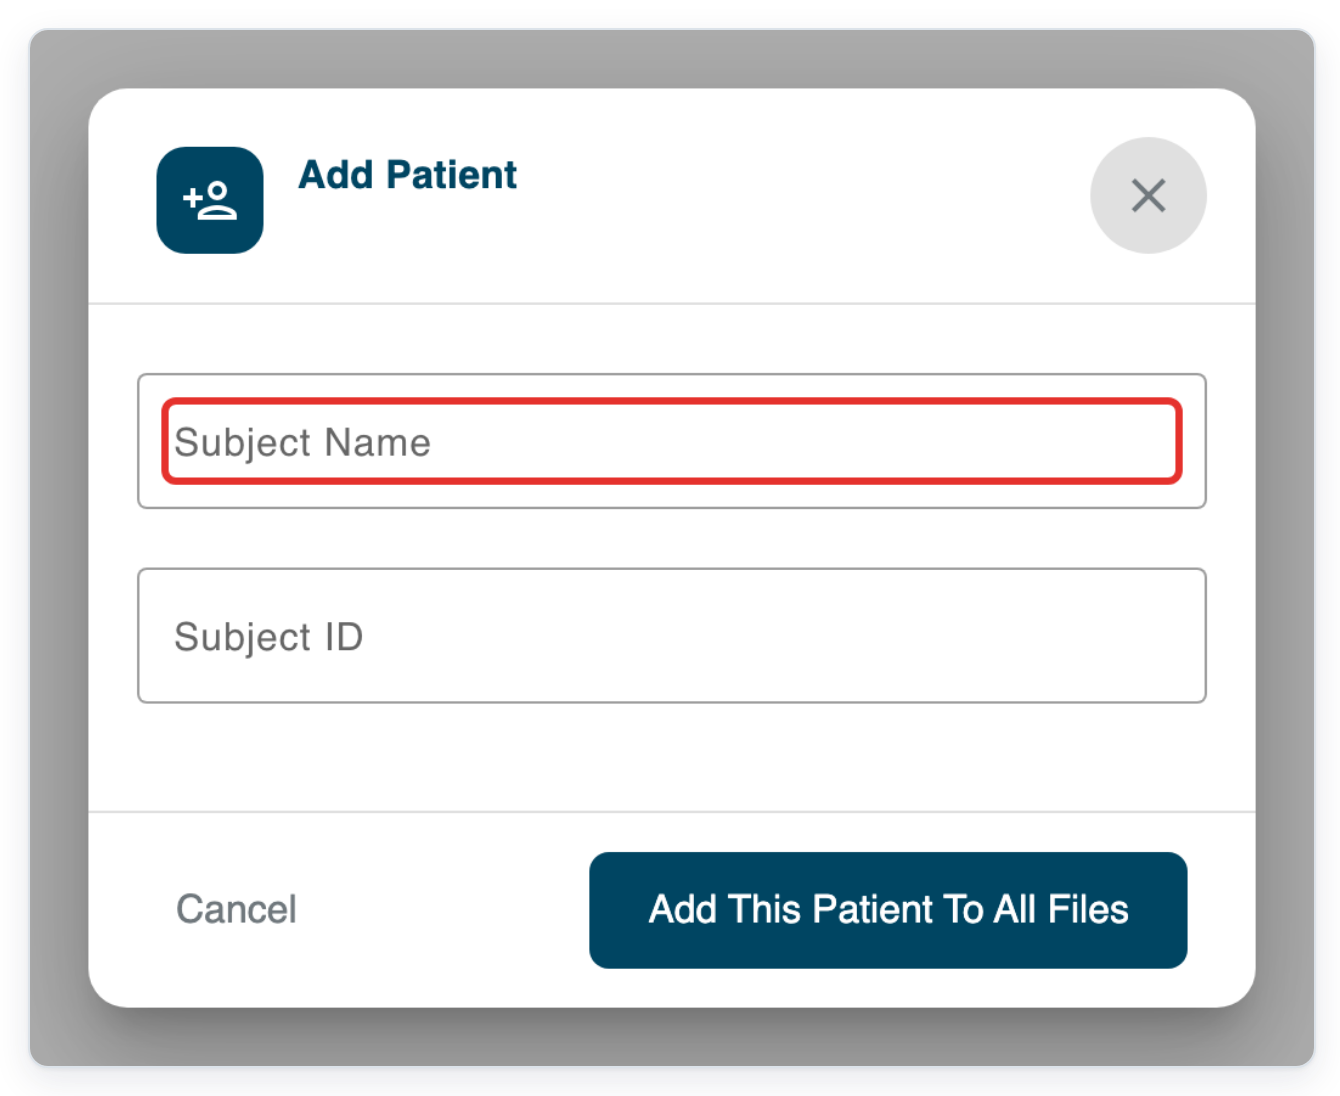
Click Subject ID and enter the patient's ID, if you have it.
The example uses AV482913.
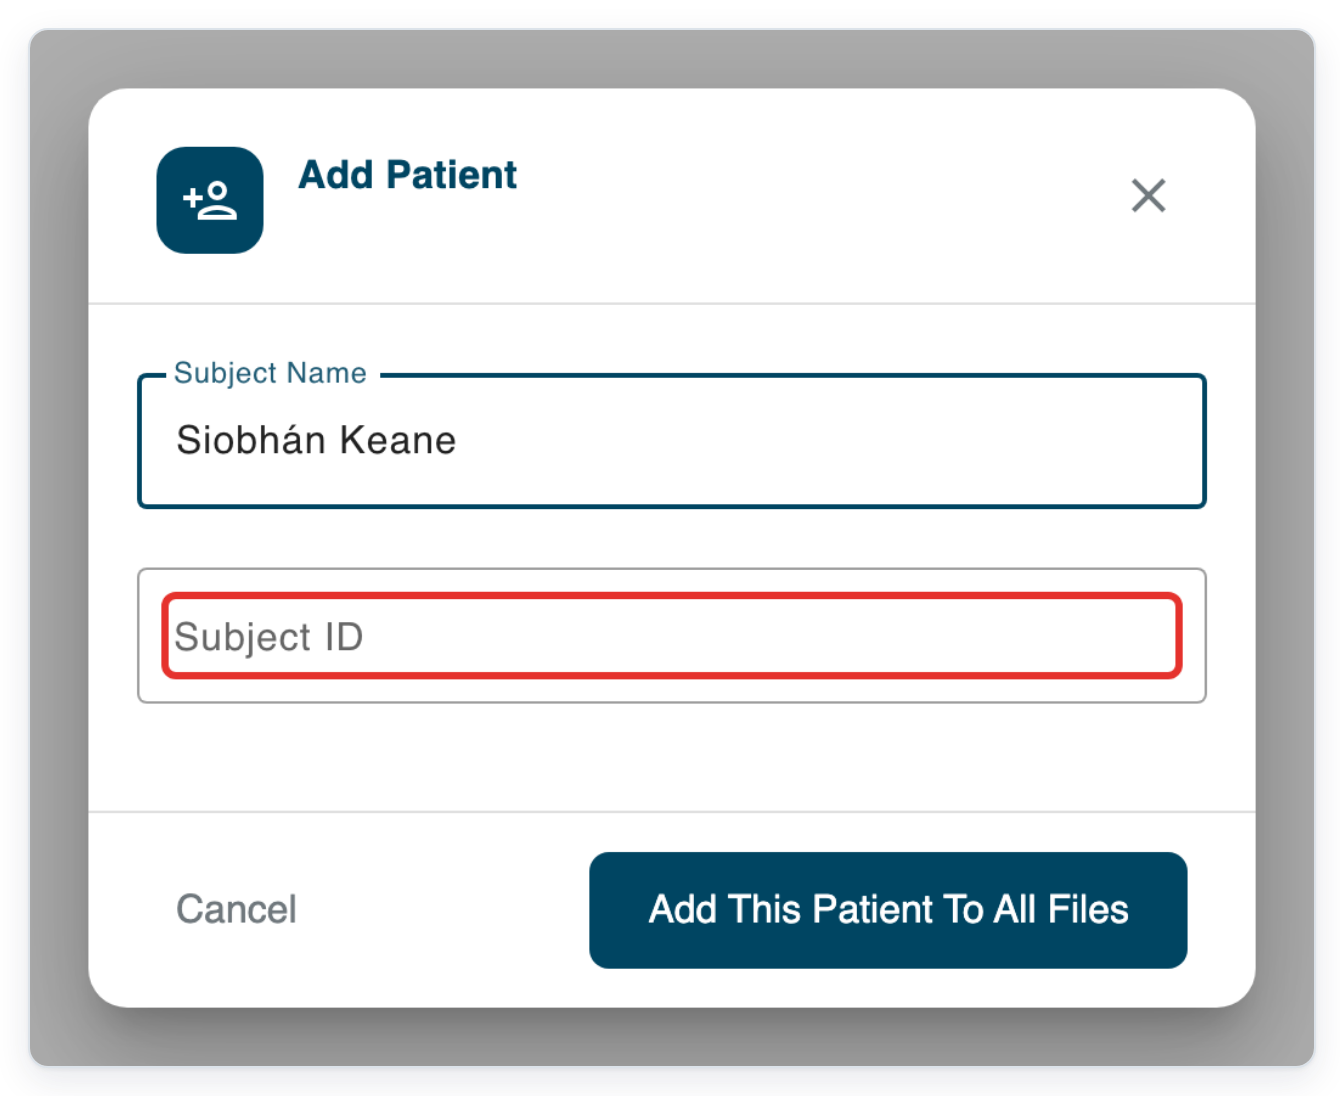
Check the patient name and ID, then click Add This Patient To All Files.
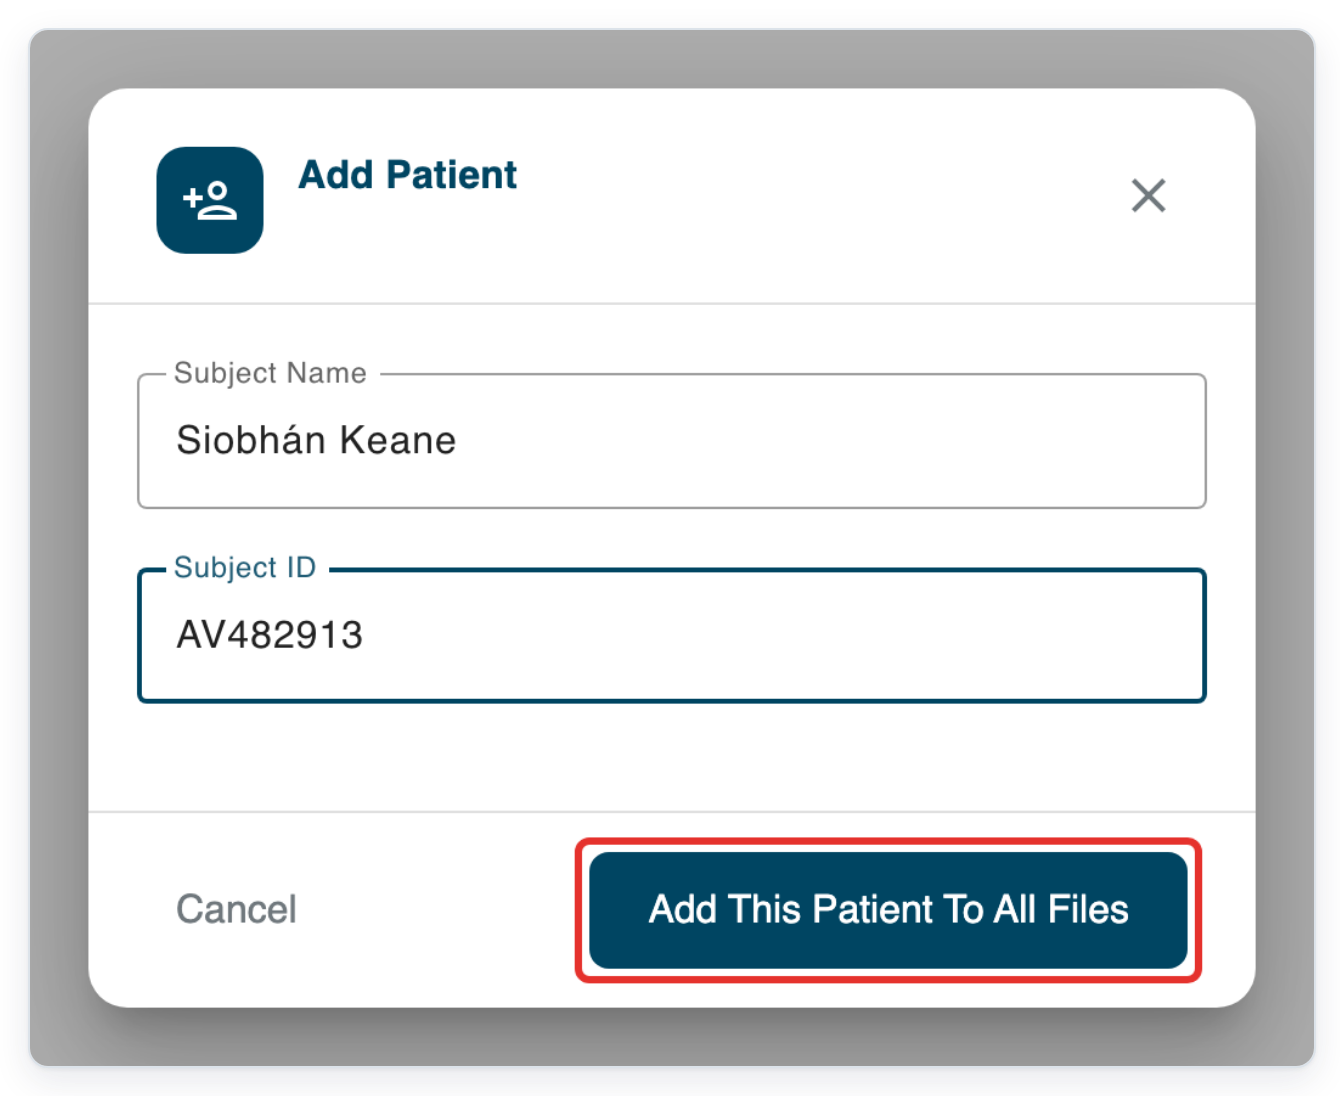
=> Both recording cards now contain the patient name and ID. Check the patient and task details on each card.
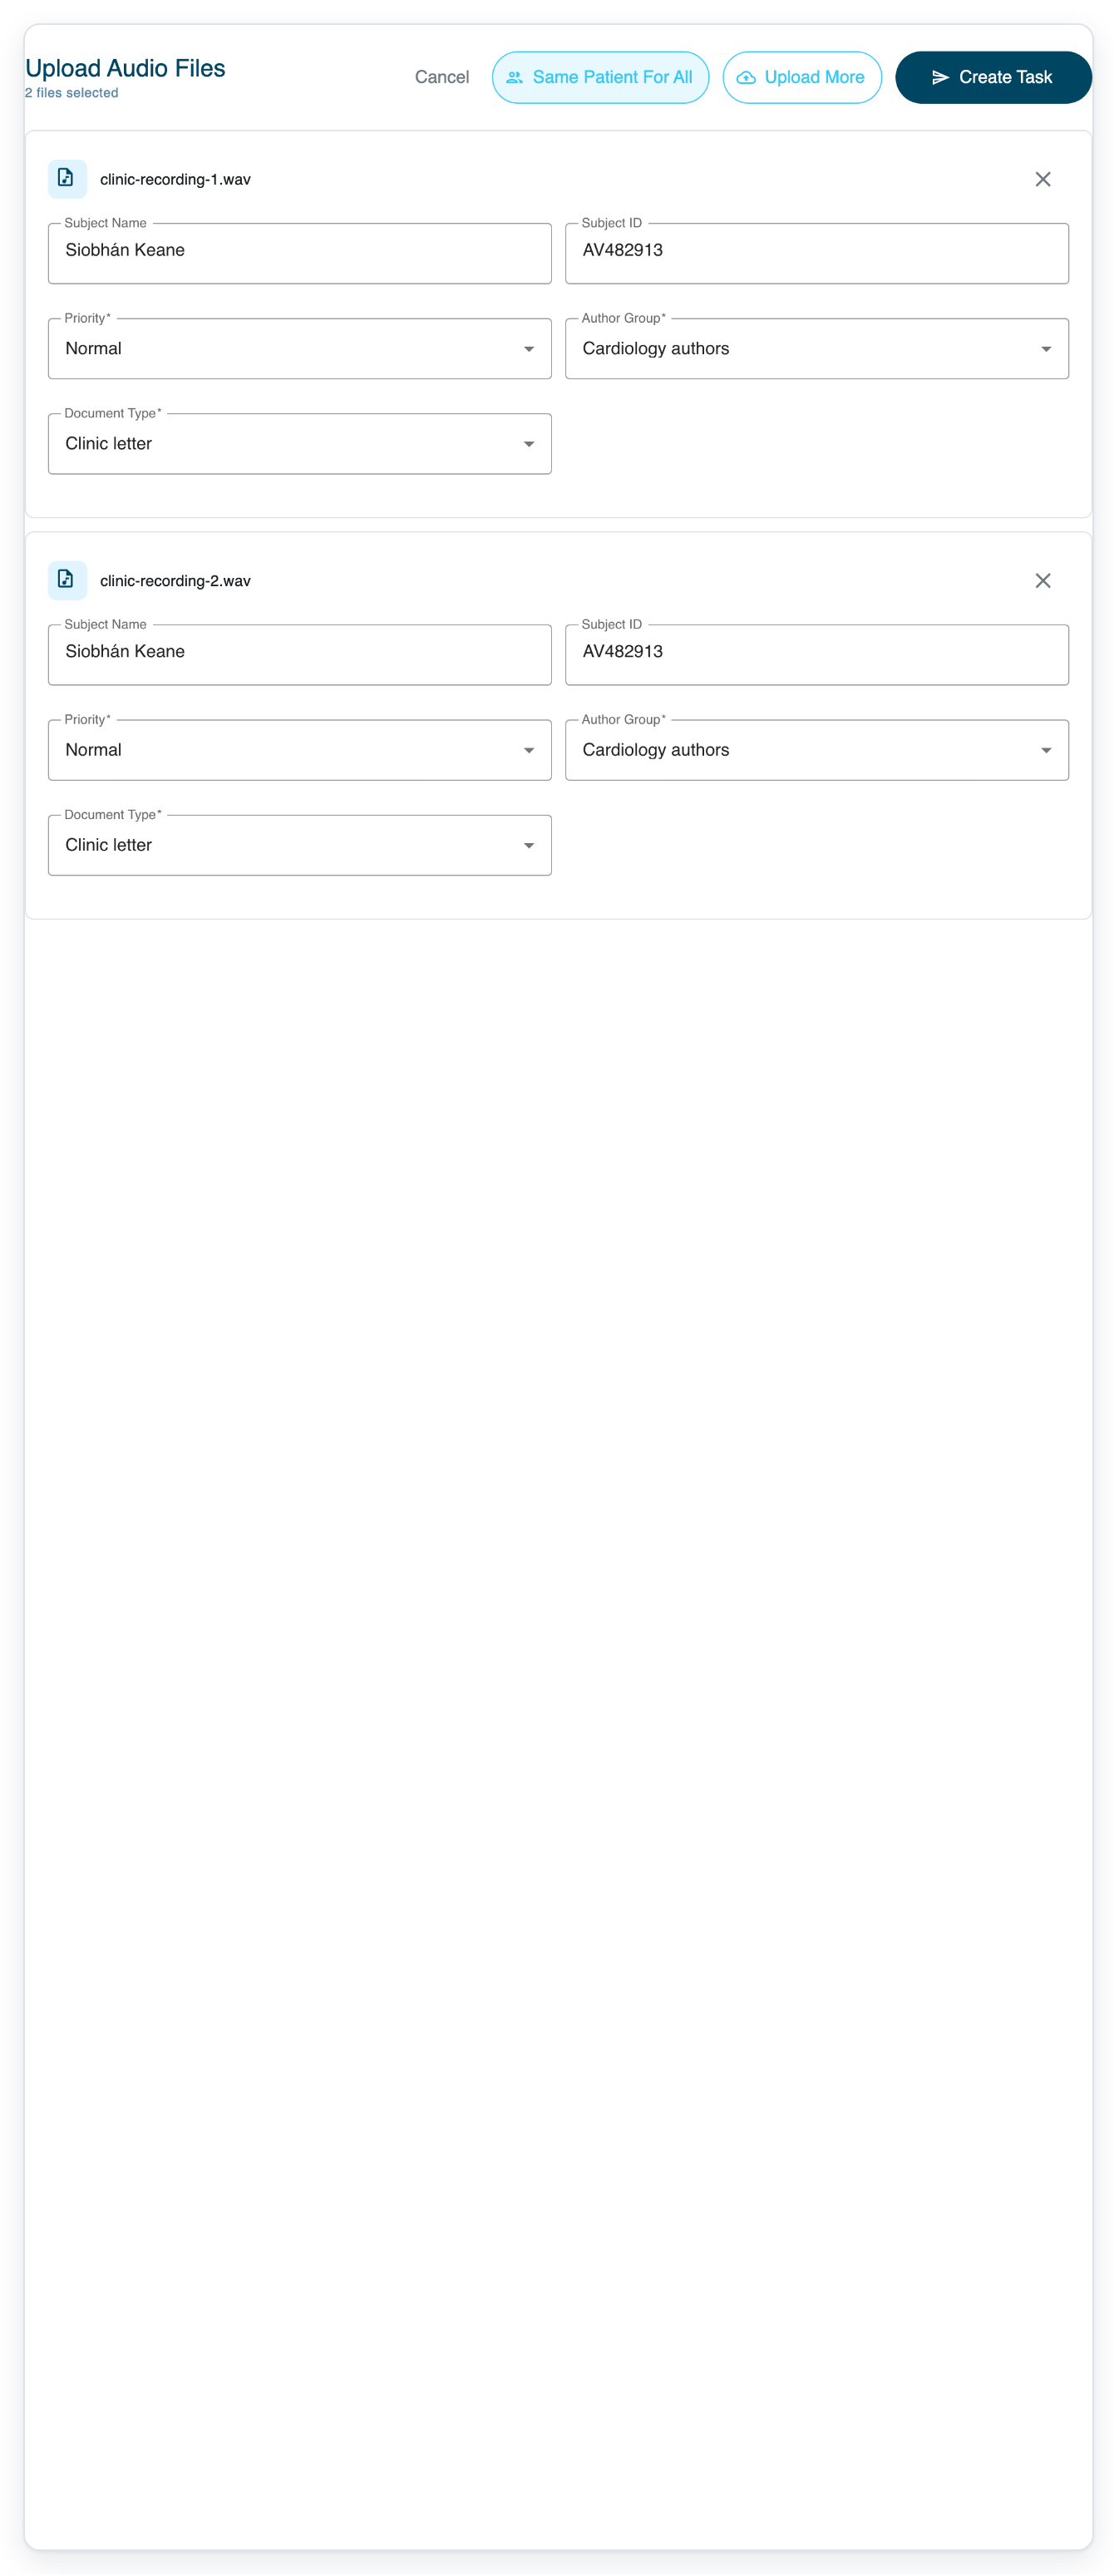
Check Priority, Author Group and Document Type on every recording, then click Create Task.
Priority starts at Normal. You can choose High or Urgent. Changing the group updates the available document types. Choose the template you need under Document Type.
In this example, Normal, Cardiology authors and Clinic letter are selected.
Keep the page open while the files upload.
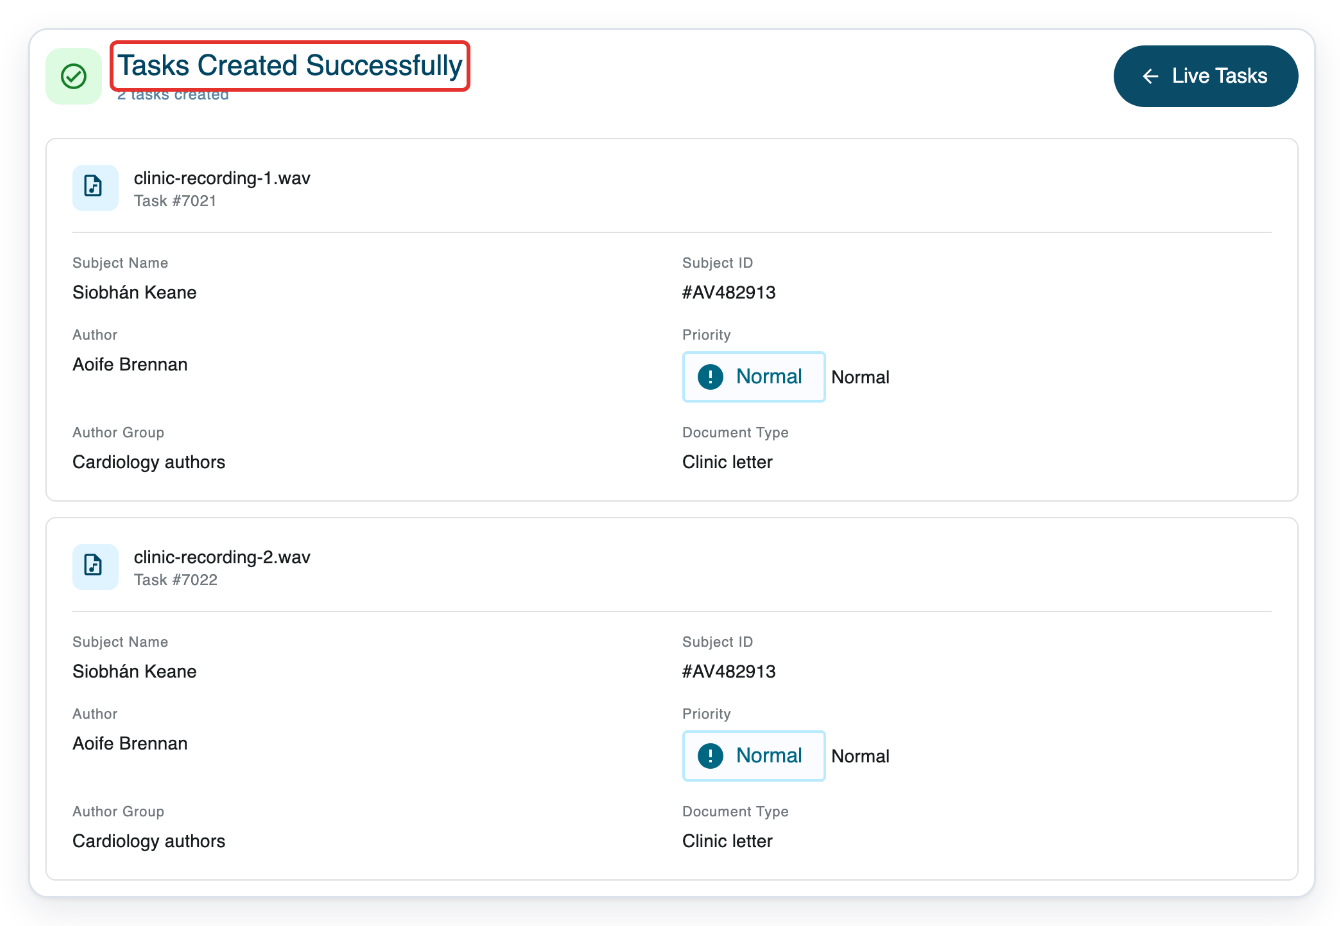
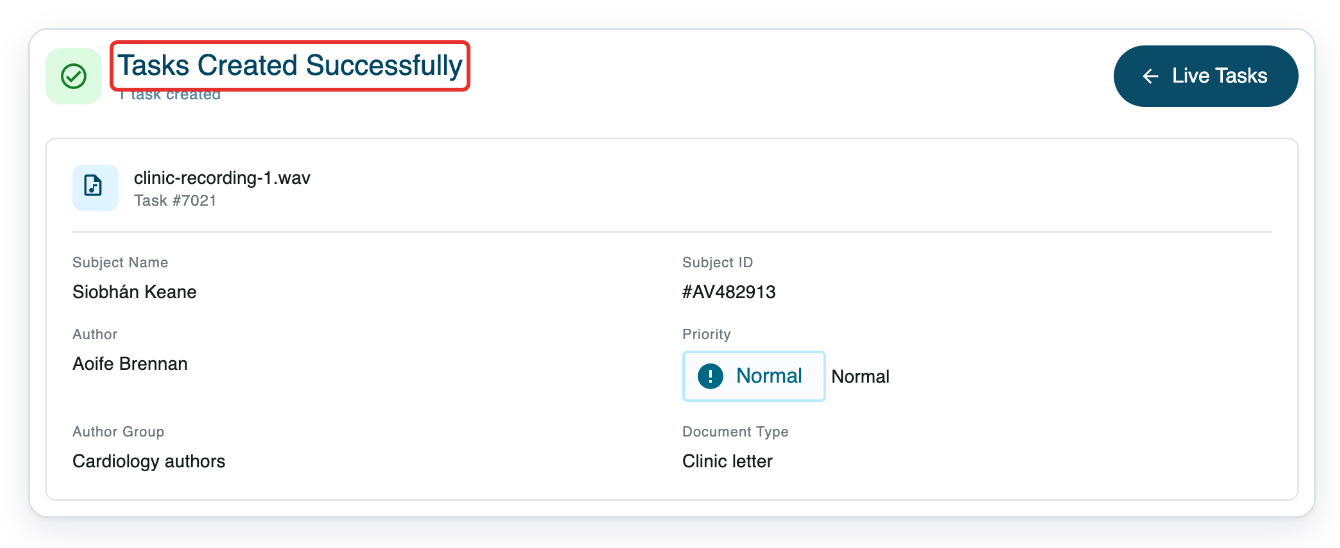
=> The Tasks Created Successfully page shows the recording, task number, patient details, author, priority, group and document type.
There is a separate task number and summary for each recording.
Click Live Tasks to return to your task list.
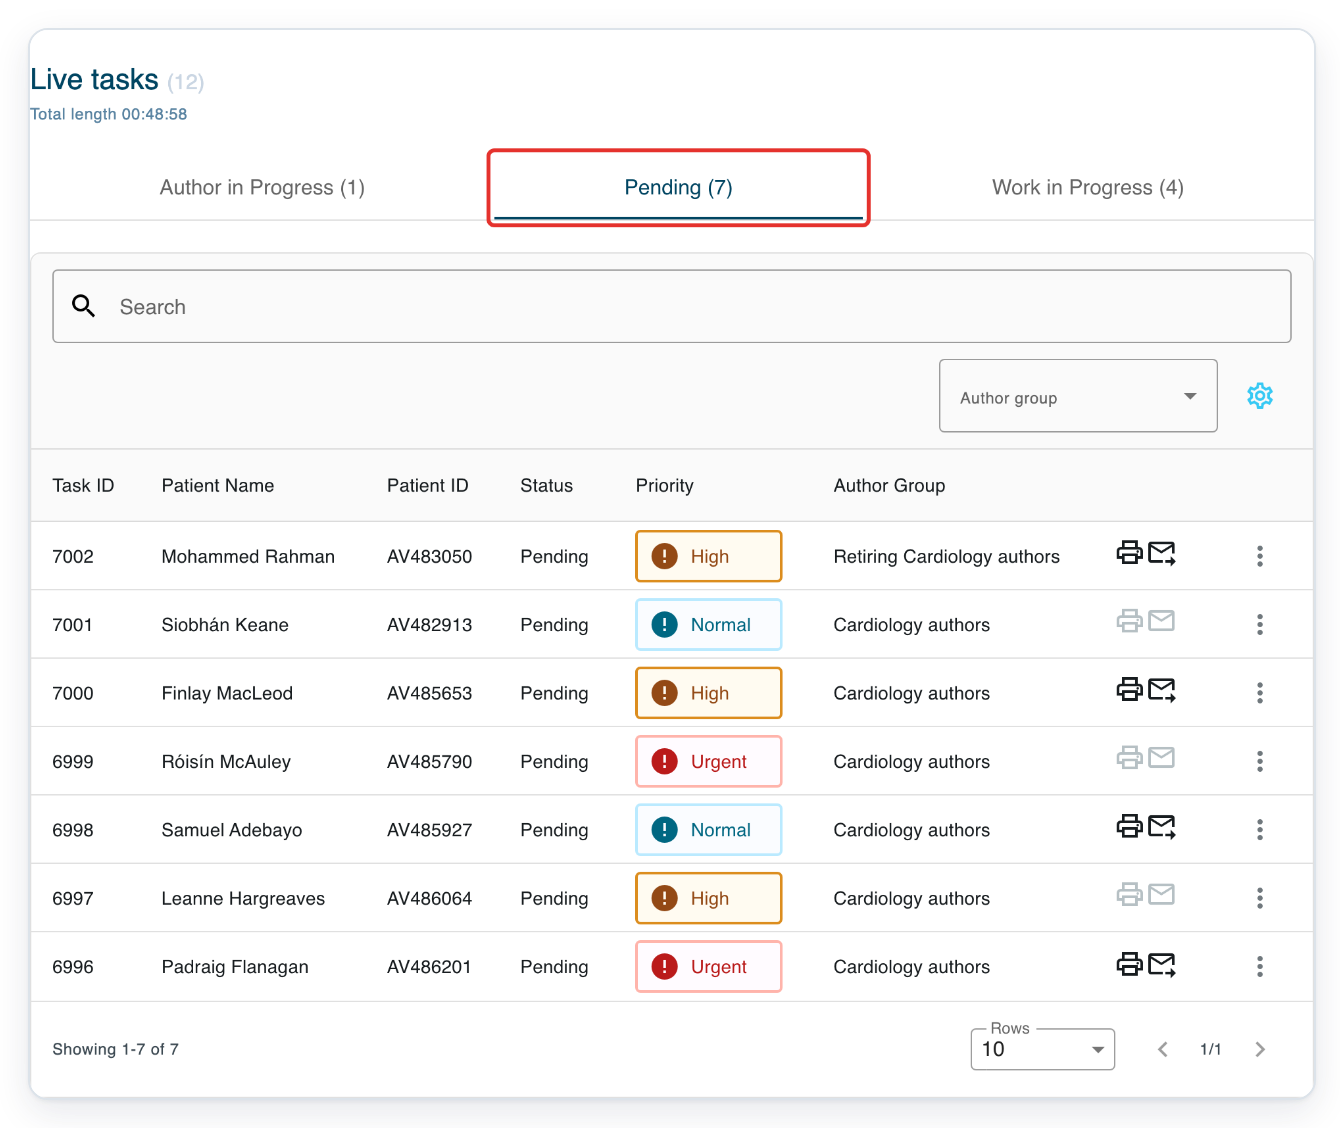
=> Pending is the queue for tasks awaiting transcription. After audio processing, your tasks follow their transcription route. They reach Pending when that route includes a transcriber group.
As a transcriber
Go to Live Tasks. Click Upload task in the bottom right corner to open the upload page.
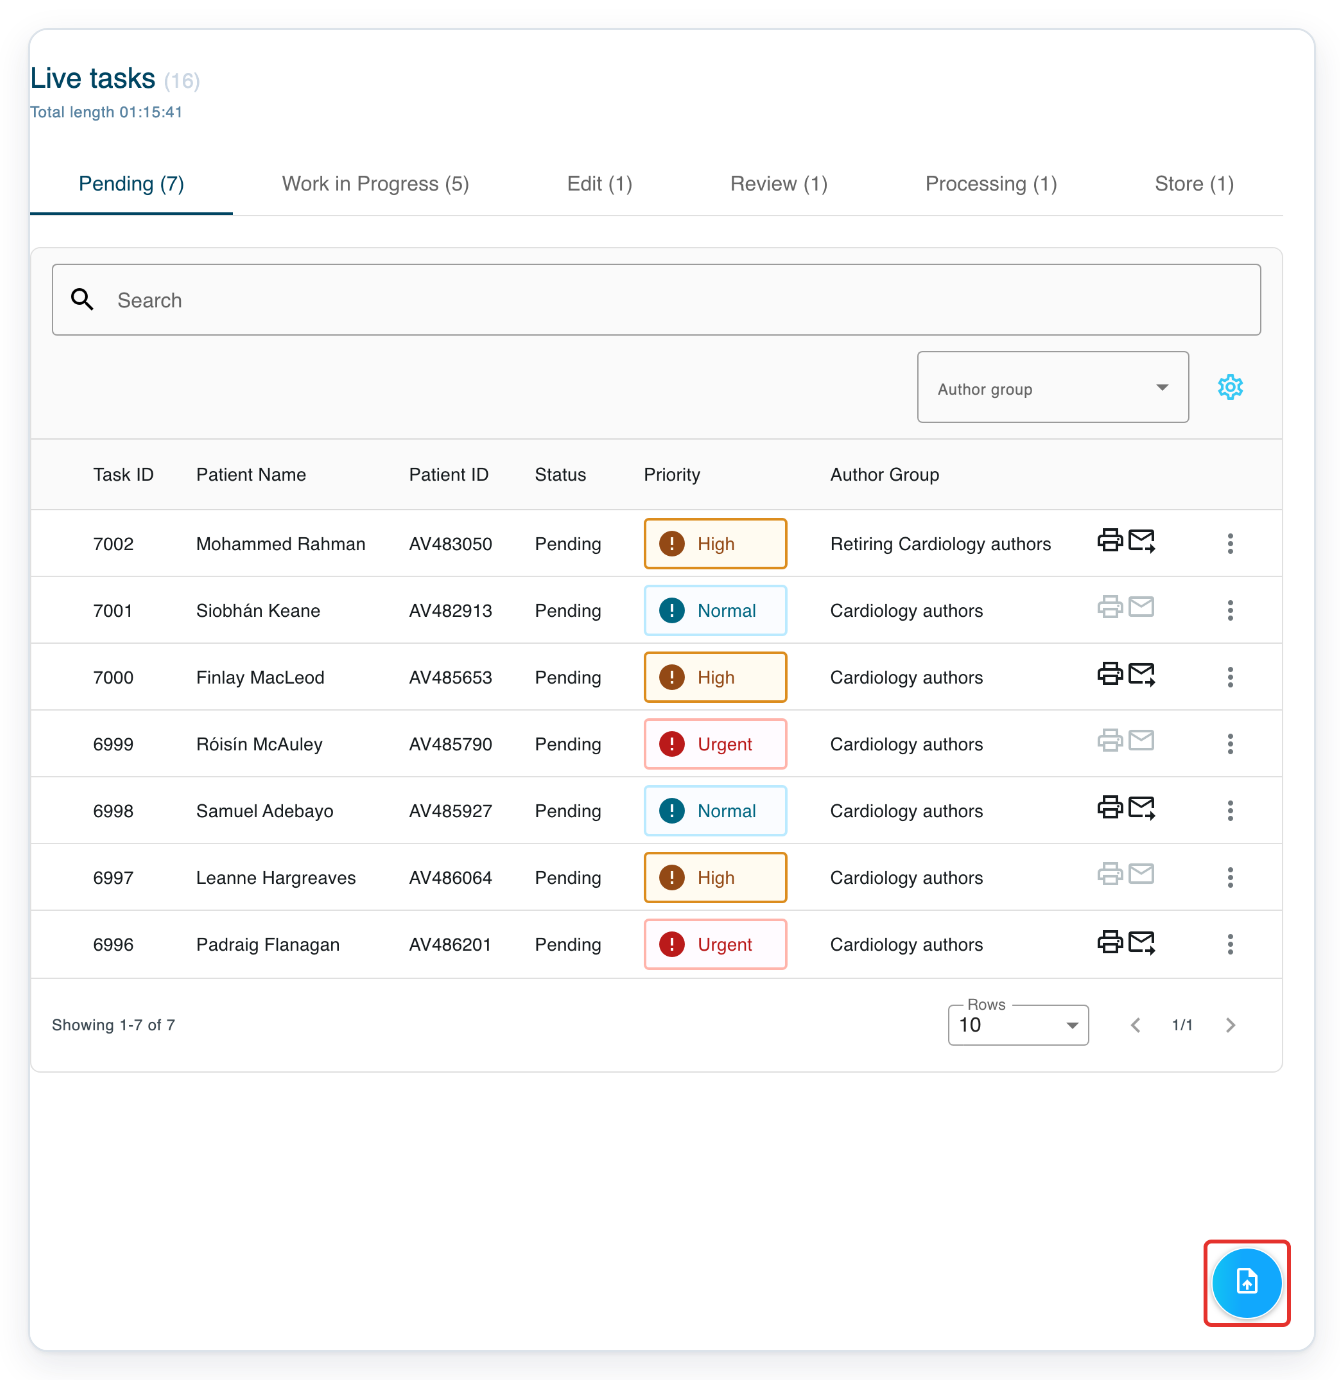
Click Click to upload, then choose the recordings you want to upload for an author.
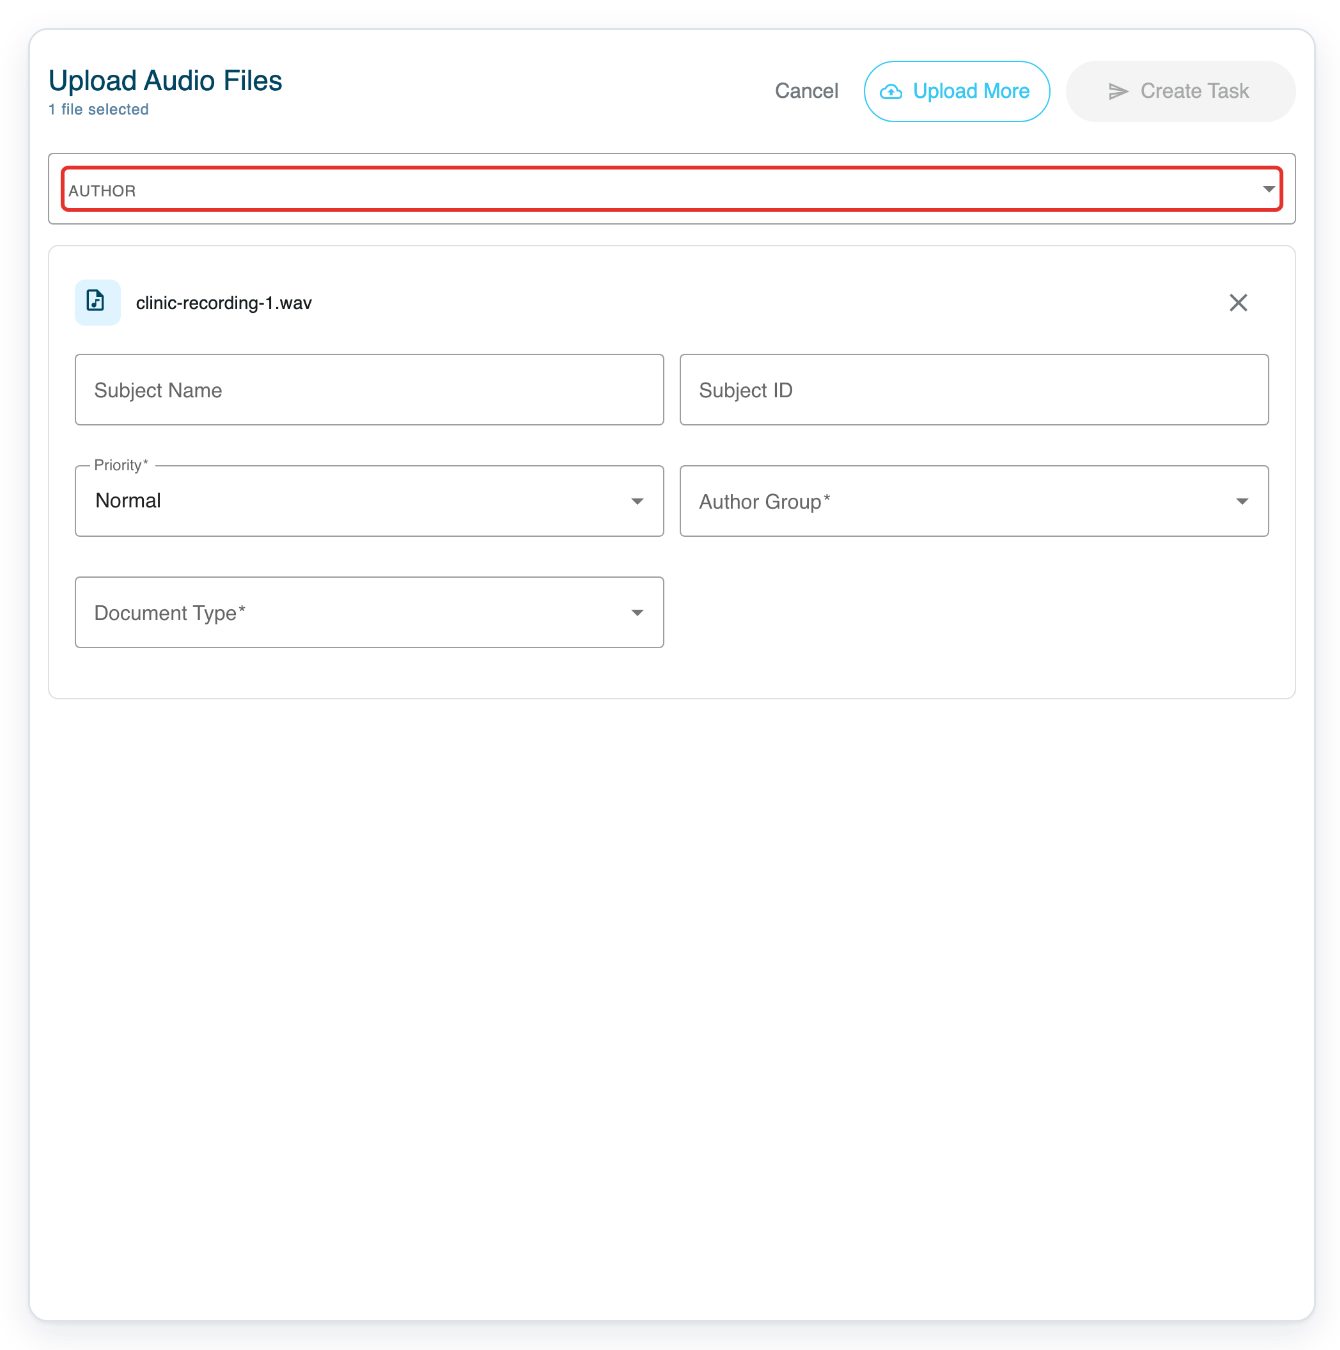
Each selected file appears on a separate card. You can also drag and drop files onto the upload page.
Open the AUTHOR dropdown above the recording cards to choose the author.
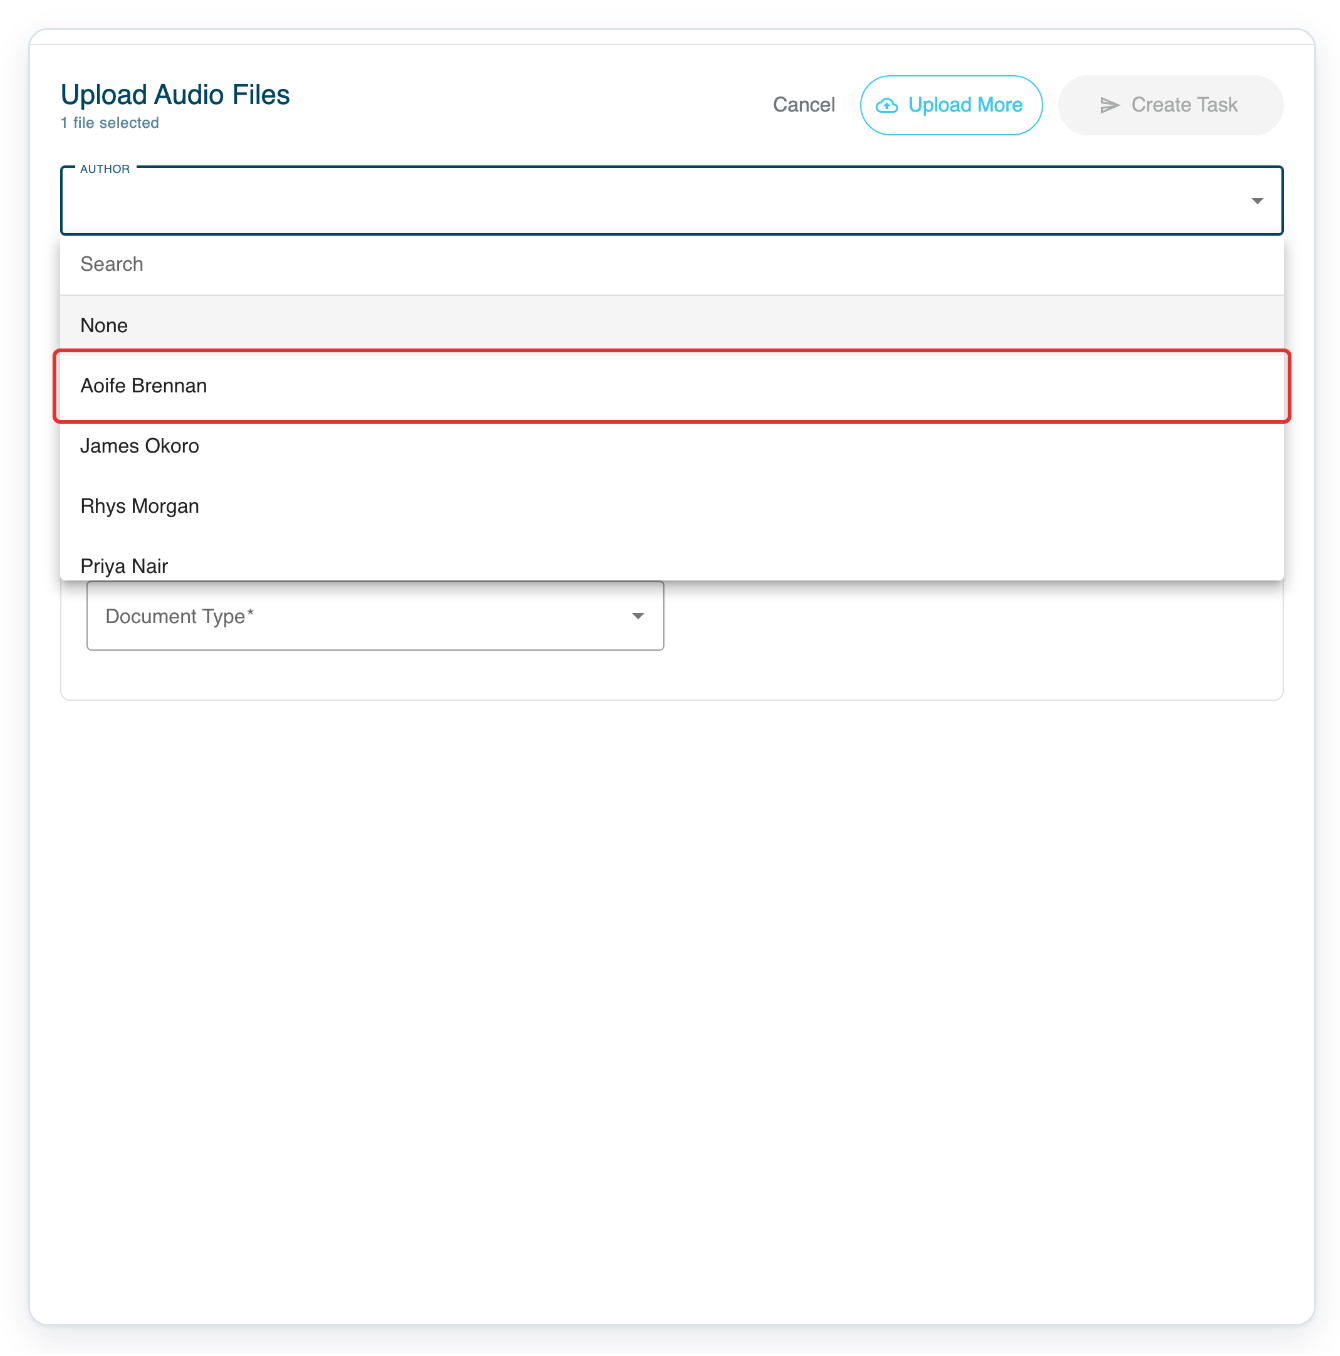
Use Search in the dropdown to find an author by name.
Click the author's name. The example shows Aoife Brennan.
T-Pro uses the author's default group and document type, if set. This example shows Cardiology authors and Clinic letter.
Click Subject Name on each recording's card and enter the patient's name.
The example uses Siobhán Keane.
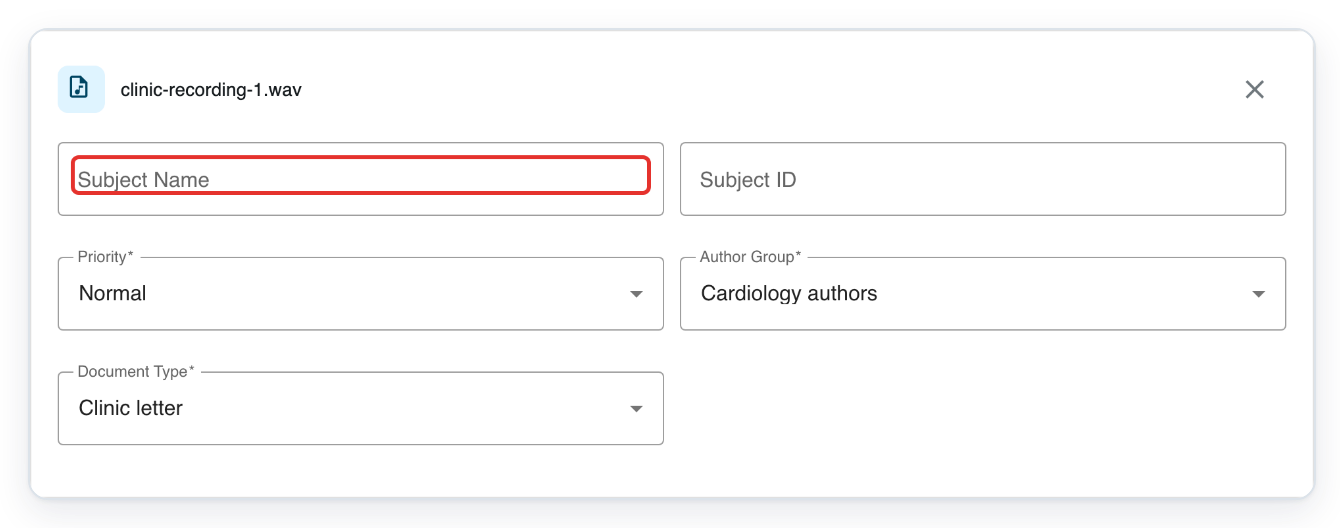
Click Subject ID and enter the patient's ID, if you have it.
The example uses AV482913.
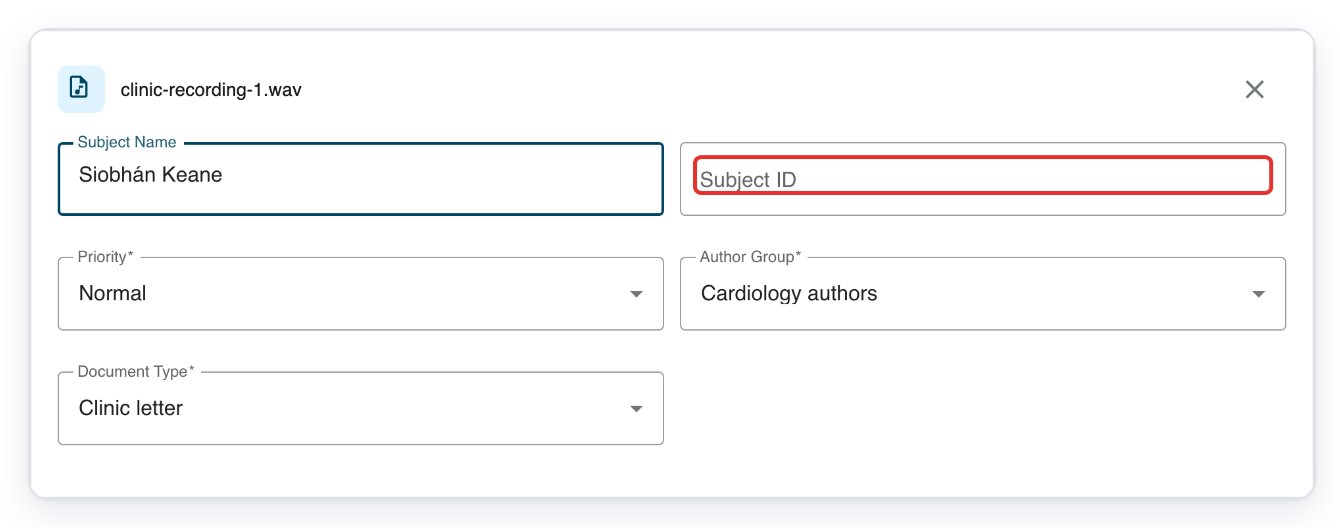
Check Priority, Author Group and Document Type on every recording, then click Create Task.
You can set these separately for each recording. This example uses Normal, Cardiology authors and Clinic letter.
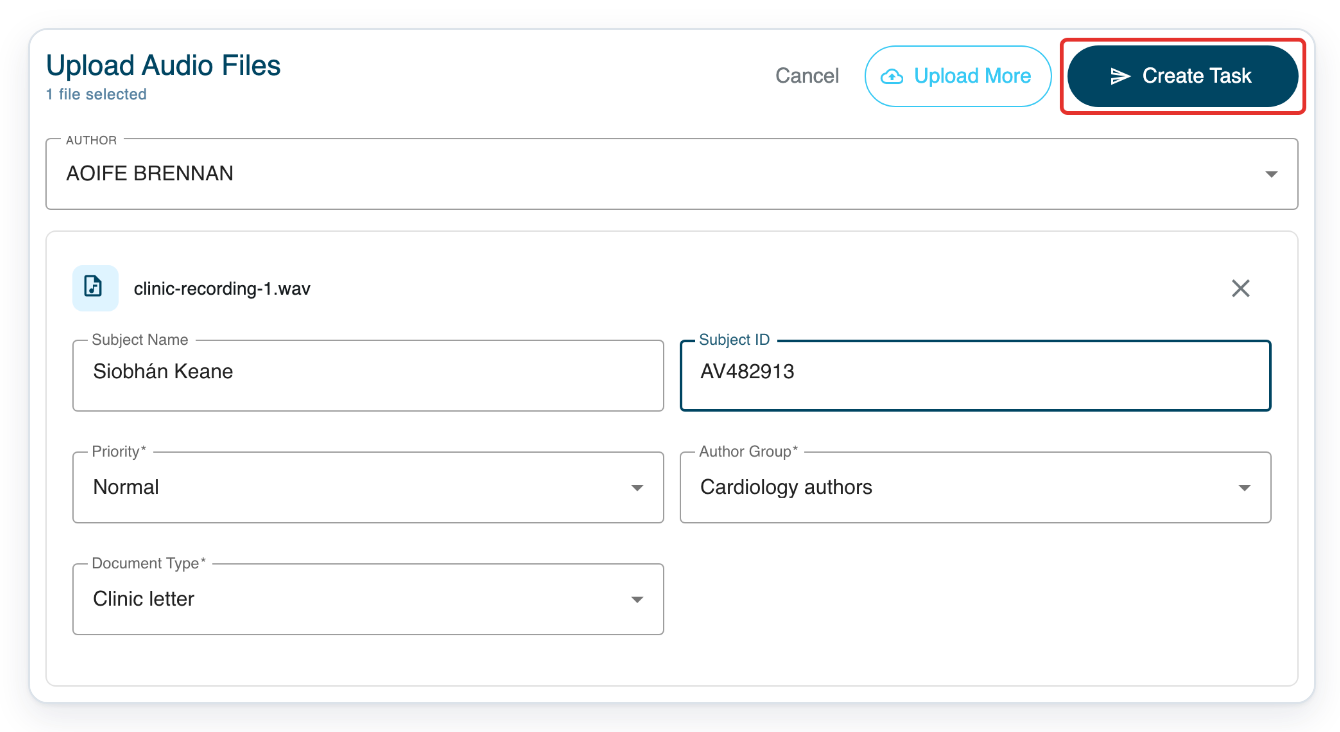
=> The Tasks Created Successfully page shows the recording, task number, patient details and task details. Click Live Tasks to return to your task list.
NOTE:
- Keep the upload page open until Tasks Created Successfully appears.
- Upload for one author at a time. Changing AUTHOR applies the new author's group and document type defaults to every selected recording.
- Before uploading, click Upload More to add recordings. To remove a recording, click the cross beside its filename.
- The original files stay on your device. Check your previous uploads before selecting files again to avoid duplicate tasks.
- Subject Name and Subject ID are optional. If you do not have patient details, leave them blank and continue to Create Task.
Which recordings can I upload?
| Check | Details |
|---|---|
| Supported file types | WAV, MP3, ACC, M4A, DSS, DS2, WMA, CAF, OGG and OPUS. |
| Maximum file size | 500 MB per recording. |
Tip: When several recordings belong to one patient, use Same Patient For All. In the window that opens, enter the patient details and apply them to all files. This replaces the patient name and ID on every selected recording.
Can't upload your recordings?
- T-Pro shows “Invalid file format”. Choose a supported file type from the table above. Check which recordings already have cards before adding the remaining files.
- A recording is too large. Choose a file no larger than 500 MB.
- You can't click Create Task. If you're a transcriber, select an author first. Check Priority, Author Group and Document Type on every recording.
- T-Pro shows “File Upload Error, try again”. Click Retry beside the failed recording and keep the page open.
Related articles
If you have any more queries, please do not hesitate to contact our Helpdesk or support@tpro.io.
© 2020 - 2026