
Before you start
Your author account and organisation must have eCM enabled. You'll also need a scheduled video appointment. Allow microphone and camera access in your browser.
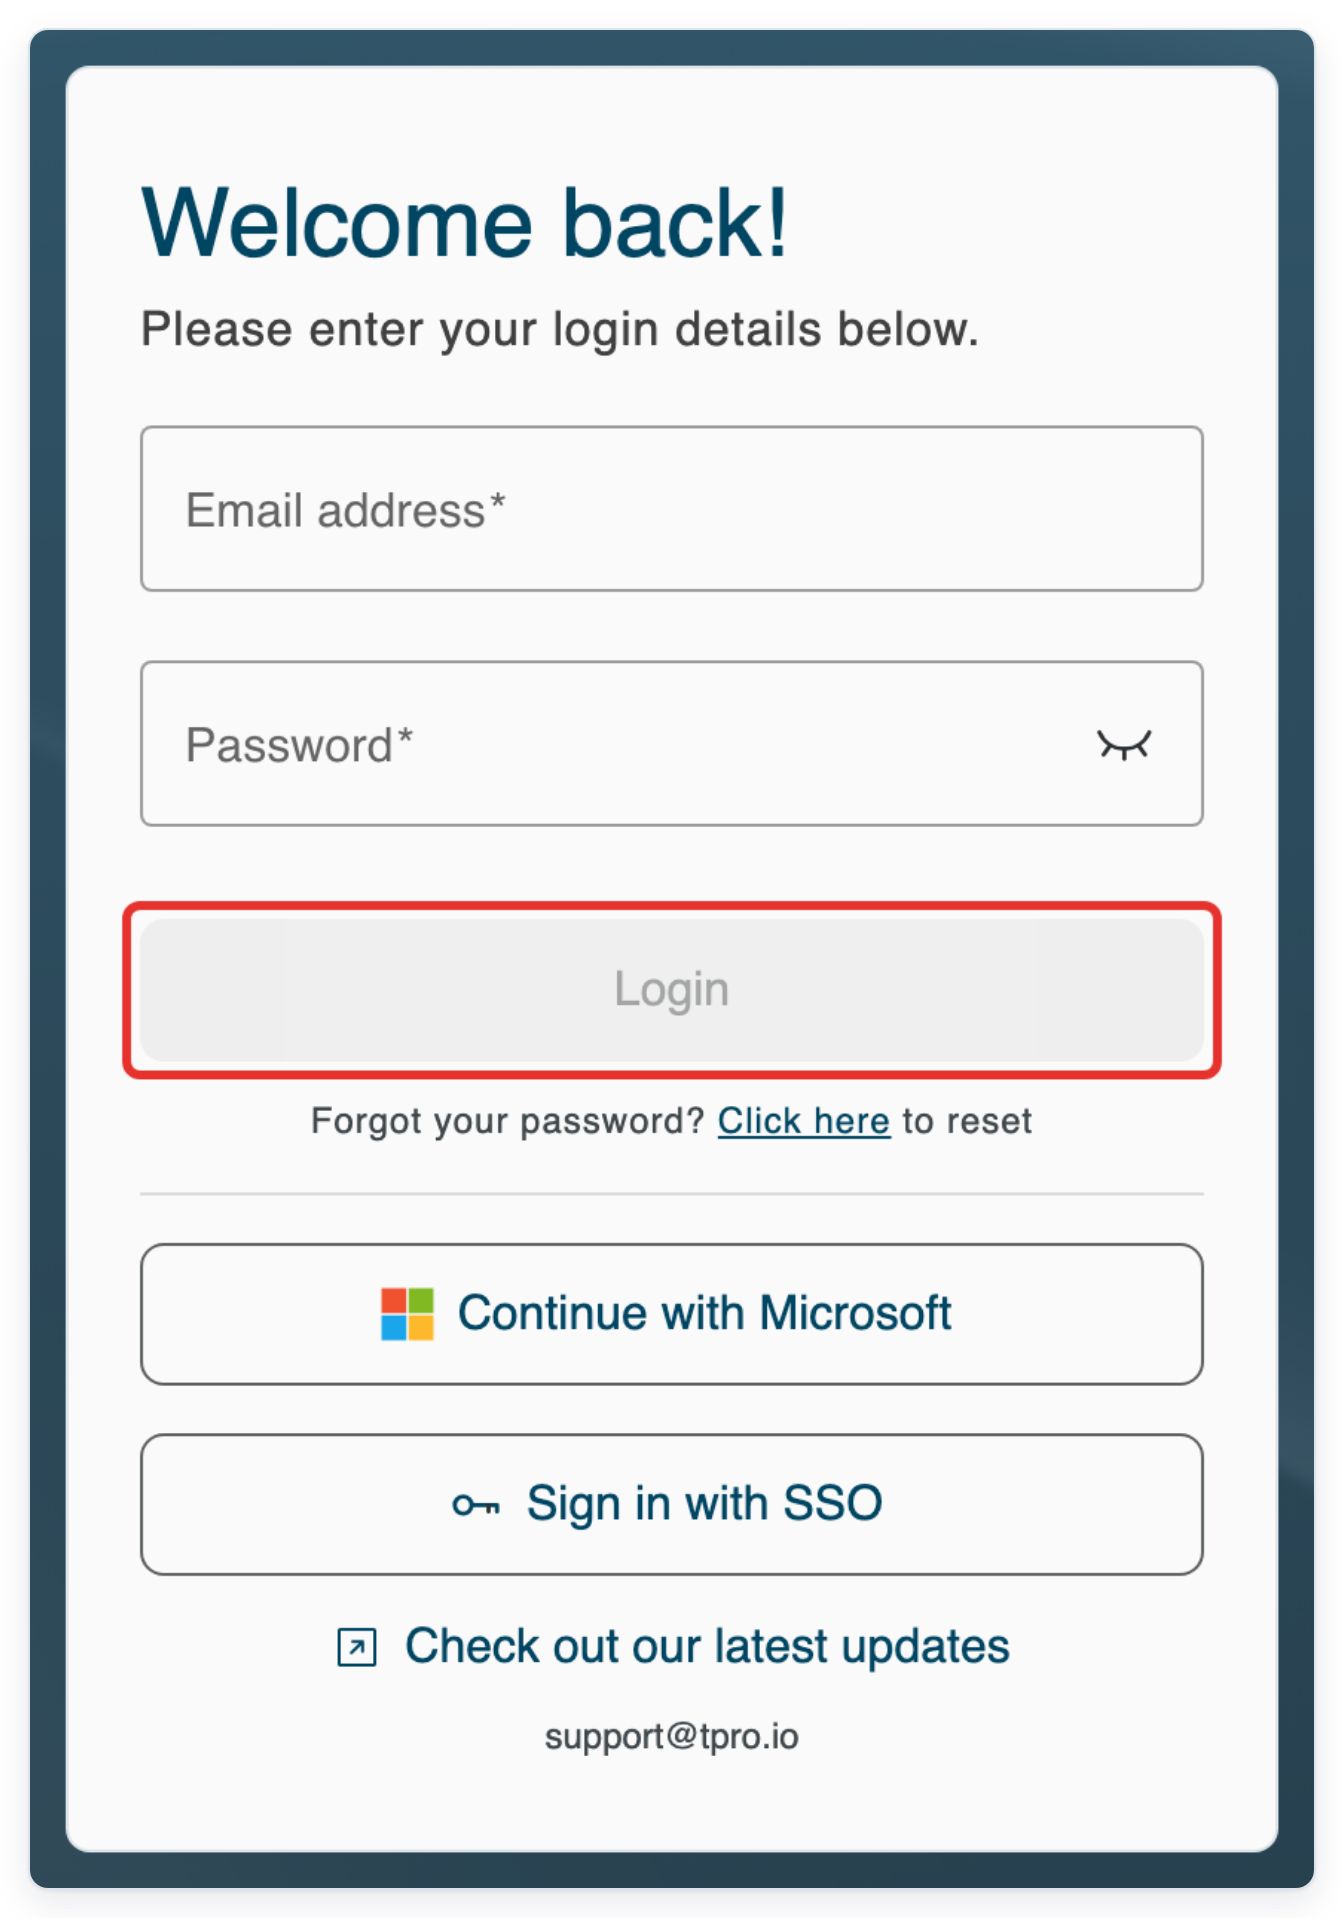
Log in to T-Pro with your author credentials.
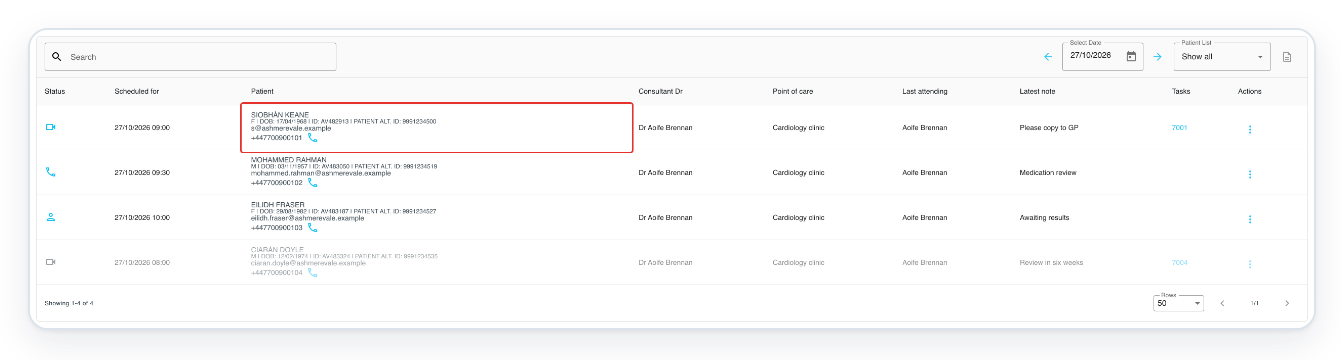
In Clinic Schedule, click your patient's video appointment.
Check the patient details and scheduled time to make sure you have the right appointment.
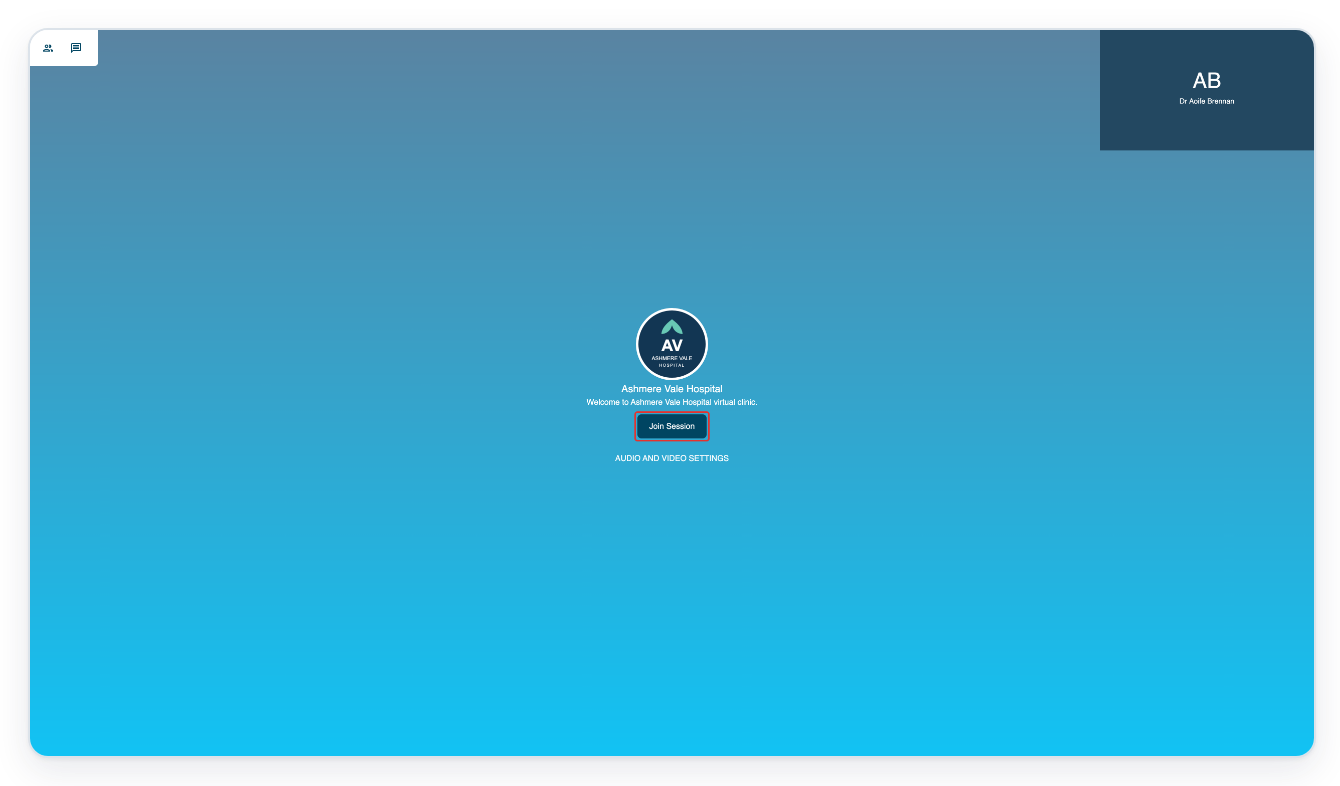
=> The appointment opens in a new tab with Join Session and audio and video settings.
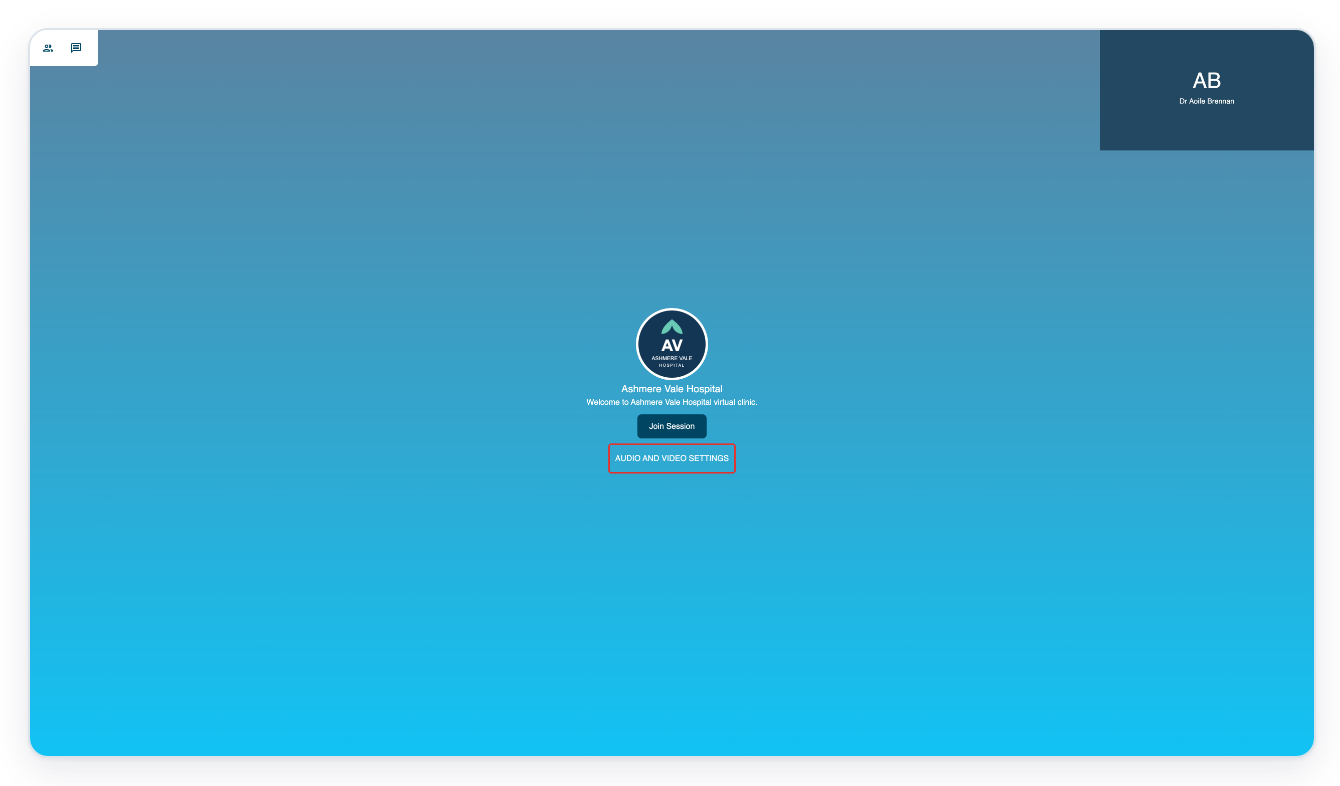
Click audio and video settings to check your camera, microphone and speaker.
=> The Settings window opens with a camera preview, device lists and Check Your Connection.
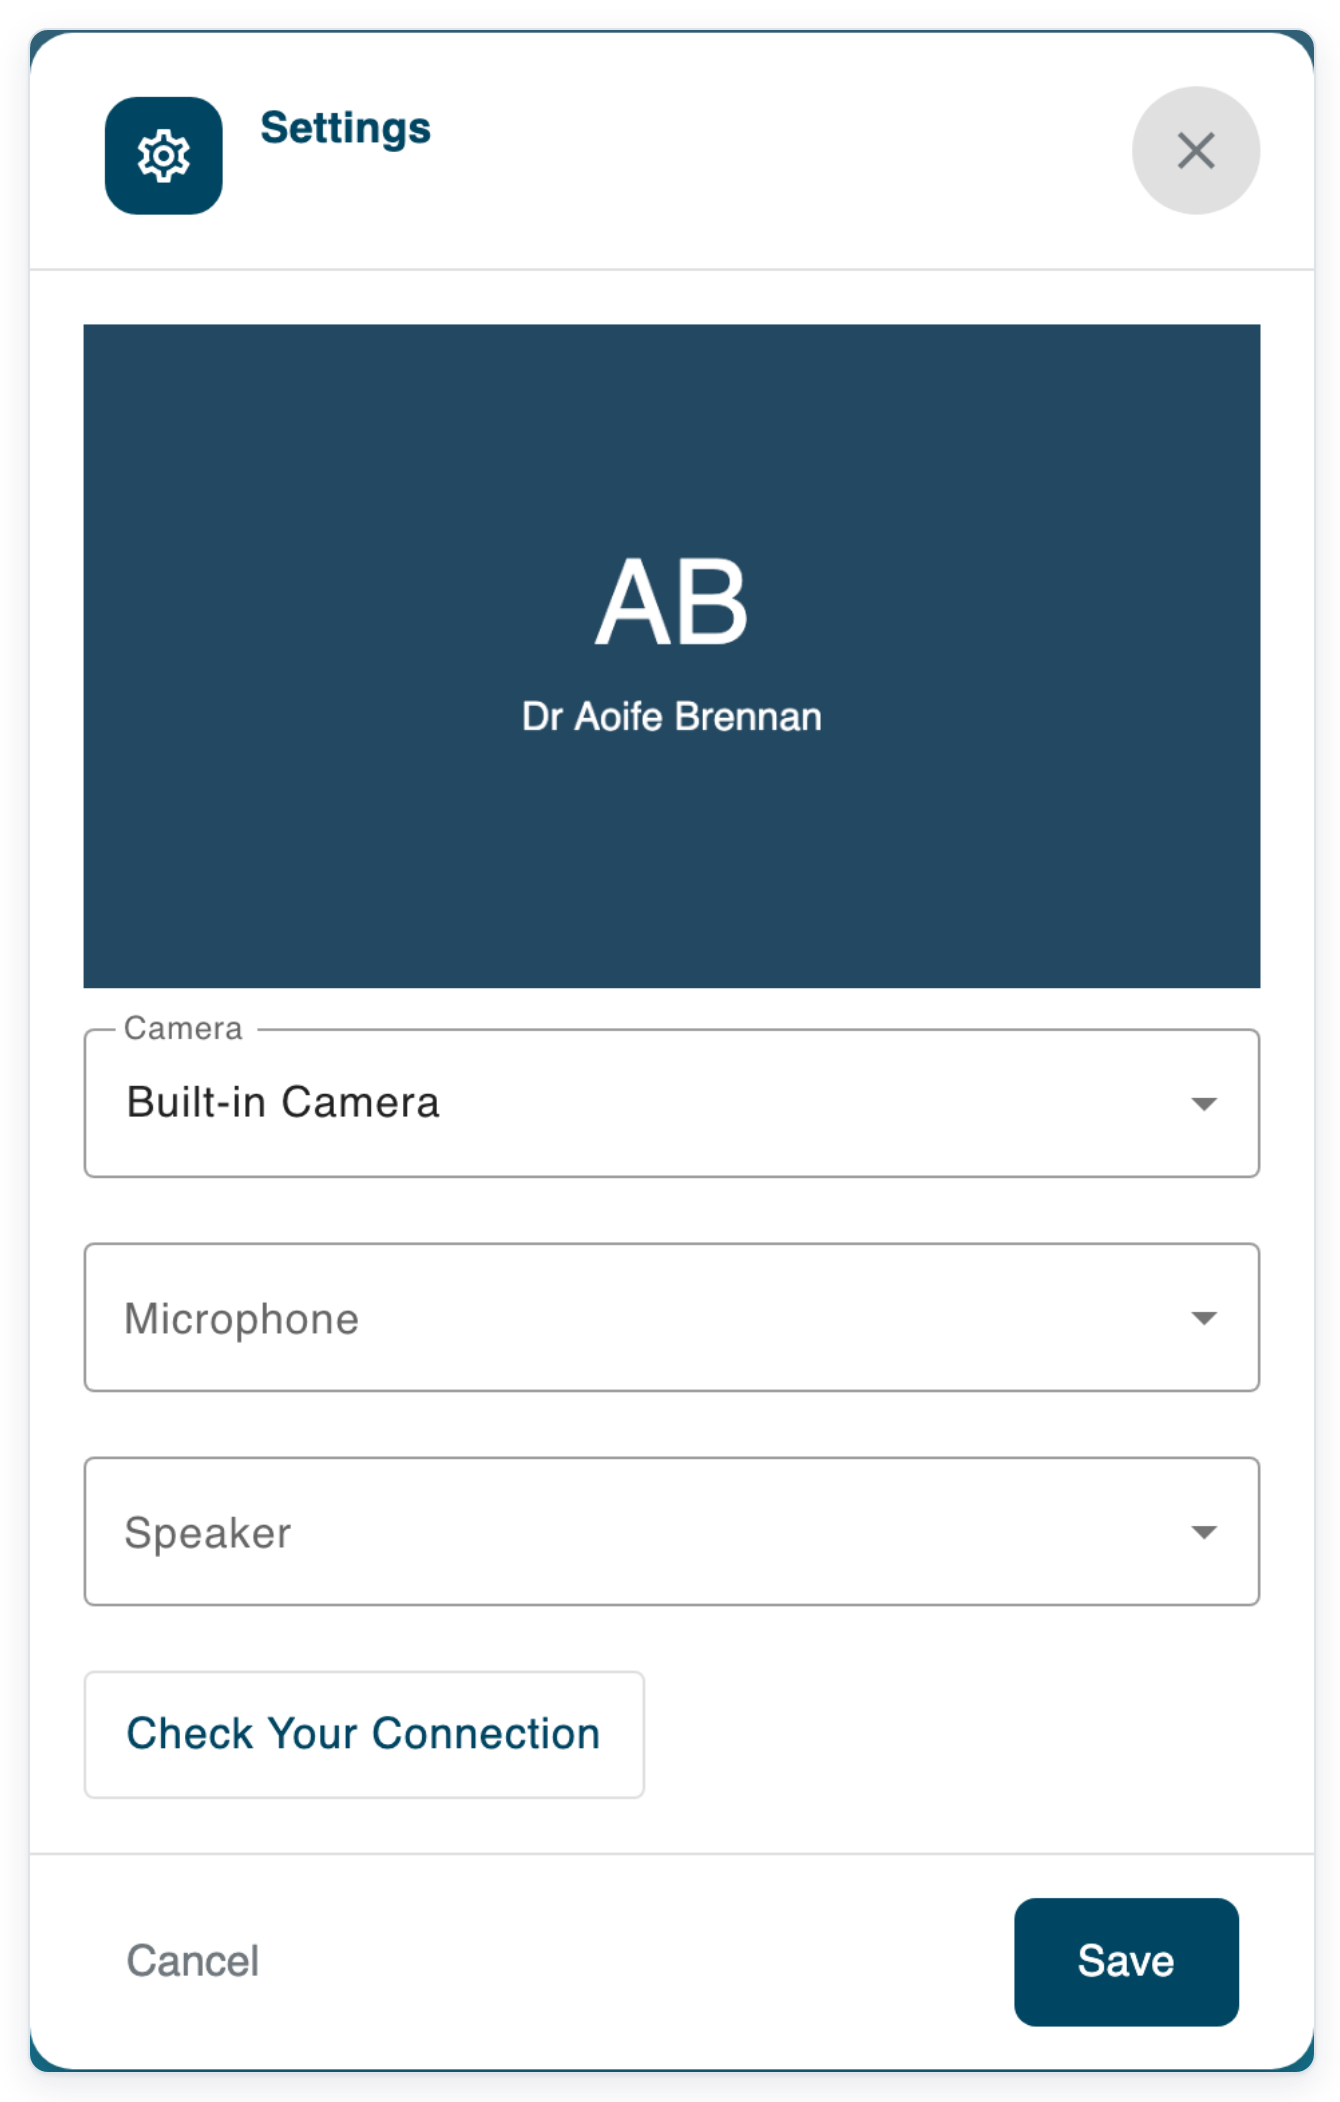
Open the Microphone list to see the available microphones.
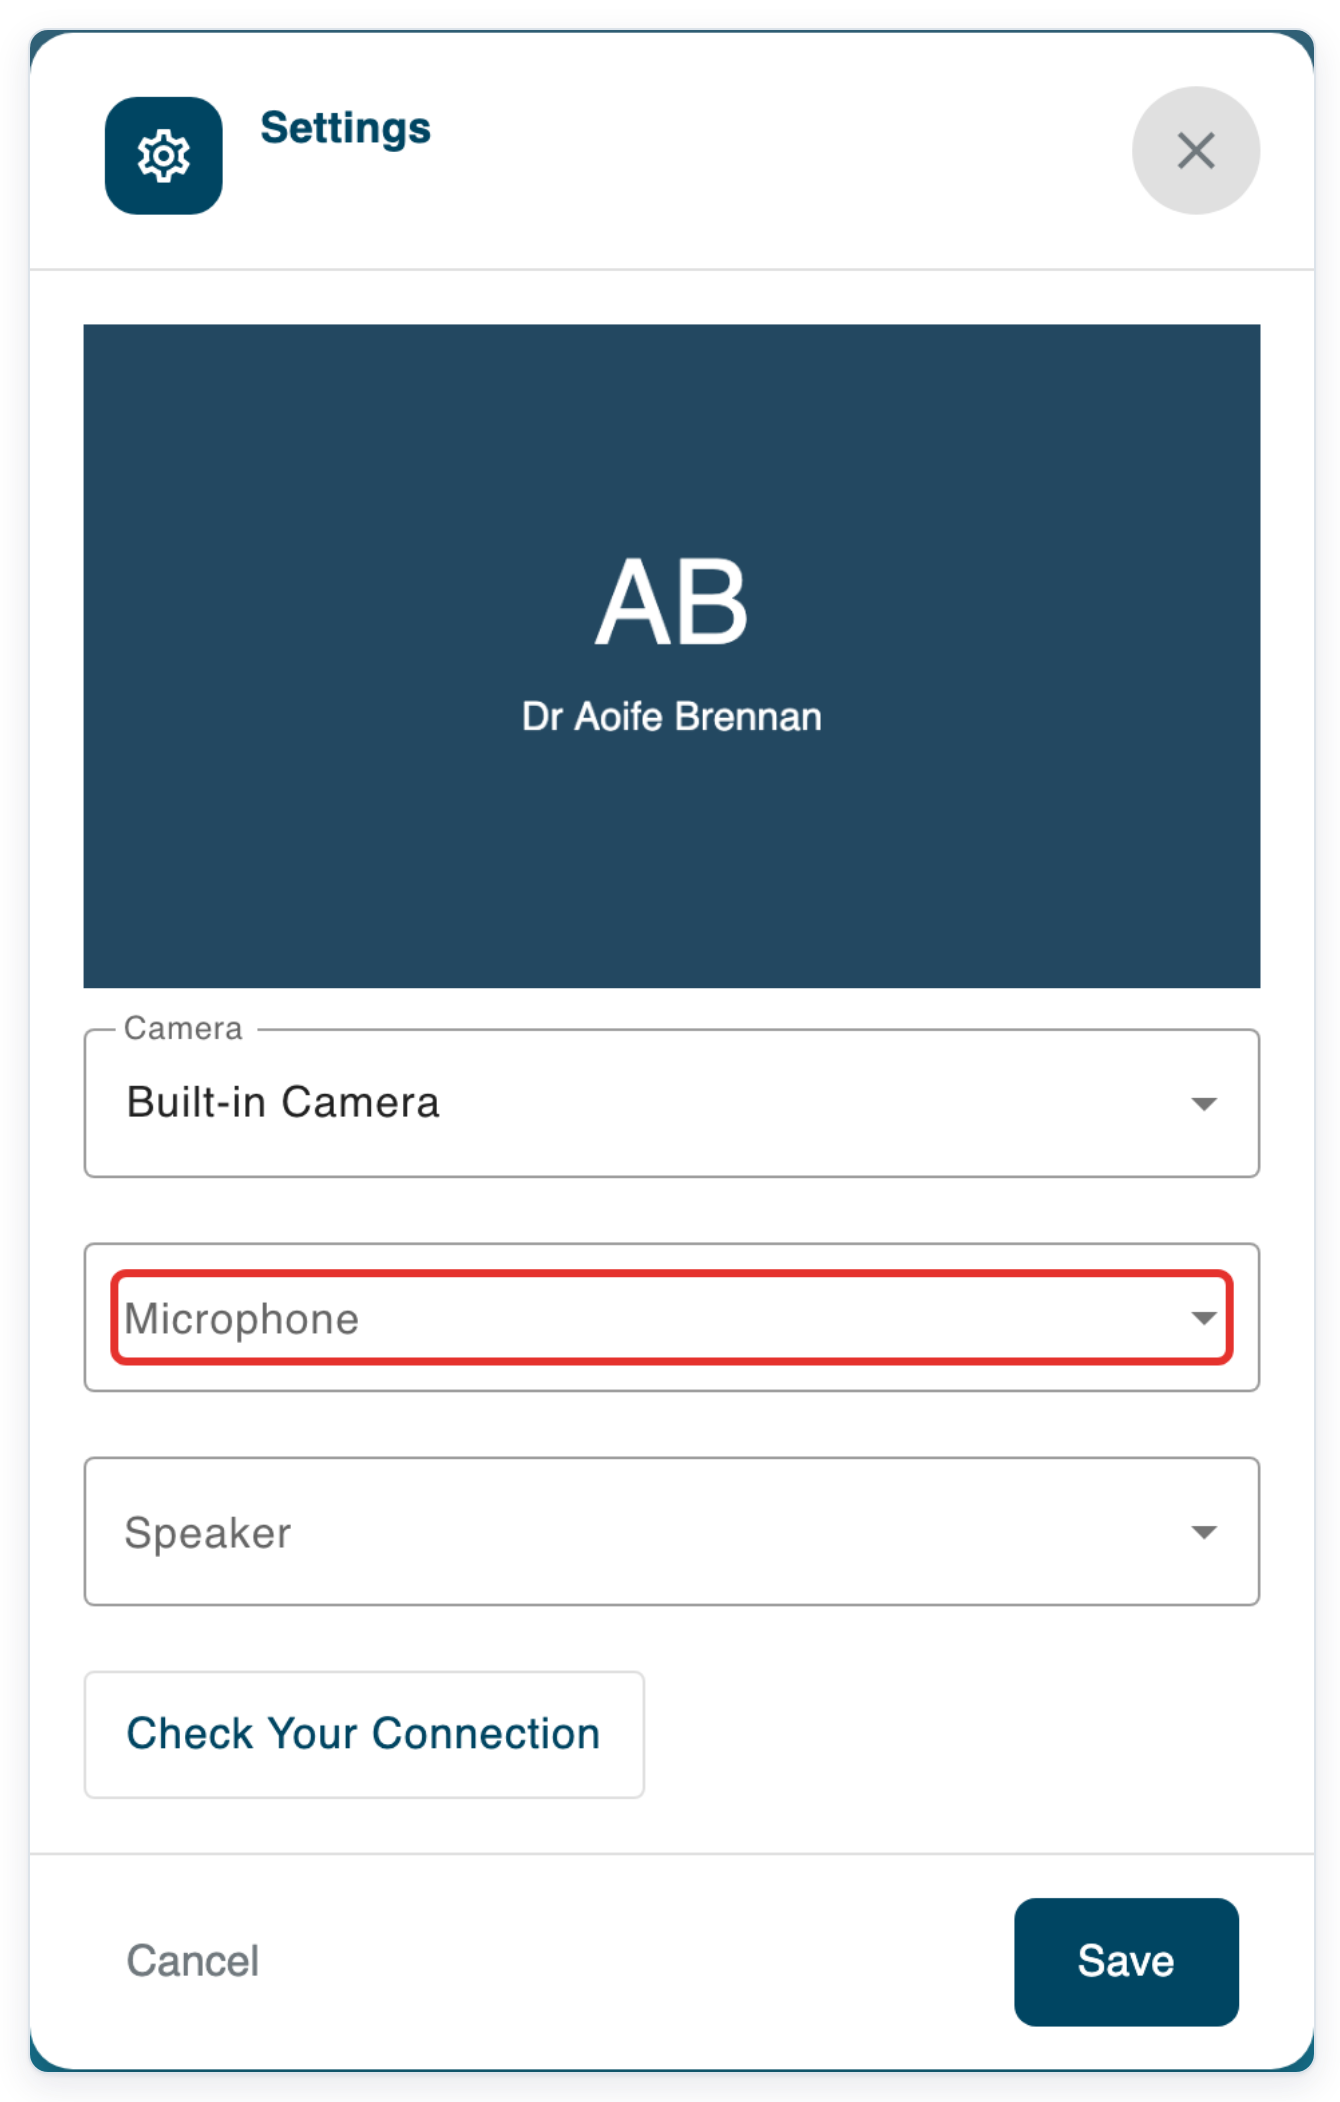
Choose Built-in Microphone.
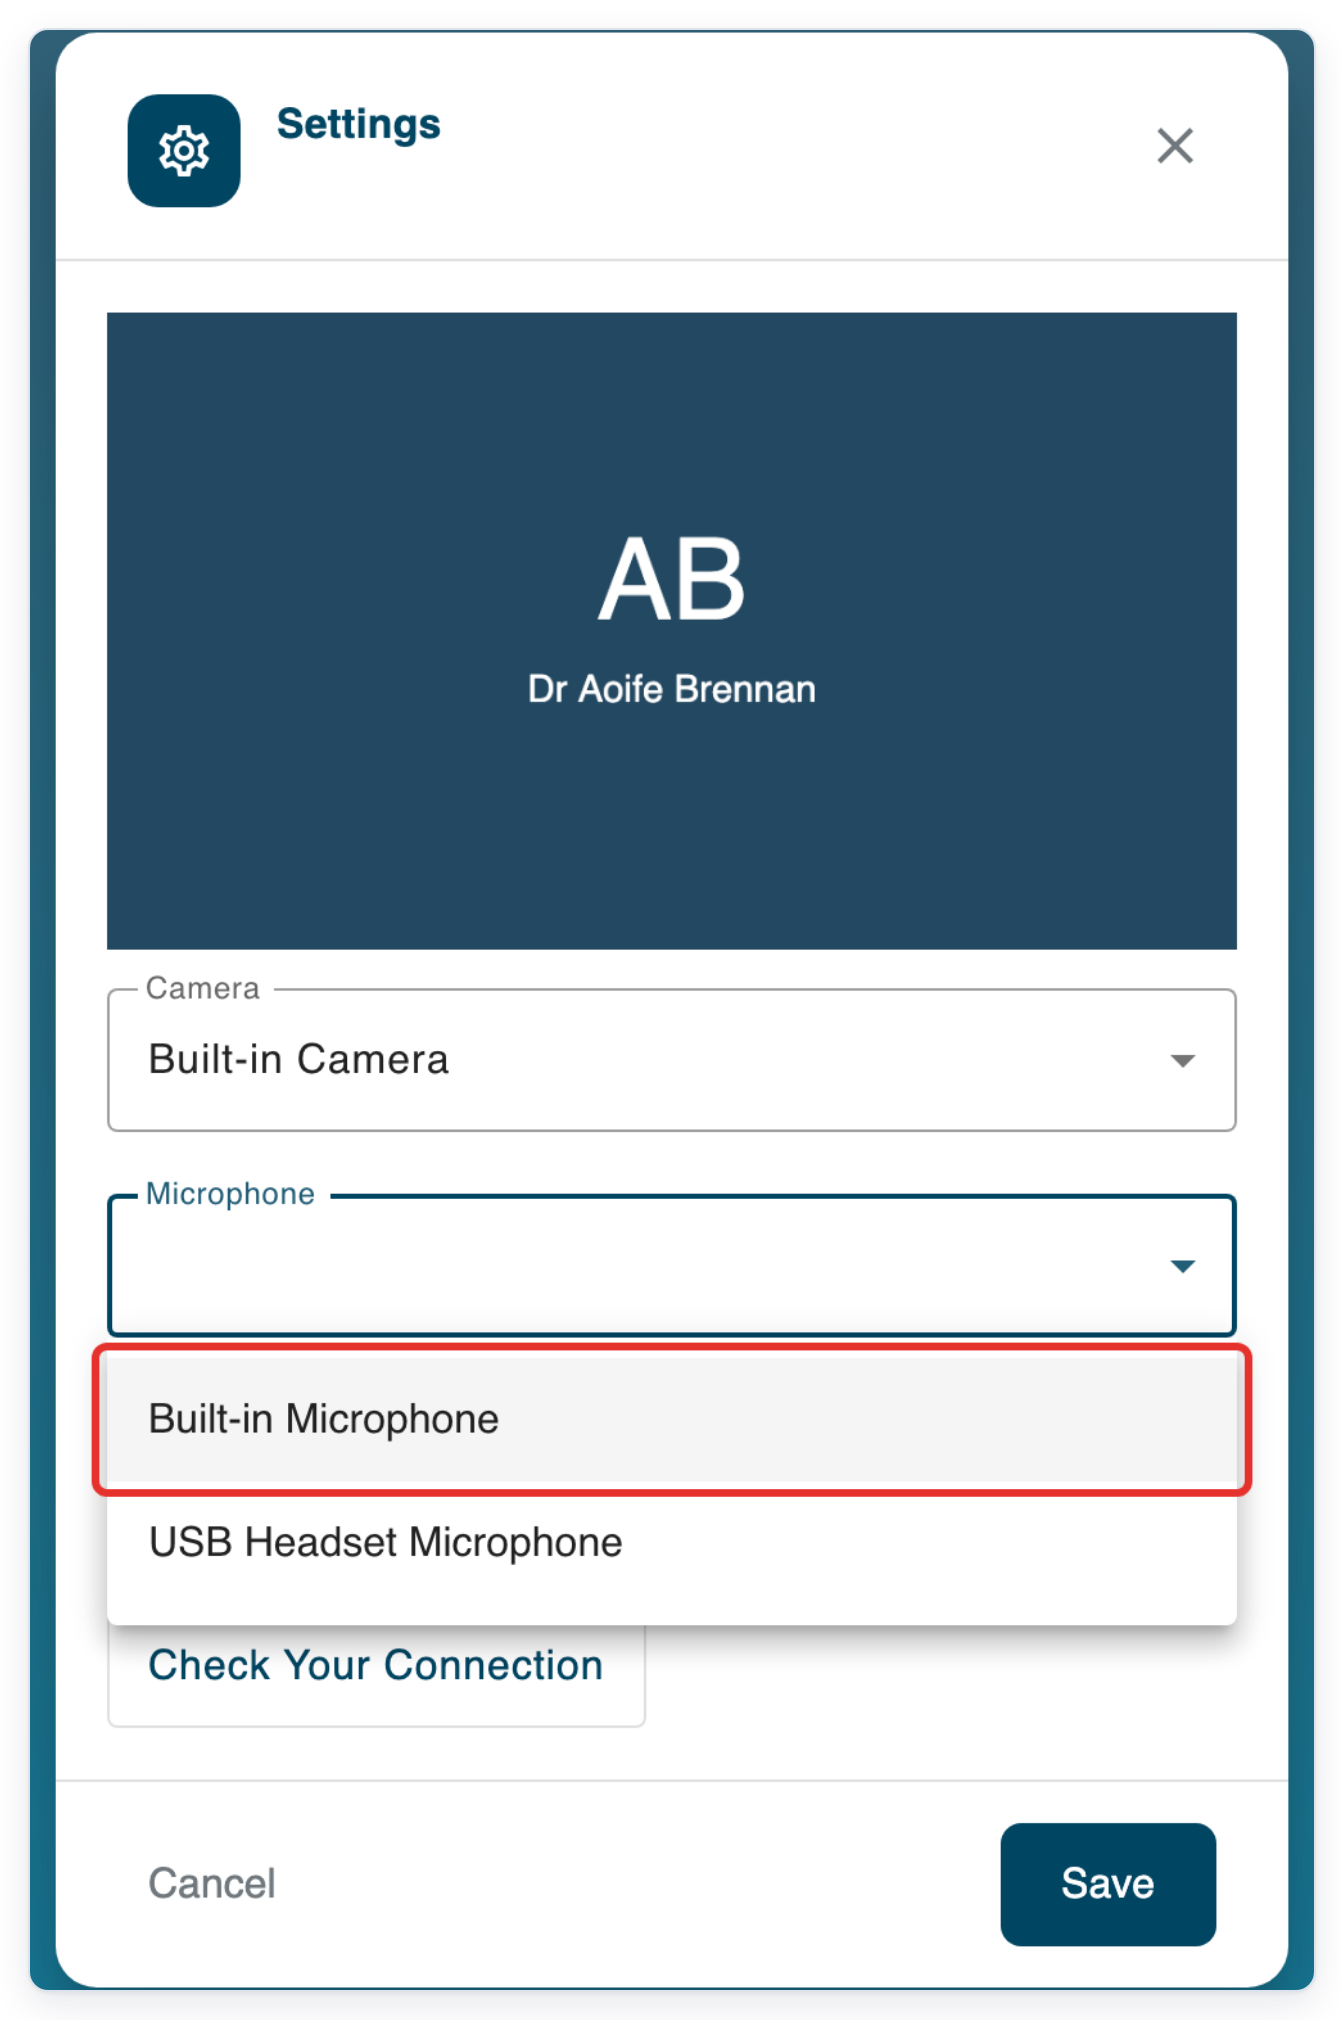
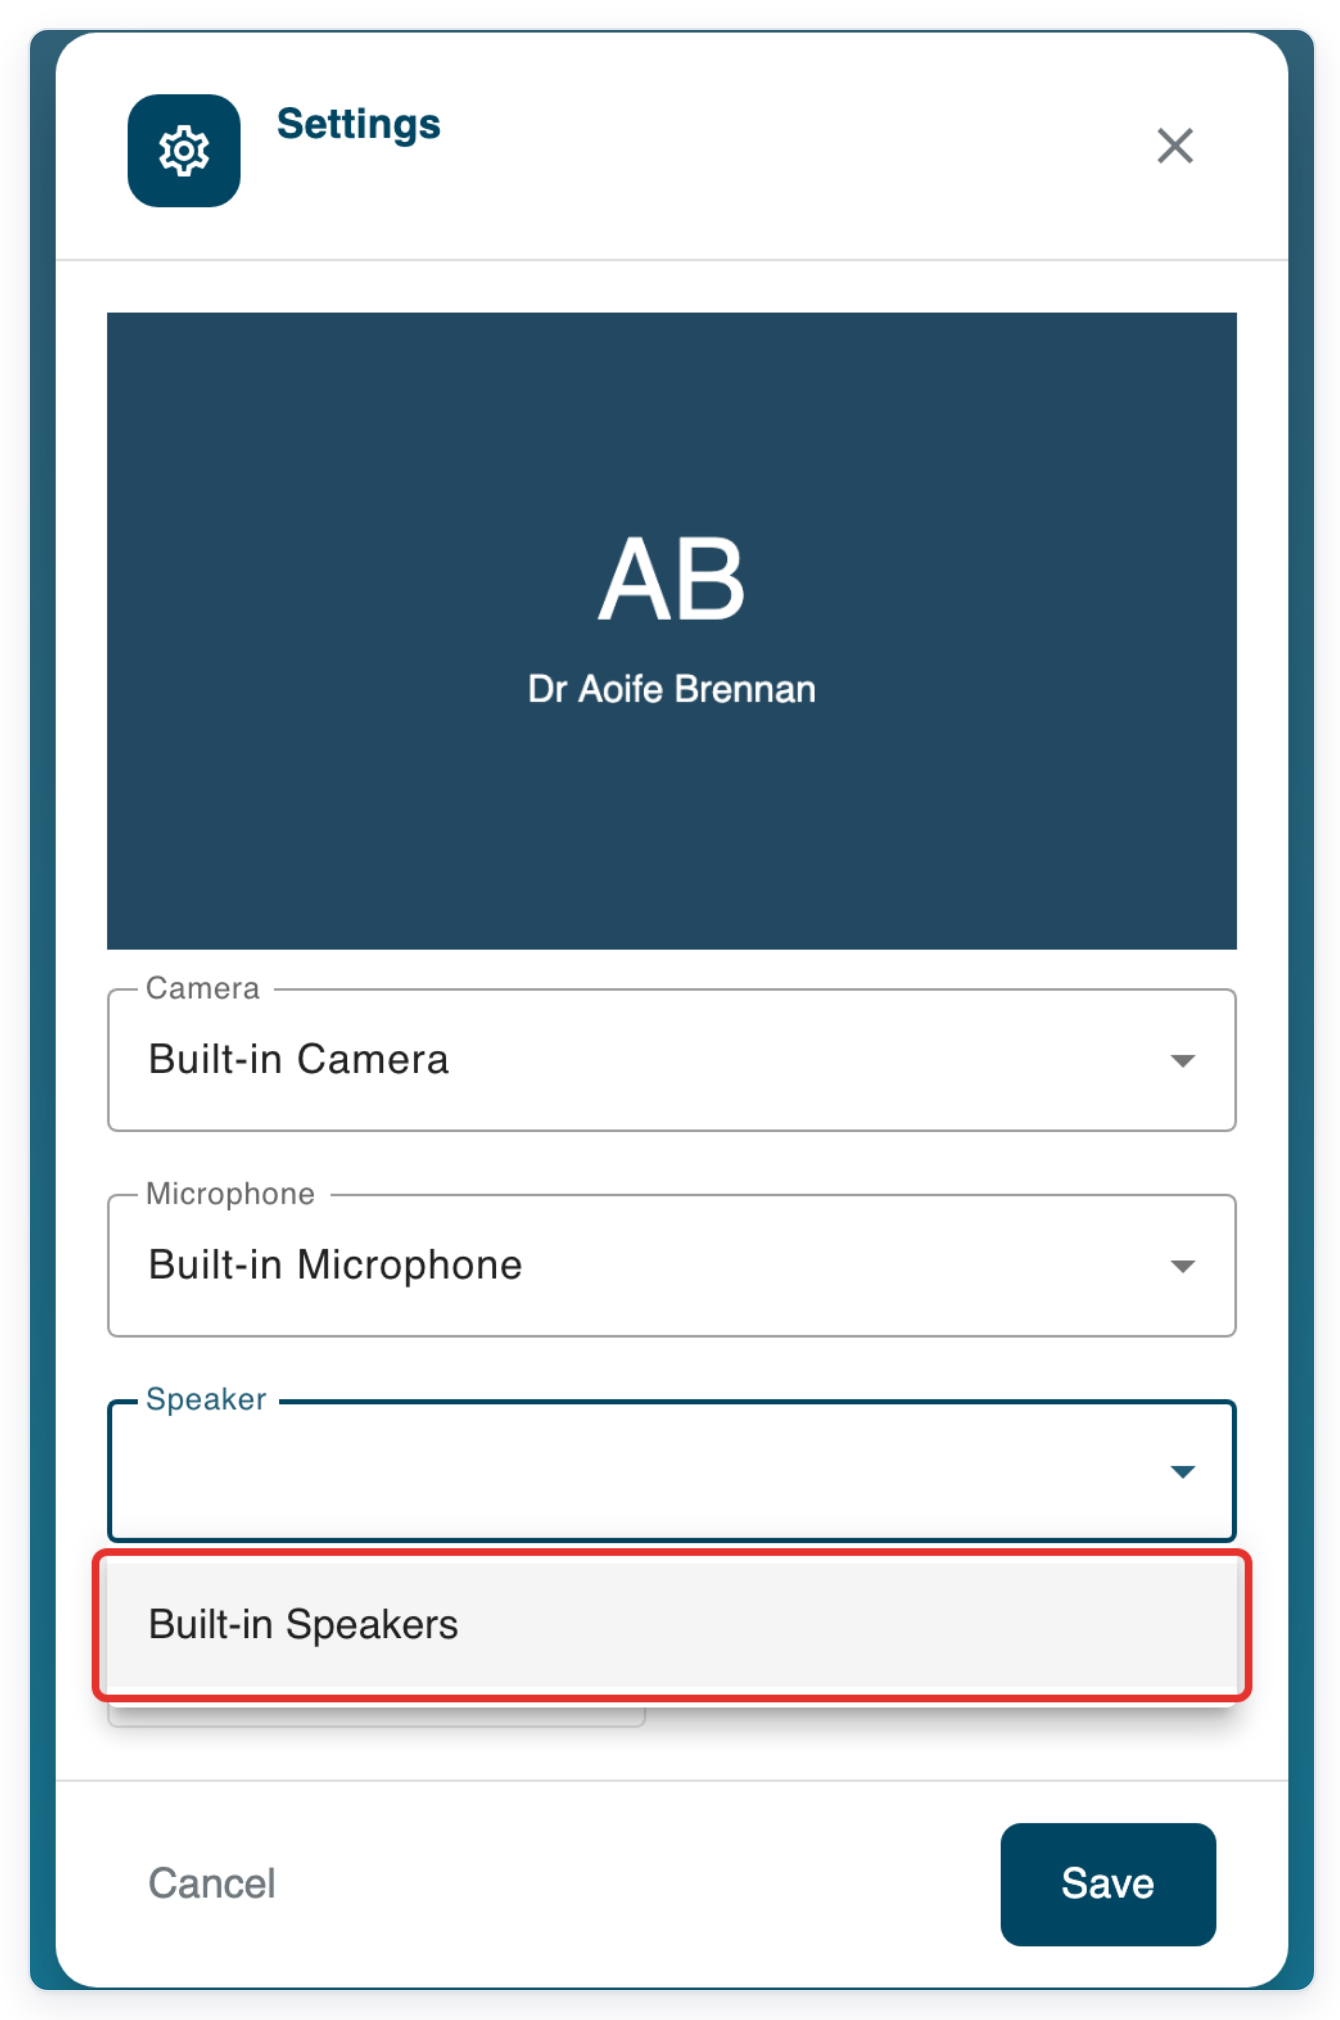
Open the Speaker list to choose where you'll hear the call.
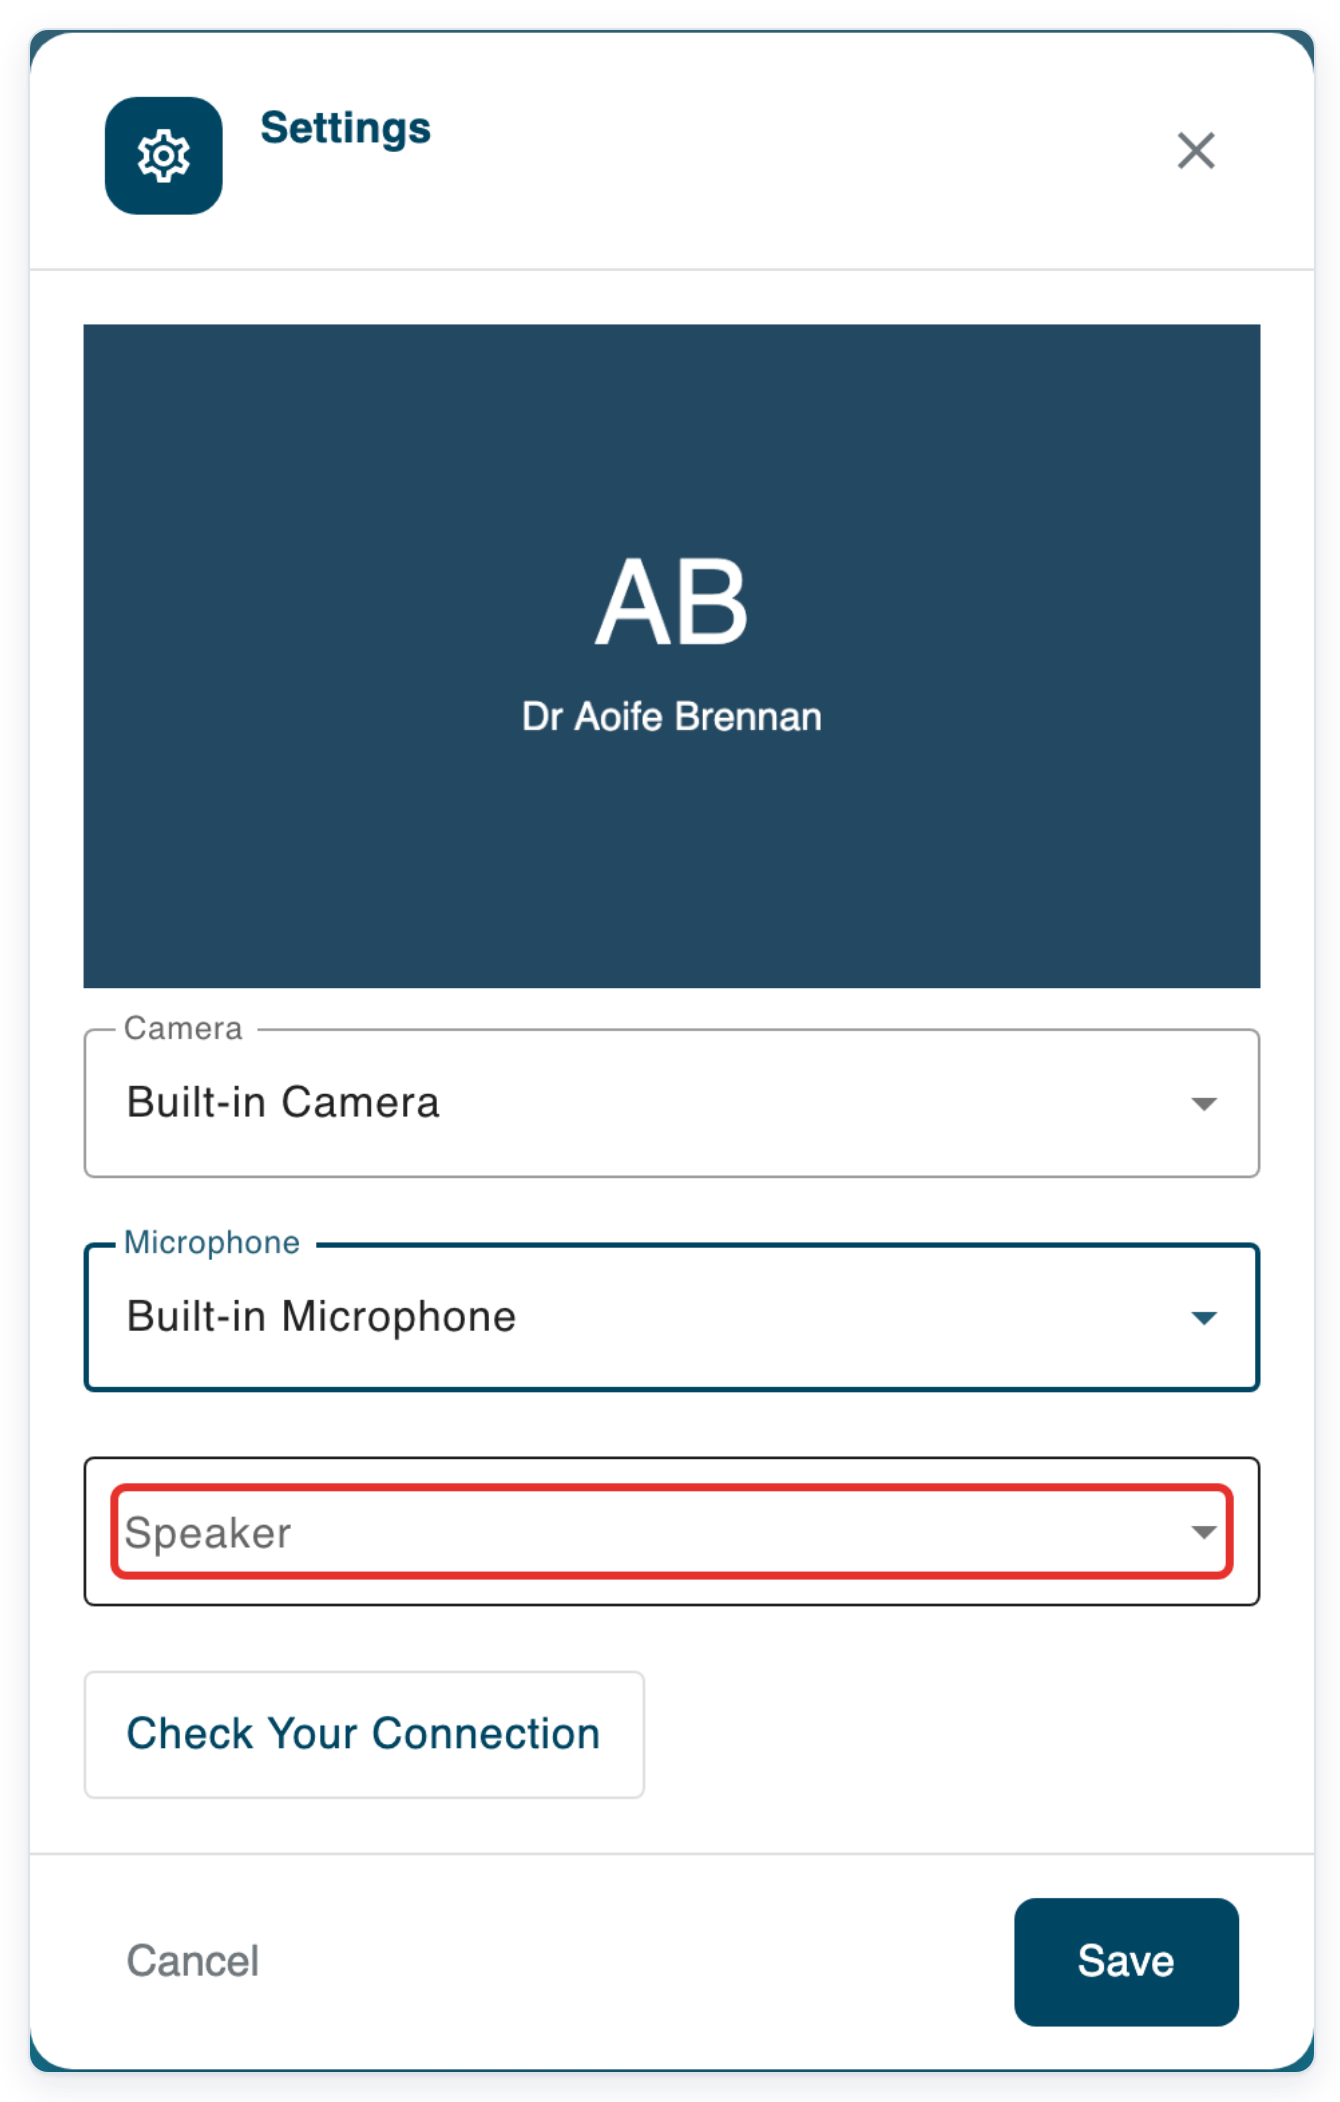
Choose Built-in Speakers.
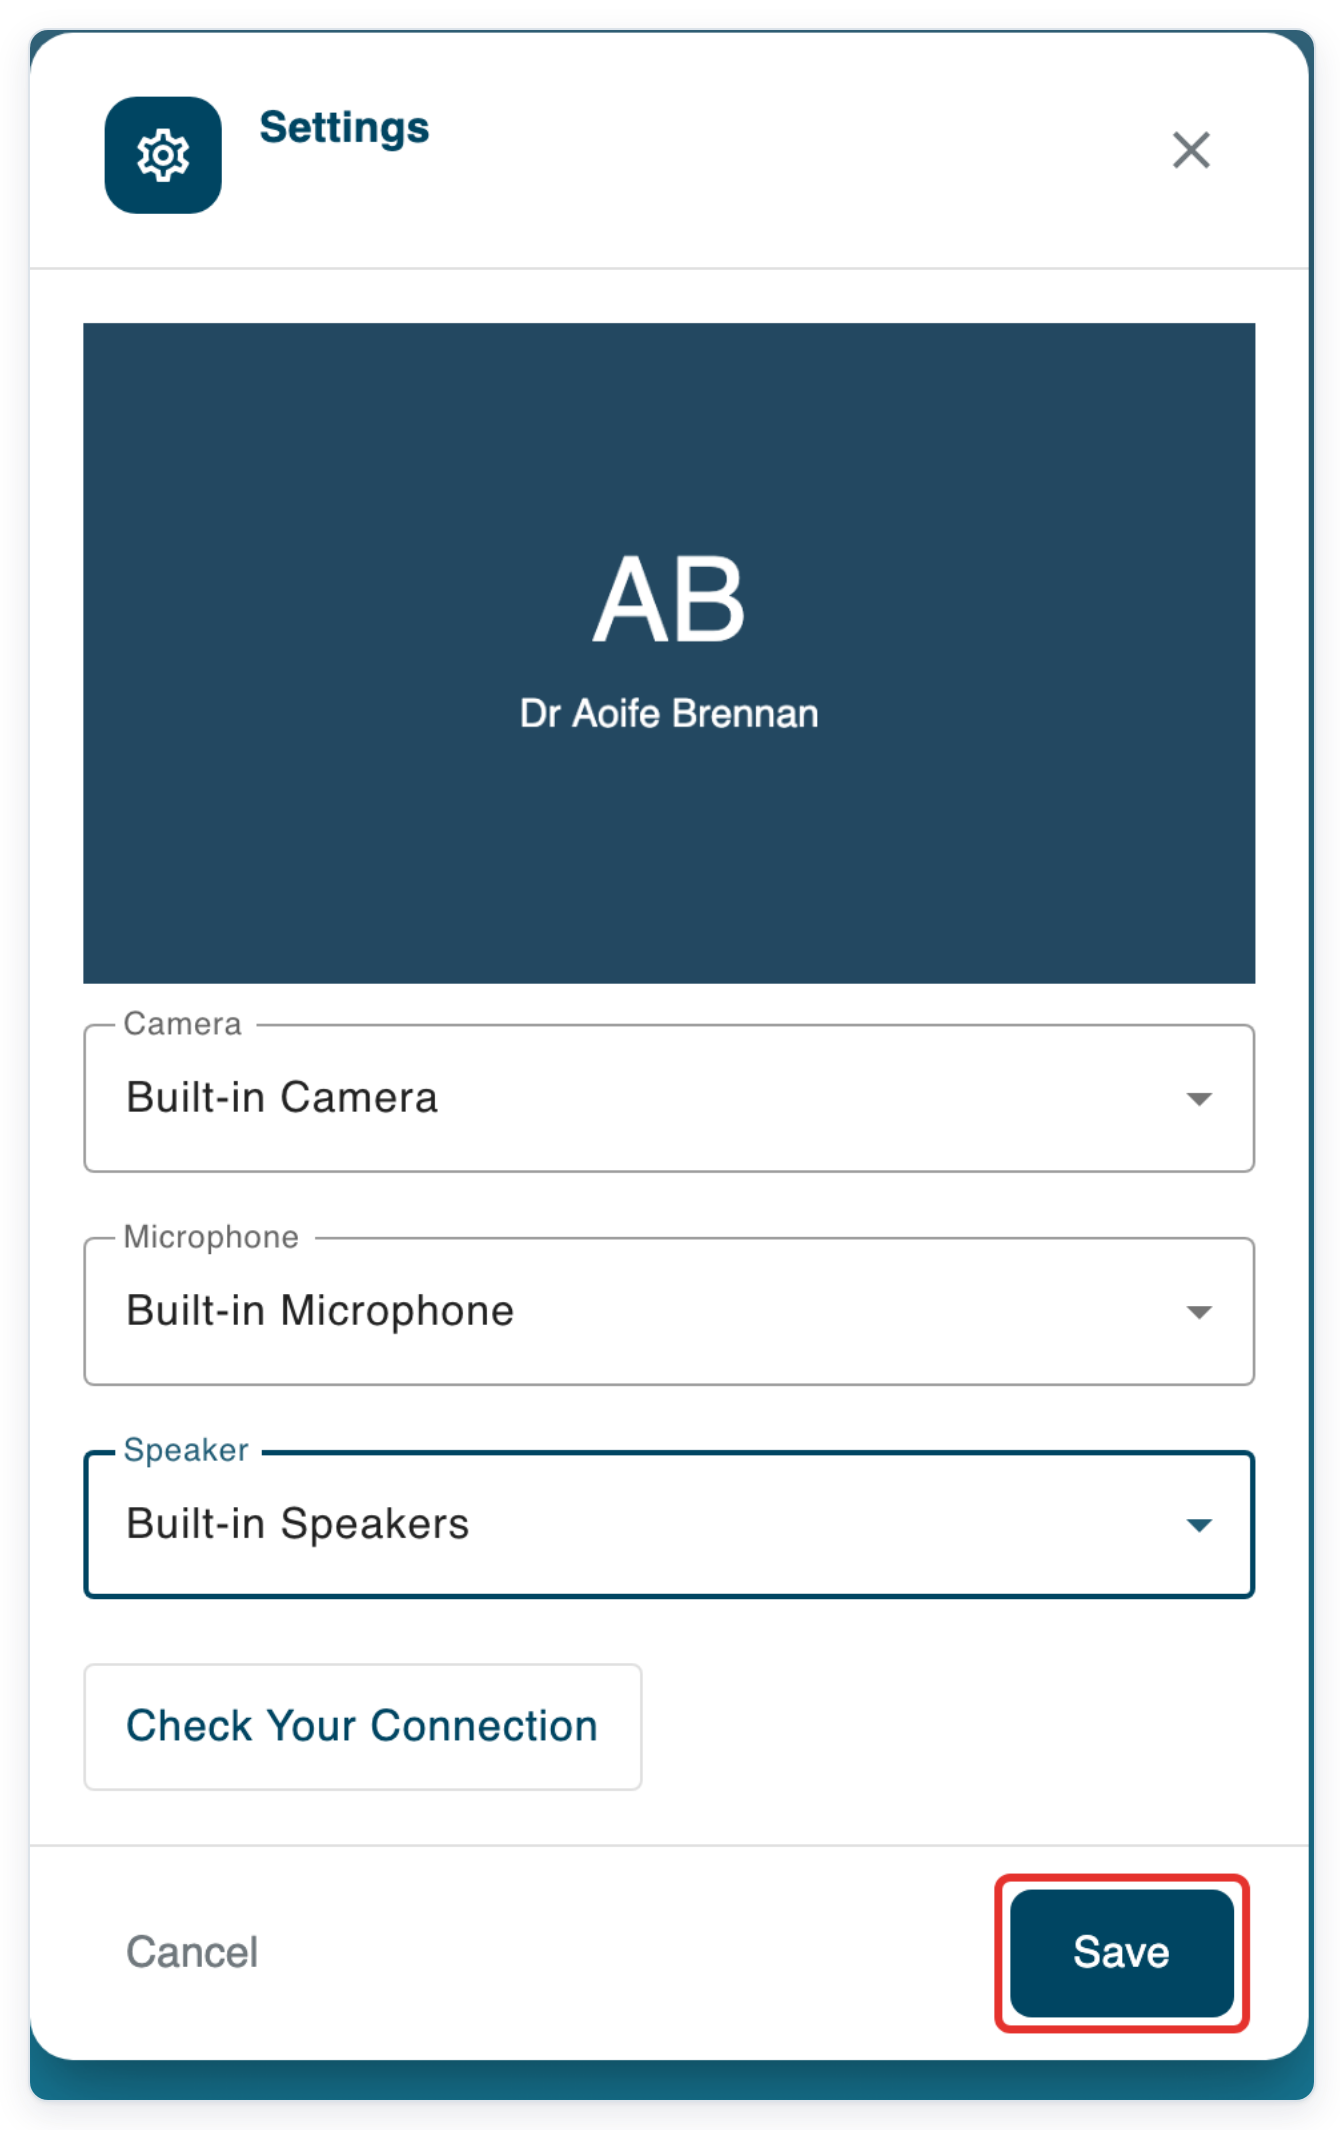
Click Save to save your device choices and return to the appointment.
=> When you're ready, click Join Session to join the call.
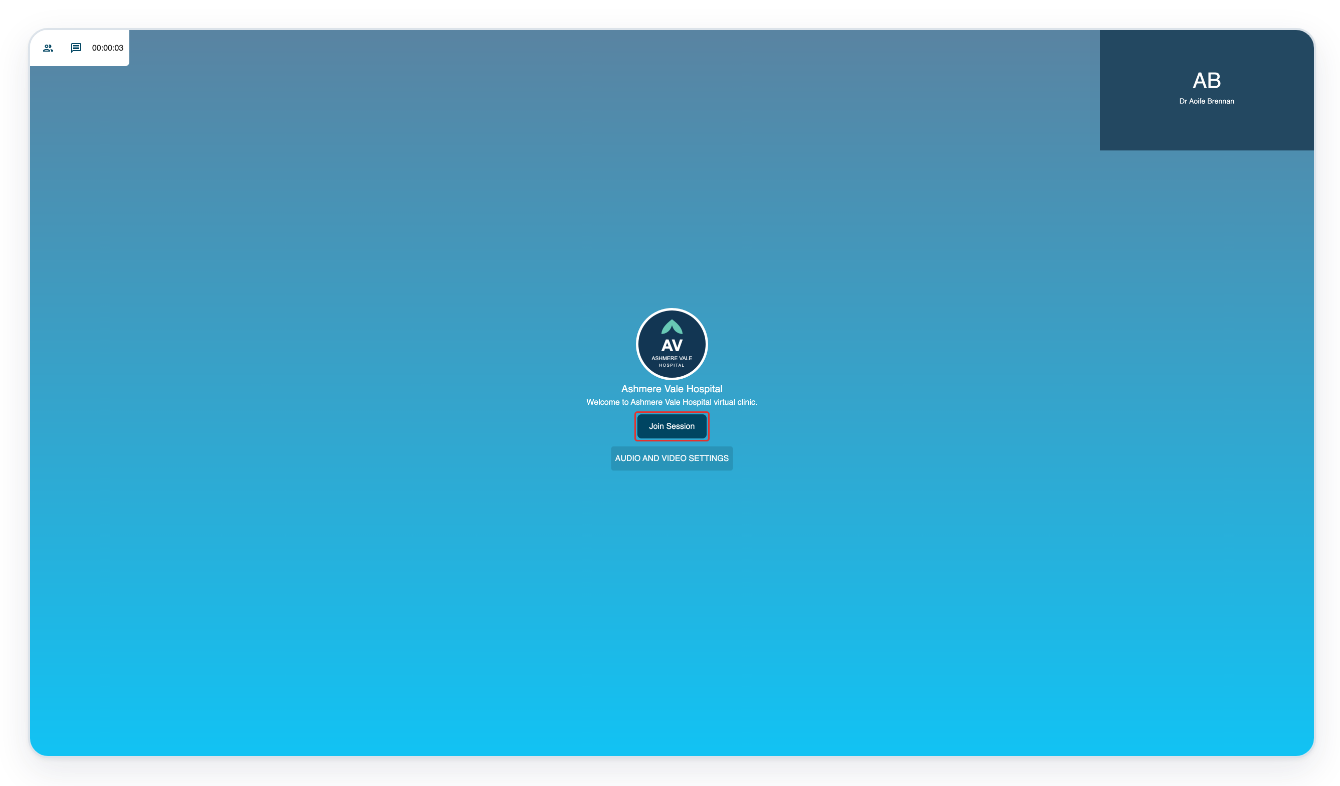
Click Join Session. The call controls appear, with your patient waiting for approval.
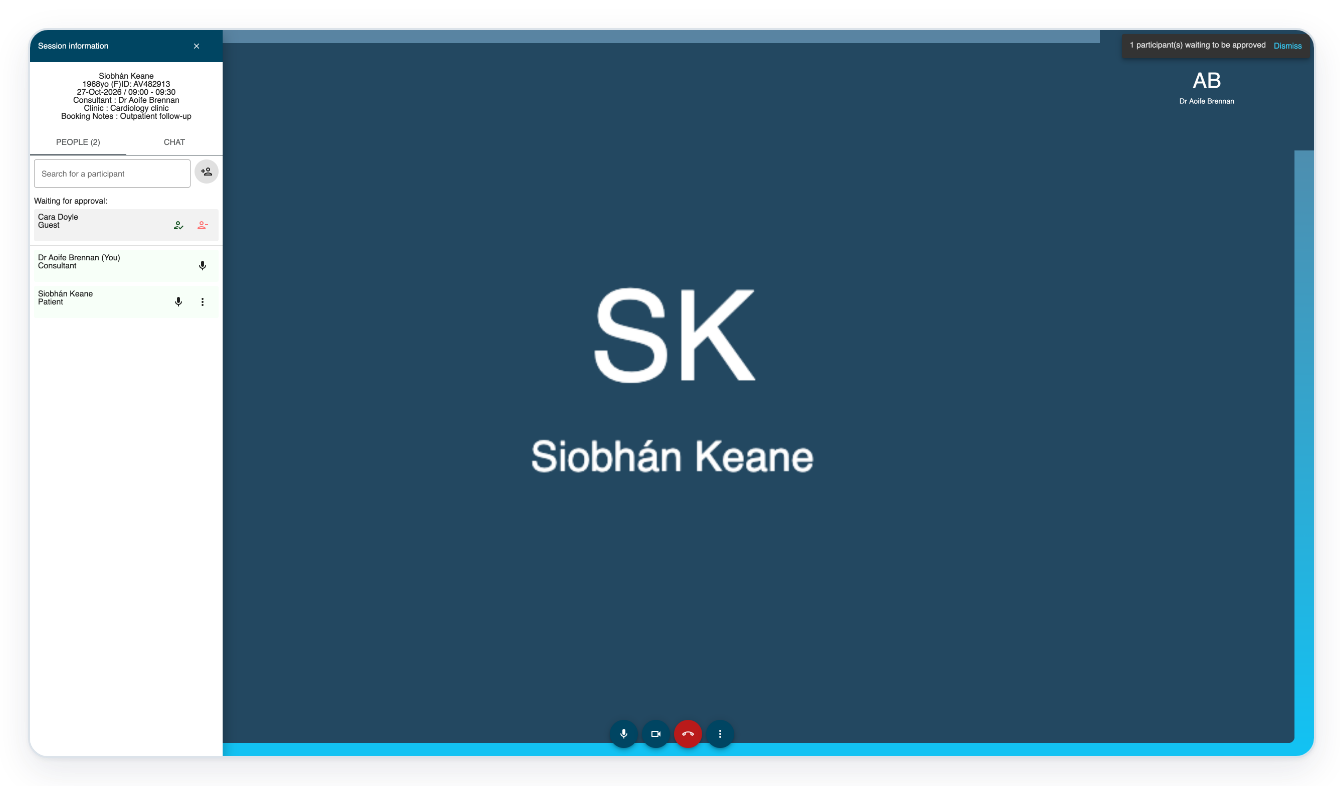
Under Waiting for approval:, click the admission icon with a tick beside your patient's name.
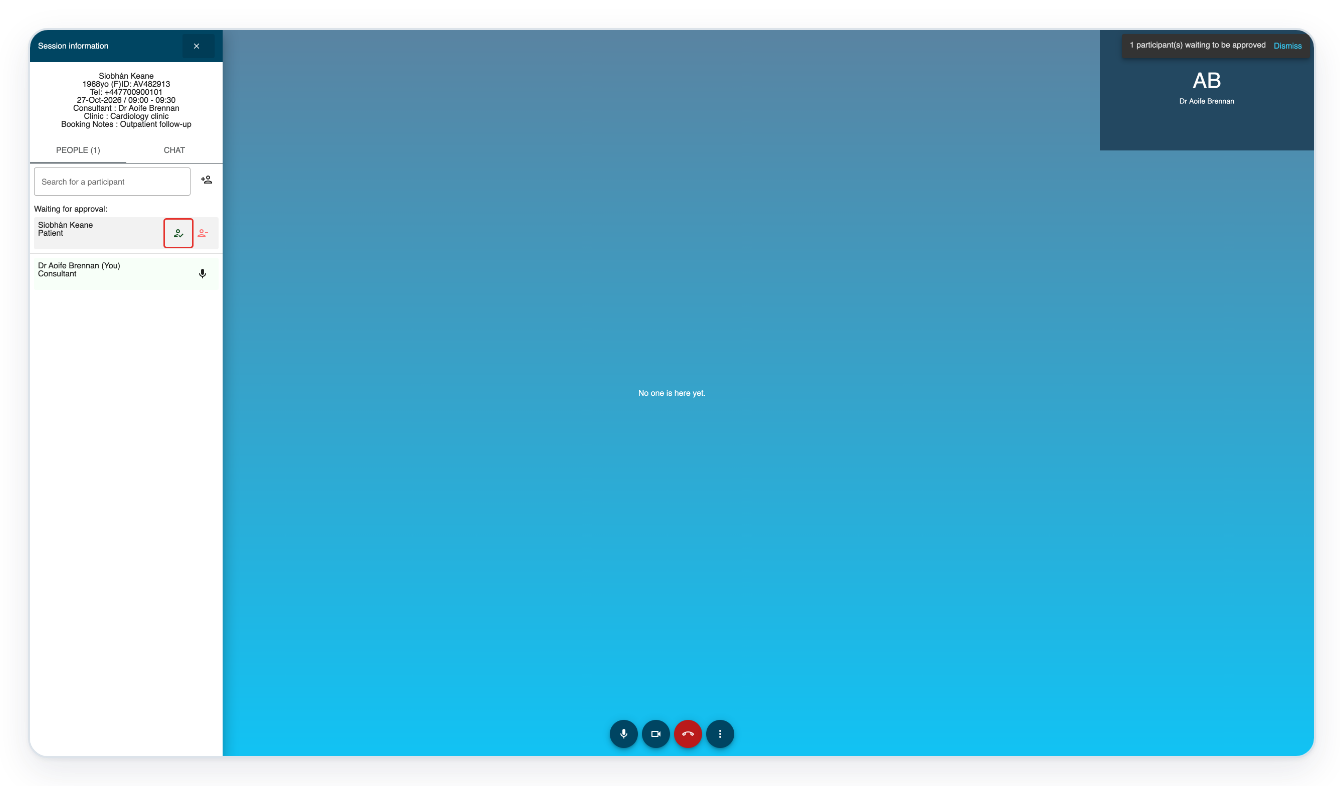
=> Your patient joins the call. Their tile appears beside your preview, with microphone, camera, hang-up and more options controls below.
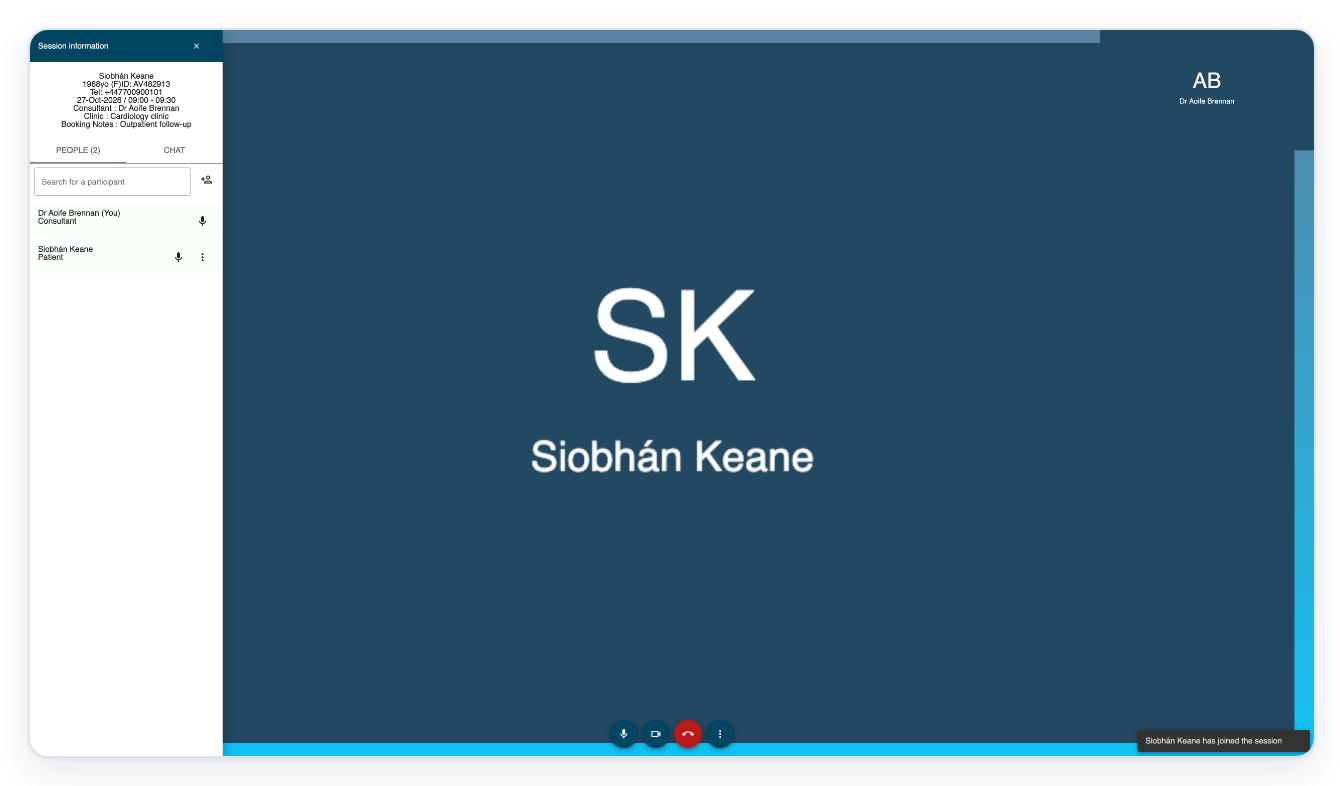
To invite someone else, click the add-person icon beside Search for a participant in People.
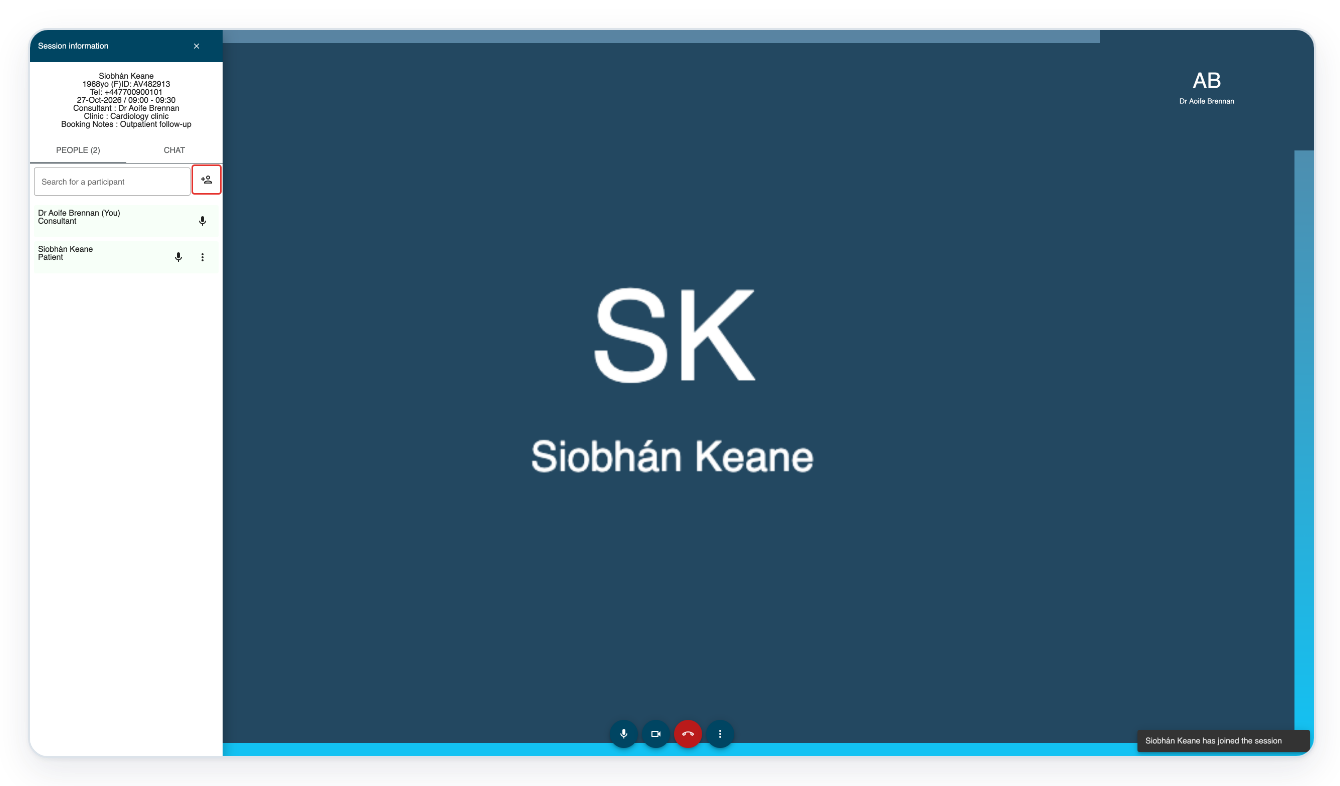
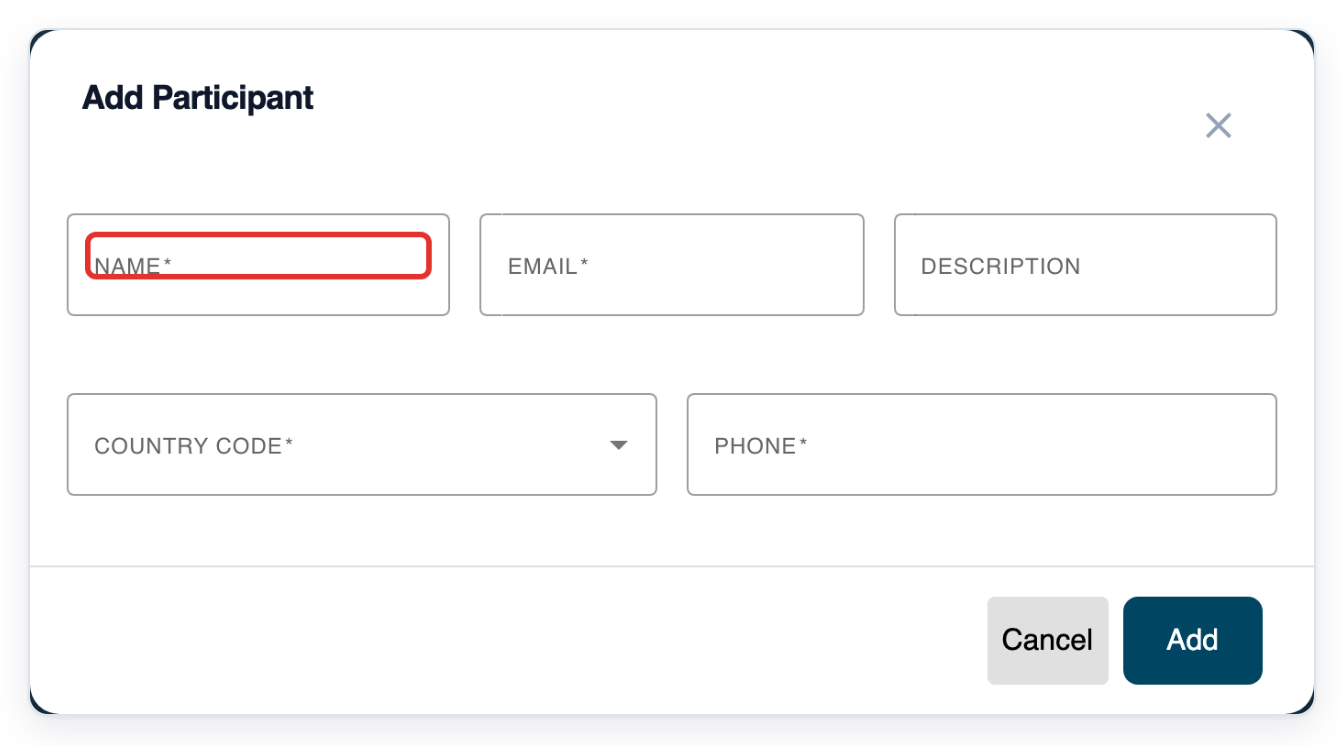
=> The Add Participant form opens with name, email, description, country code and phone fields.
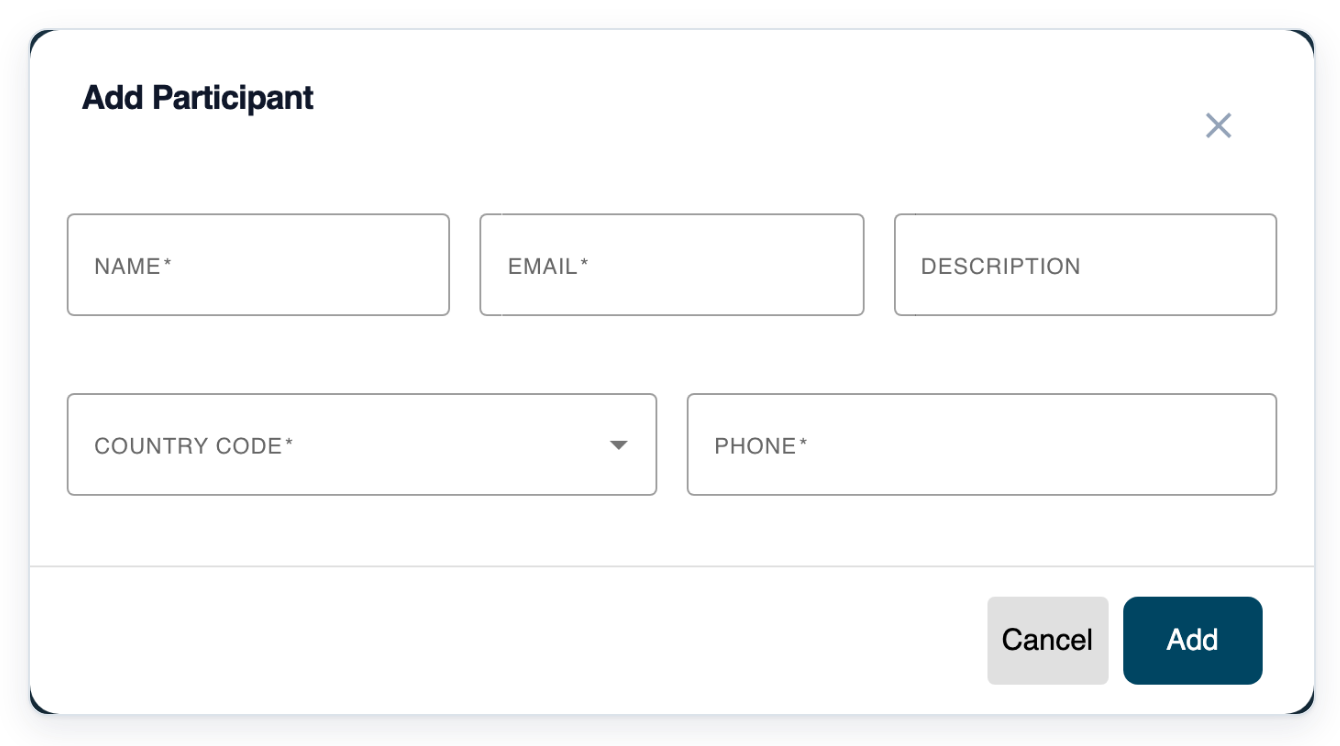
Enter the person's name in Name, for example Cara Doyle.
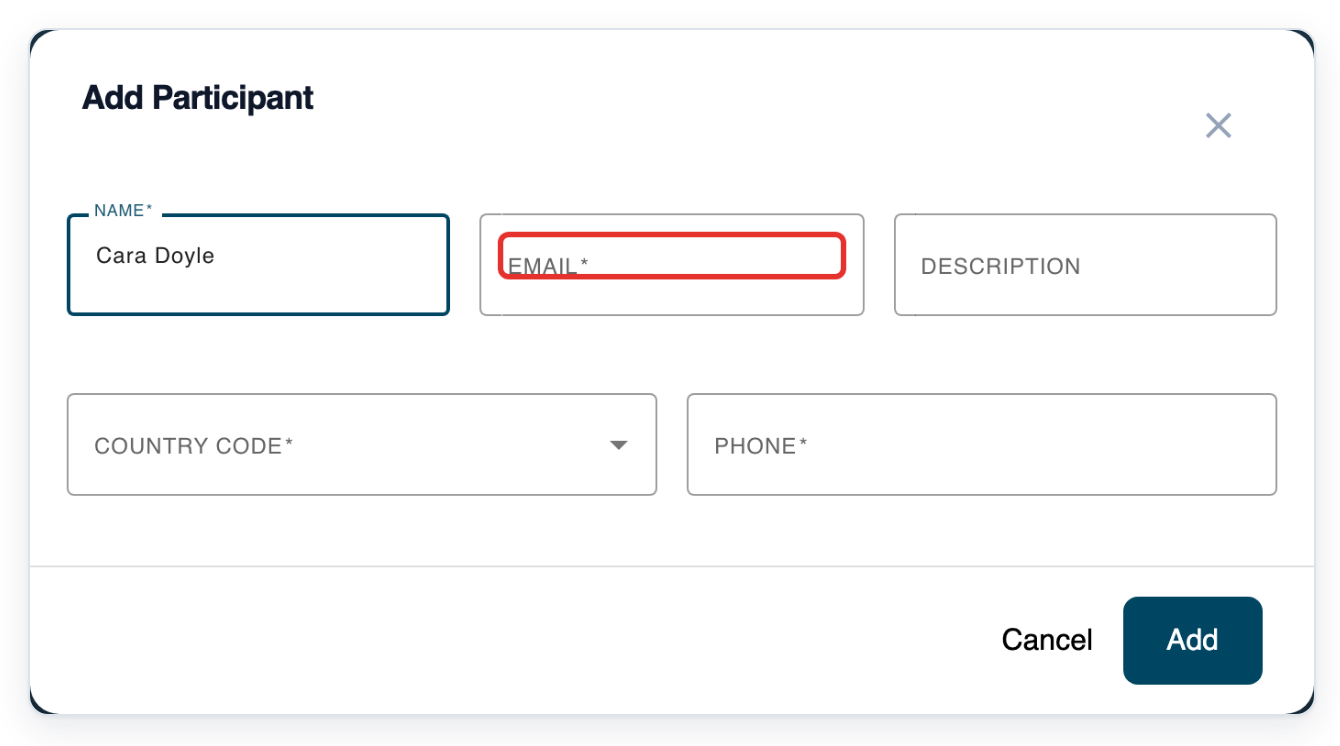
Enter their email address in Email.
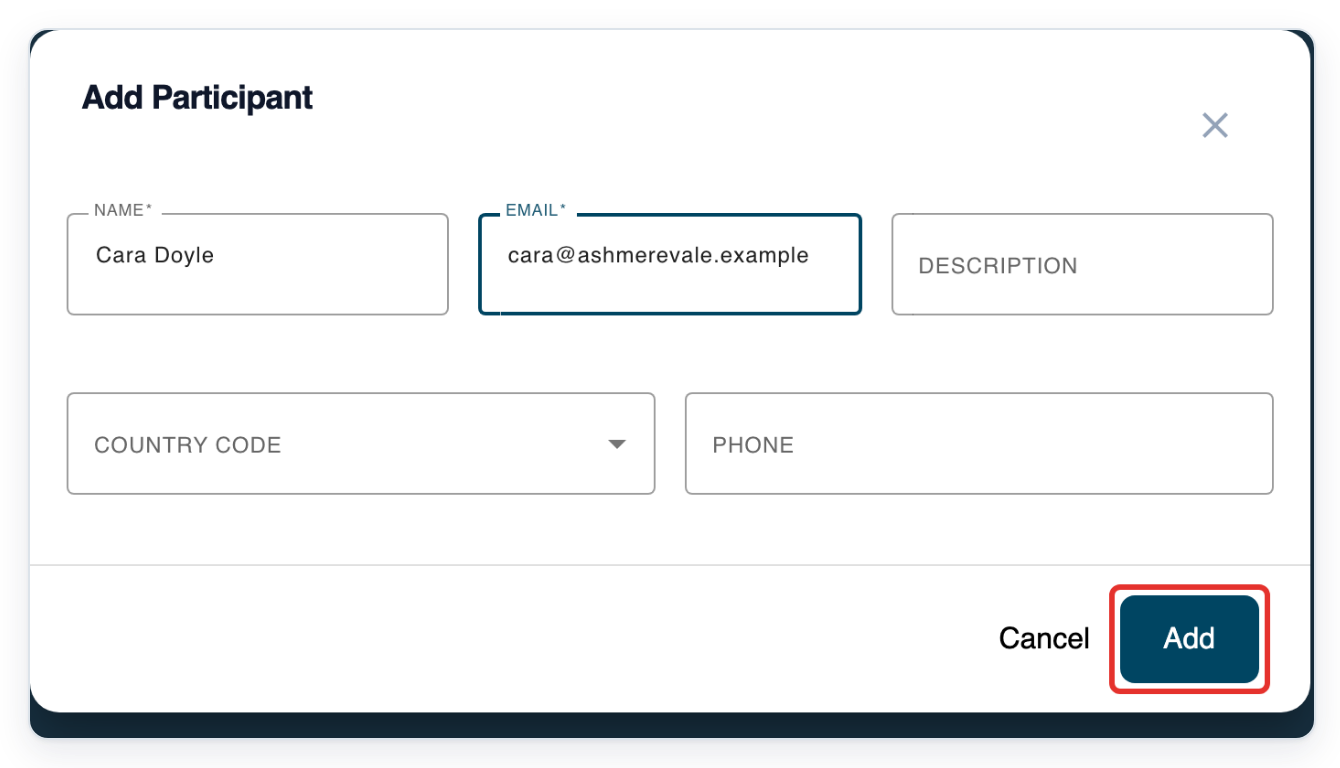
Click Add to send the invitation.
=> When the invited person enters the waiting room, they appear under Waiting for approval:. Admit them when you're ready.
In People, click the three-dot menu beside your connected patient's name.
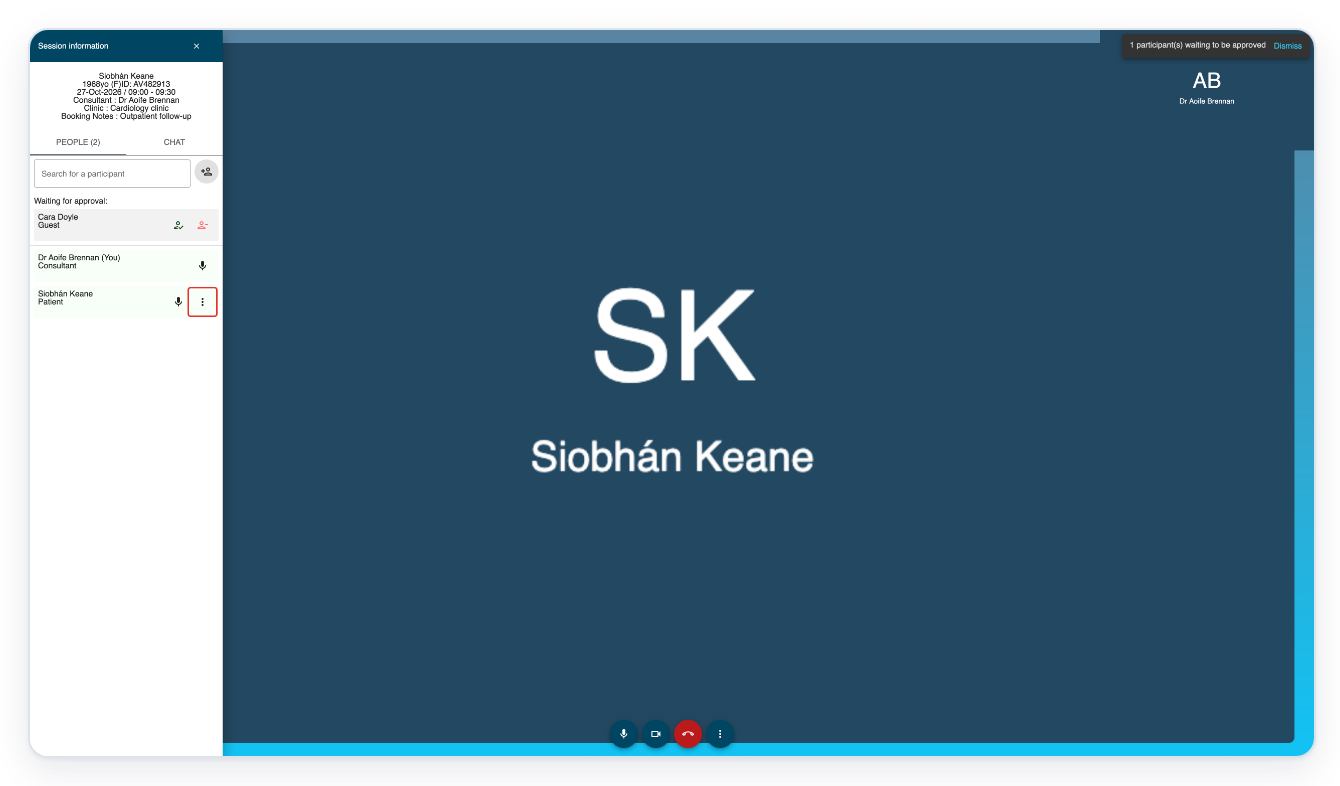
=> The menu opens with Take screenshot and Remove user.
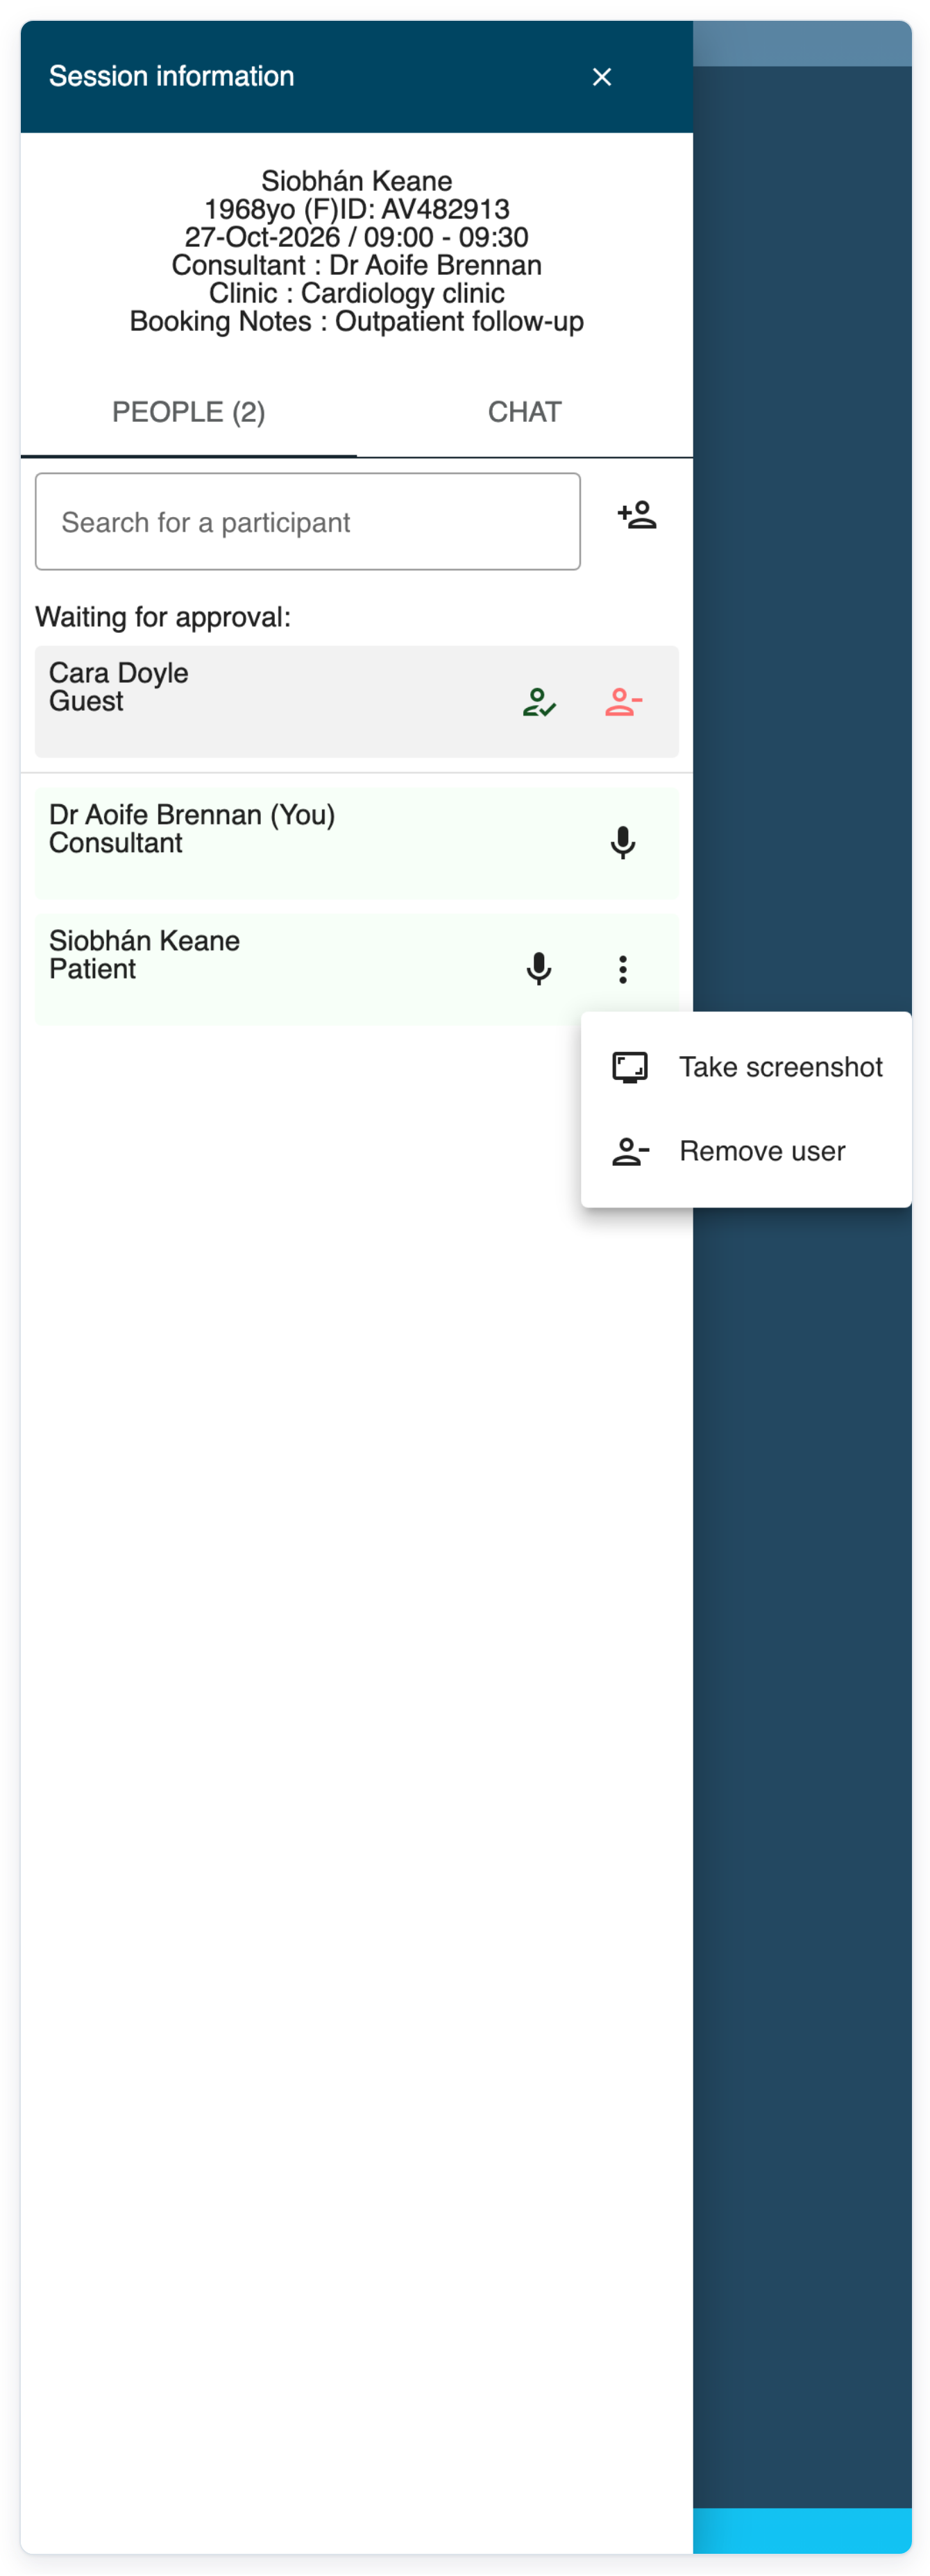
Choose Take screenshot to ask your patient's permission to capture an image from their camera.
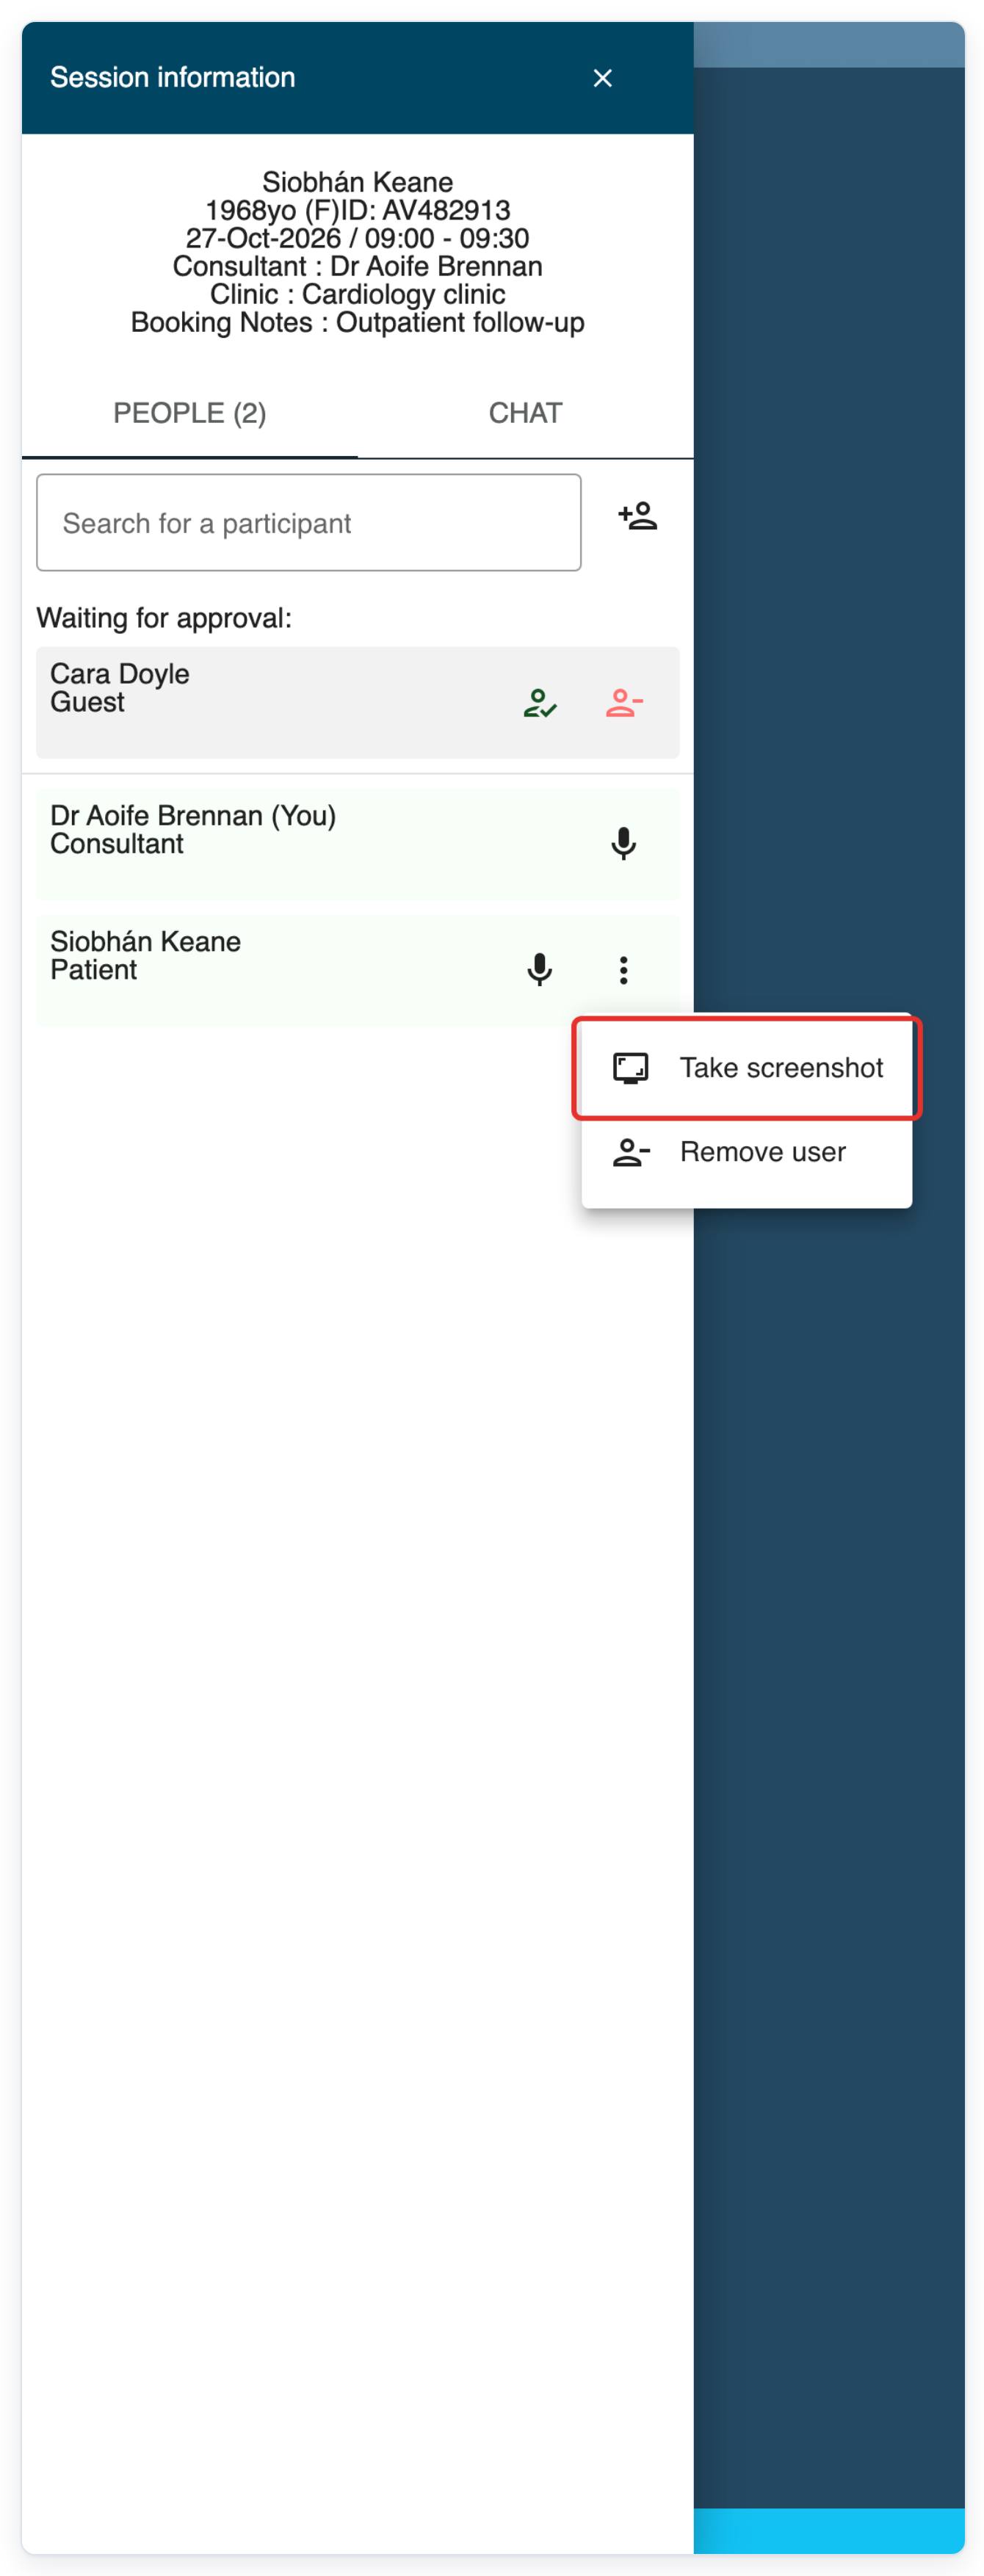
Click Chat in Session information to open the appointment's messages.
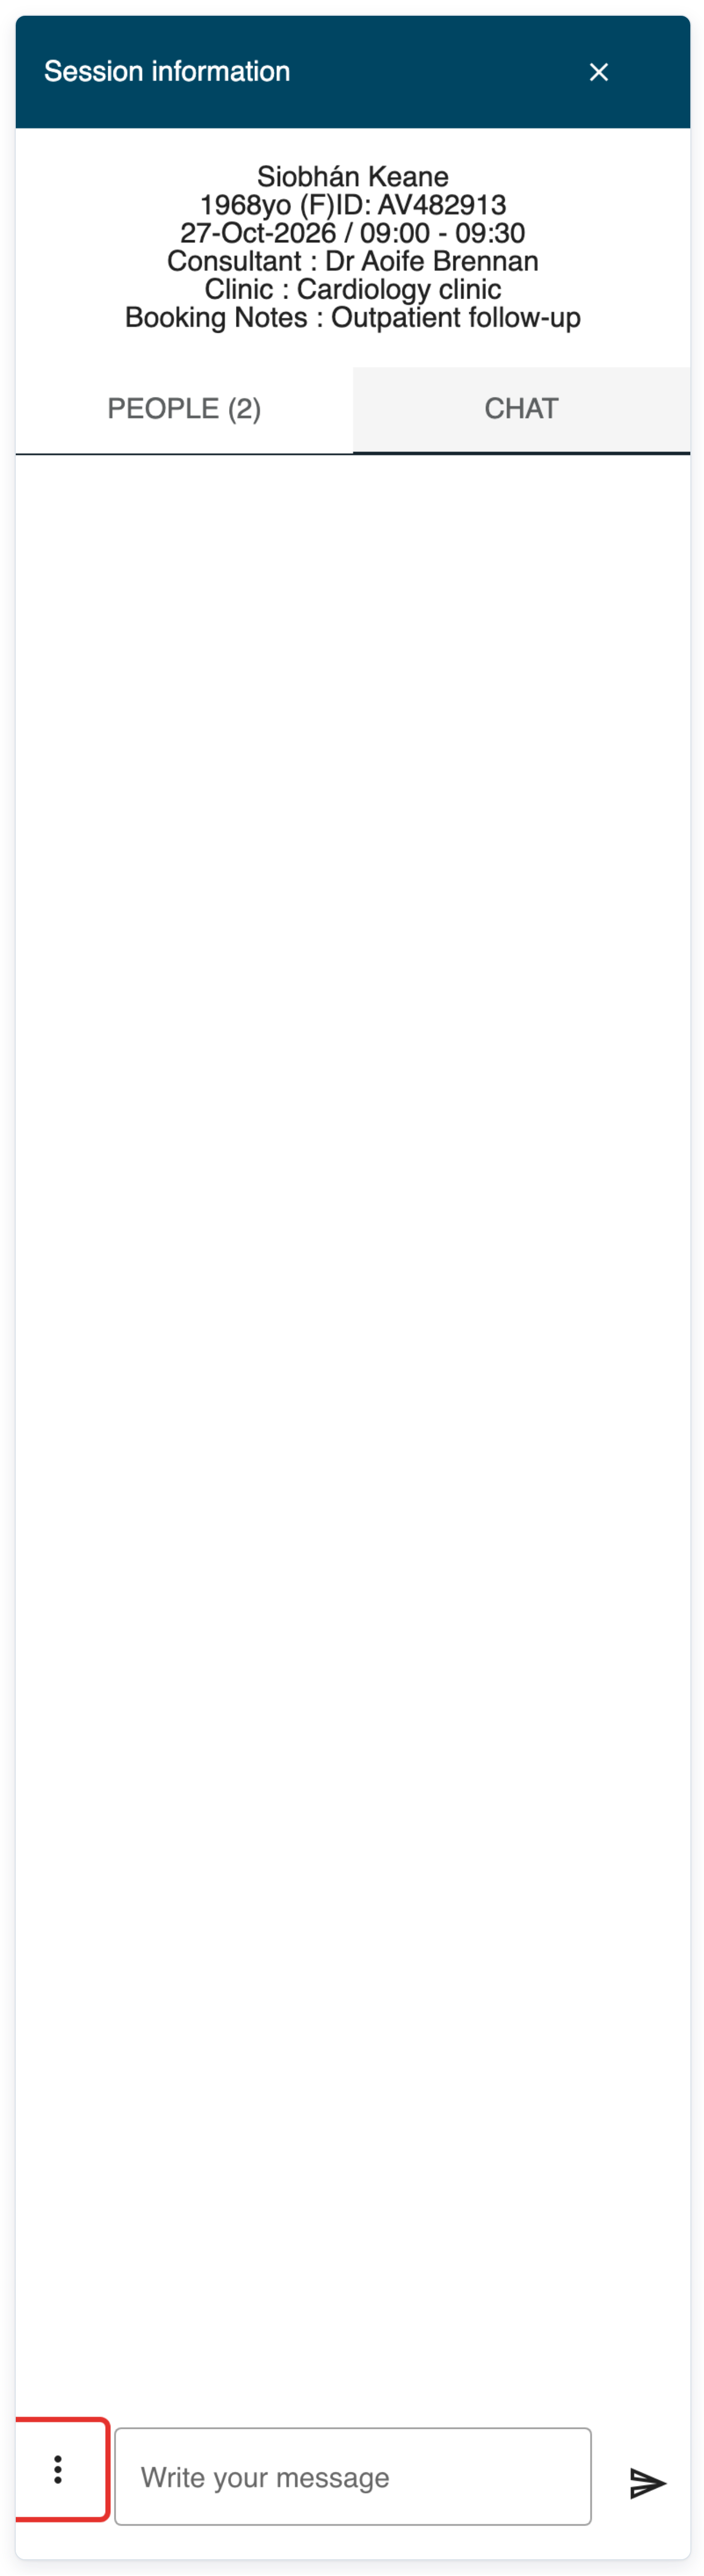
Click the three-dot menu beside Write your message to open the chat options.
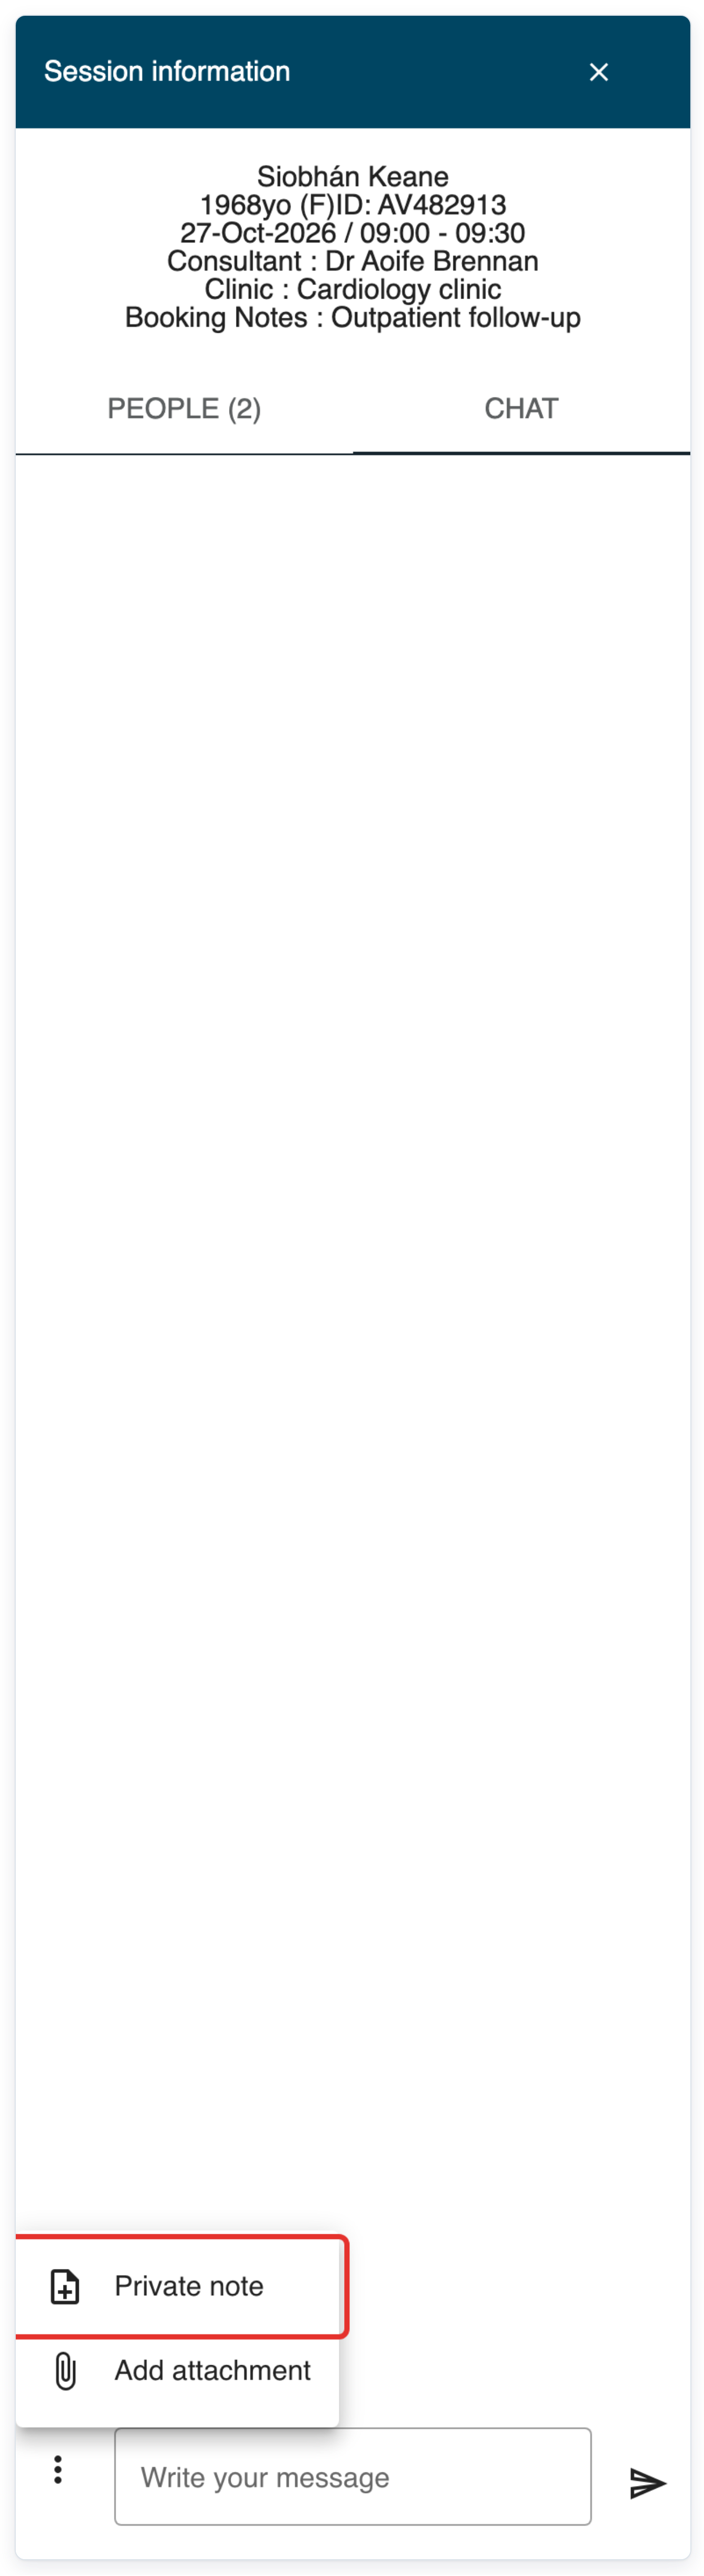
Choose Private note to open your appointment notes.
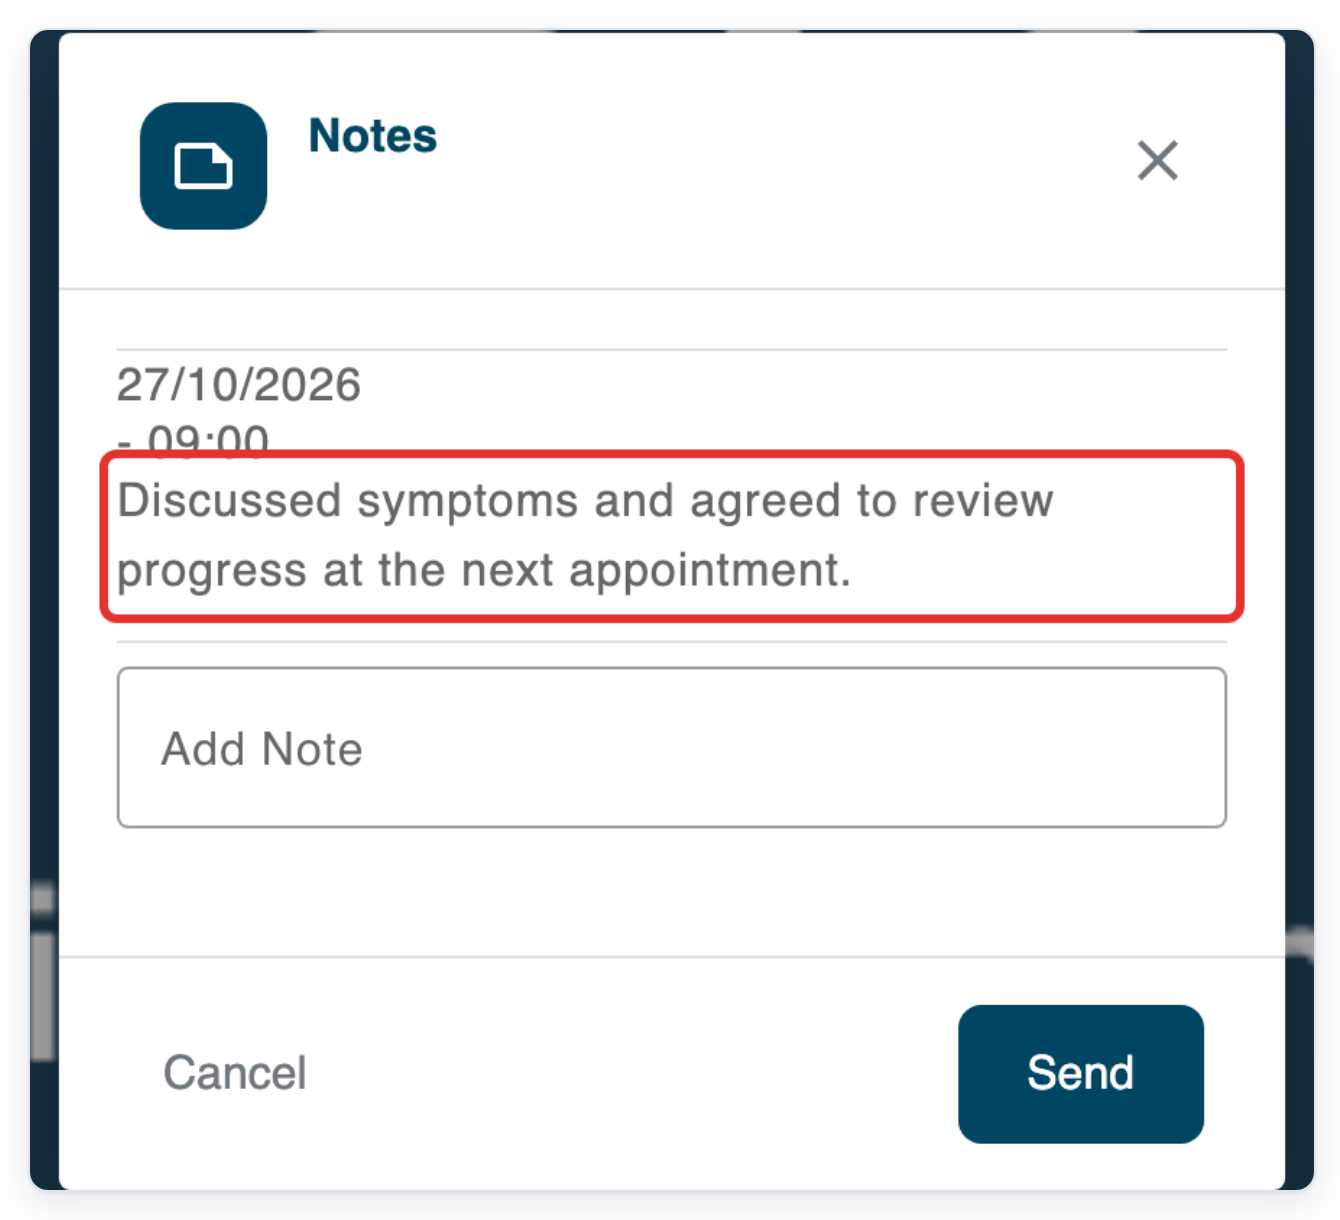
=> The Notes window opens. Saved notes appear above Add Note, with Send at the bottom.
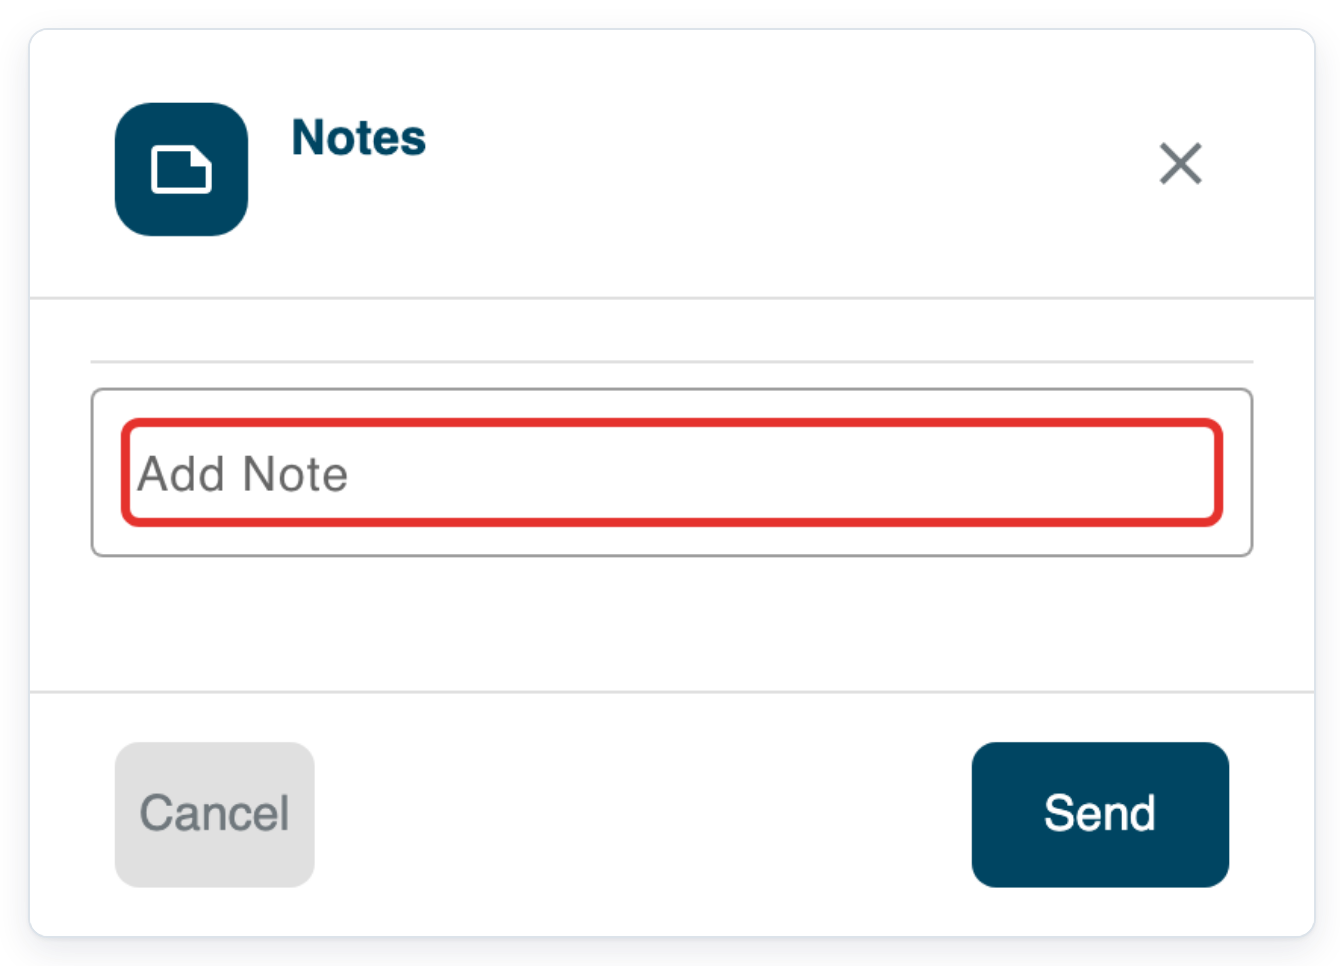
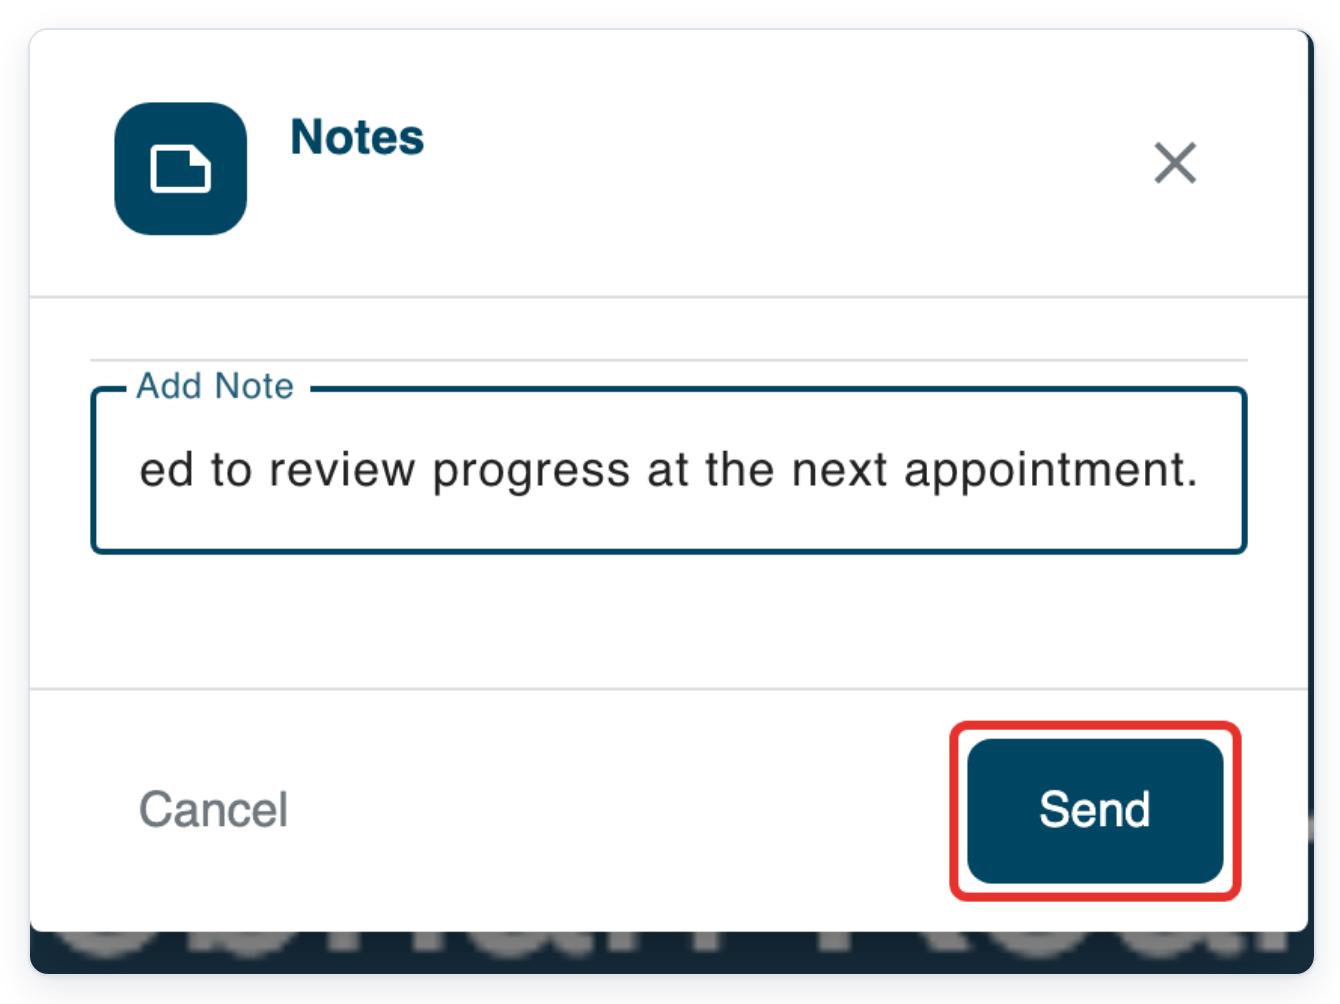
Enter your appointment note in Add Note.
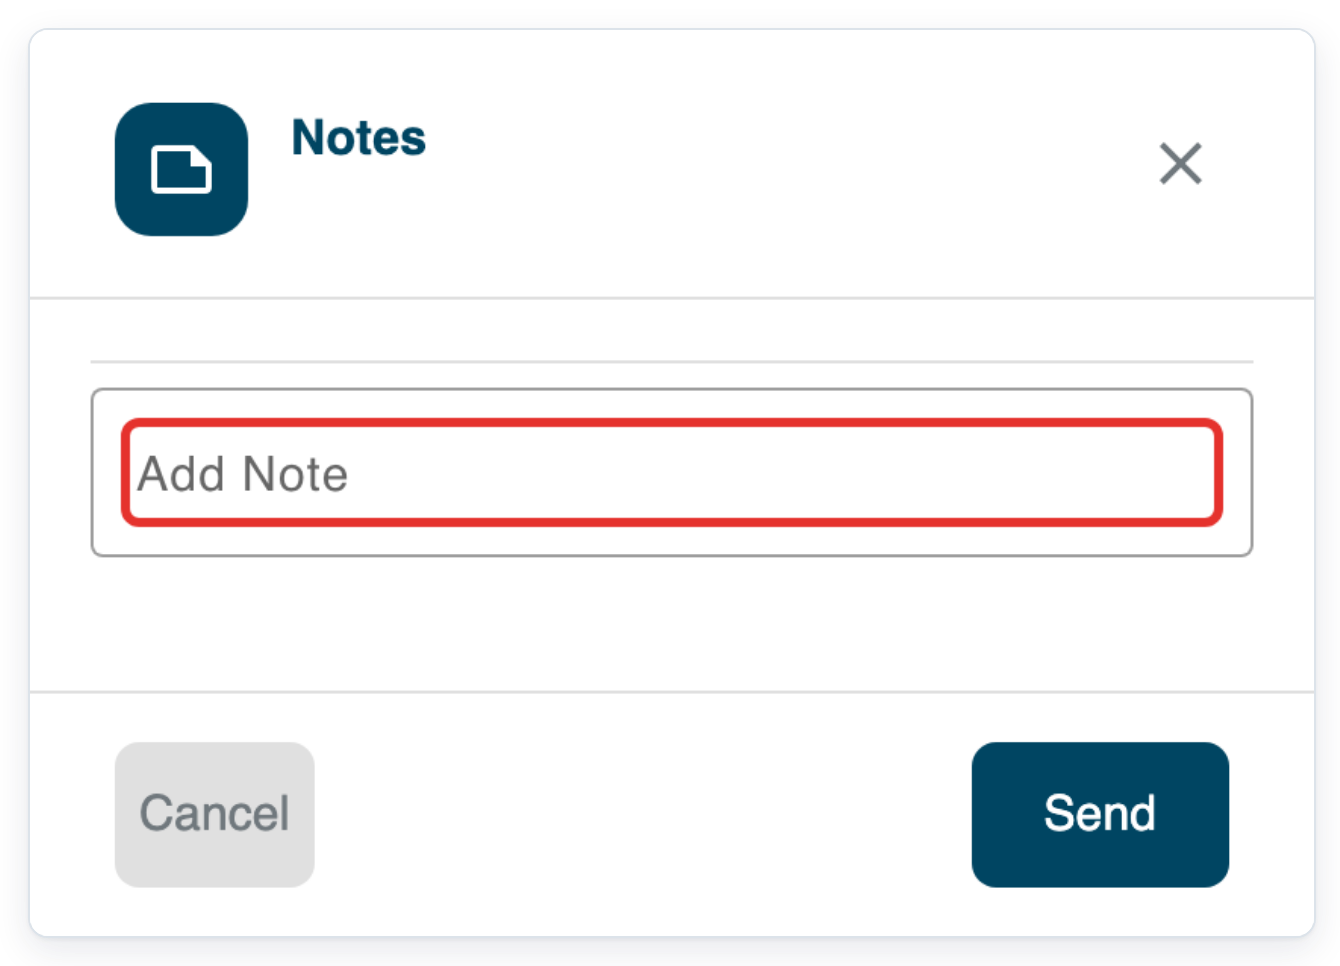
Click Send to save your note to the appointment.
=> Your saved note appears in the history under its date and time. The Add Note field clears.
NOTE:
- Everyone in the appointment can read chat messages and download shared attachments.
- Private notes are hidden from patients. Other staff with access to the appointment can read them.
- You choose whether to show captions on your screen. Caption text is temporary and isn't saved with the appointment.
- You can open device settings before joining and during the call.
Your video appointment controls
| Control | Where to find it | What you can do |
|---|---|---|
| Join Session and admission | Waiting screen, then People. | Click Join Session to join the call, then admit your patient in People. The admit button appears once you've joined. |
| People | People panel at the top left. | Search for a participant. Click the icon beside the search box to invite someone. To disconnect someone who's waiting, click the remove icon. During the call, open their three-dot menu and choose Remove user. |
| Microphone and camera | Bottom of the call screen. | Click Microphone or Camera to turn it off or on. |
| Chat | Speech-bubble icon at the top left. | Open Chat, type your message, then press Enter or click the send icon. |
| Private note | Three dots in Chat. | Choose Private note, enter your note and click Send. You can also read saved notes from the schedule. |
| Add attachment | Three dots in Chat, when available. | Choose Add attachment, select a file and click the send icon. Click a shared attachment to download it. |
| Take screenshot | A participant's three-dot menu in People. | Choose Take screenshot to ask their permission to capture an image from their camera. |
| Background blur | More options at the bottom of the call screen. | Choose Enable background blur, when available. Choose Disable background blur to turn it off. |
| Presentation | More options, on a computer. | Choose Start presentation, then choose what to share in your browser. Choose Stop presentation when you finish. |
| Closed captions | More options, when enabled by your organisation. | Choose Closed captions to show or hide captions on your screen. |
| Settings | More options during the call. | Open Settings to change your camera, microphone or speaker, or check your connection. |
| Leave session | Hang-up button at the bottom of the call screen. | If you're the last host, choose End Session or Return To Waiting Room. Returning sends everyone back to the waiting room. When you end the session, you may be asked for an outcome. Choose one and click Save, or click Skip. If another host stays, you can leave while their call continues. |
Tip: Before joining, open your device settings. Click Check Your Connection to check your connection to the video service.
Can't run your video appointment?
- Can't find the appointment? Clear or change Search, or choose the appointment date in Select Date. Press Enter after changing the search.
- T-Pro shows “Access to microphone was denied”. Allow microphone access in your browser, then reopen the appointment.
- Can't hear the call? Open audio and video settings before joining, or Settings during the call. Choose the correct Speaker, then click Save.
- Attachment rejected? Choose a PDF, JPEG, PNG or DOCX file smaller than 20 MB (20,000,000 bytes).
- Can't use attachments or captions? Ask your administrator to check whether the feature is enabled for your organisation.
- Connection lost? Check your network connection, then click Re-join in the disconnection message.
Related articles
- eClinic Manager: an introduction
- The clinic schedule
- Group video calls
- How patients join an online appointment
- eClinic Manager settings, rules and notifications
If you have any more queries, please do not hesitate to contact our Helpdesk or support@tpro.io.
© 2020 - 2026